


For doing anything Big, important thing is to start…and here is one thing you all can try to overcome the fear of getting started for iPhone development.
A traditional “Hello World” Application.Same thing told differently!!
We will term it as Hello World Project
Starting Xcode
1. Click on the search icon in the far right corner of your desktop to show the spotlight search field.

2.Type ‘Xcode’ and hit ‘Enter’.

3.The application menubar on the desktop will be replaced by Xcode menubar.

Creating a ‘Window-based Application’
1.In the xcode menu choose File > New Project

2.Here select ‘Window-based Application’ and click on the ‘Choose…’ button. On the next screen select the location for you project and specify the name of the project. In our case we will use ‘HelloWorld’ as the project name.
Note:Xcode will create a new directory at the specified location with the name of the project and it will automatically generate the basic source files for you

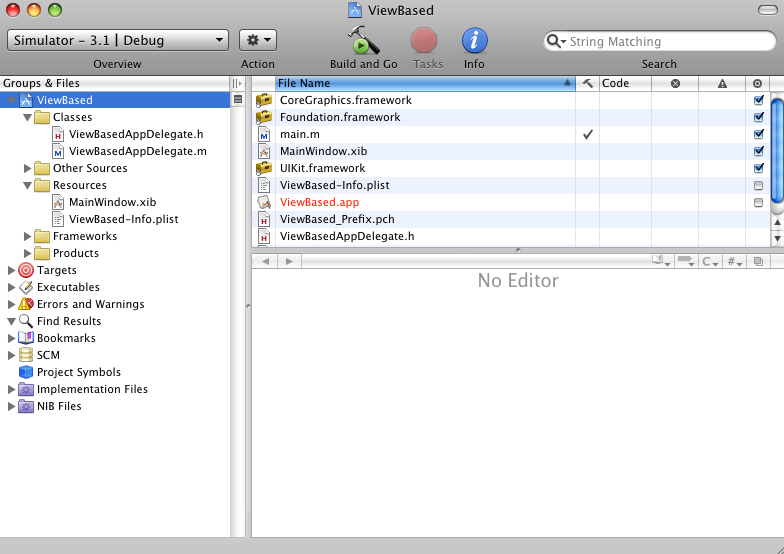
3.Here you will see the Xcode editor window. The files in the project are grouped together in the left sidebar under various ‘Groups’. Please note that these are logical groups presented as folder, they don’t reflect the exact folder structure under your main project directory.
- Classes

Here there are two files one ‘.h’ – header file and one ‘.m’ ‚Äì implementation file. In Objective-C the source files are denoted with ‘.m’ extension instead of regular ‘.c’ extension.
- Other Resources

Here there is ‘.pch’ ‚Äì Pre-compiled Header file and the ‘main.m’ file. This file contains the main() function of the program which is the default entry point for all C programs.
- Resources

The ‘.plist’ file is XML file which contains the settings for your iPhone application such as the name of the main icon file of the application, etc.
The ‘.xib’ is an interface builder file. This file is also called as ‘Nib’ file. This file contains the definitions of the various UI elements which you can create in Interface builder with VB style ‘Drag & Drop’ approach.
- Frameworks

This group contains the inbuilt frameworks referenced by your project.
- Products

This group contains a ‘.app’ file. It is the application bundle of your project which you will distribute.
Running the Application
At this point your application is ready to be built and run. Just hit the ‘Build & Go’ button on the Xcode toolbar to run your application. It will launch your application in the iPhone simulator.

As you can see iPhone Simulator launches your application and presents a blank window. You can terminate the application by clicking on the rounded square button near the bottom of the iPhone.
Adding a Label to the Main Window
1.Return to the Xcode editor by clicking on the Xcode icon in the ‘Launchpad

2.’Under ‘Resource’ group double click on the ‘MainWindow.xib’ file to open it in interface builder.

Here you will be presented 2-3 windows depending upon what was open in the previous run of the interface builder, but typically you should see at least one window as follows:

Here you can double click¬† on the fourth item ‘Window’ to bring the ‘canvas’ for you window, which look like as follows:

After this if the ‘Library’ window is not open you can open it by using Tools > Library menu option form ‘Interface Builder’ menu. This library window contains the ‘controls’ which you can put on your window.
3.Here scroll around the ‘Library’ window to find the library window. And drag and drop it on the window canvas.


4.Double click on the label and type ‘Hello World. Use ‘Command + S’ to save the file and hit ‘Command + R’ to run the project. You should see following result in the iPhone simulator.

So get Started!!