The Android NDK is a set of tools that allows Android application developers to embed native machine code compiled from C and/or C++ source files into their application packages for borrow 1000 dollars.
While you were able to access native code via Java Native Interface (JNI) all along, You would’ve typically had to compile everything on your host computer for the target architecture, requiring you to have the entire toolchain on your development machine.
Android NDK (Native Development Kit) simplifies working with native code. It includes the entire toolchain needed to build for your target platform (ARM). It is designed to help you to create that shared library.

To do’s:
1. Create the Java class that represents the native code
2. Create header file for the native code.
3. Implement the native code by writing your C code
4. Compile everything and build you Shared Library
5. Use your native code inside Android activity
1. Create Native Library
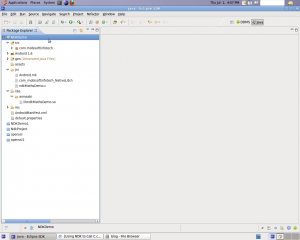
Create a Native Library in src directorary in your Eclipse project./src/com.mobisoftinfotech/NativeLib.java
2. Create C Header File
In your project bin directory (in my case, /<workspace>/NDKDemo/bin), run javah tool to create the JNI header file.
NDKDemo/bin$ javah -jni com.mobisoftinfotech.NativeLib
Next, create a jni directory in your project directory ( in my case , <EclipseWorkspace>/NDKDemo/jni).
Next, copy the JNI header from <EclipseWorkspace>/NDKDemo/bin to <EclipseWorkspace>/NDKDemo/jni
3. Write the C Code
In your <EclipseWorkspace>/NDKDemo/jni/ folder, create ndkMathdemo.c file. This is where we’ll implement the native code. To start, copy the function signatures from the header file, and provide the implementation for those functions. In this example, the header file looks like this:
<EclipseWorkspace>/NDKDemo/jni/com_mobisoftinfotech_NativeLib.h
4. Build The Library
To build the library, first we need to create a makefile for how to compile the C code:
<EclipseWorkspace>/NDKDemo/jni/Android.mk
Next, we need to tell NDK how to build the shared library and put it in the correct place inside the Eclipse project. To do this, create a folder <NDKHOME>/apps/ndkMathsdemo/ and inside this folder create the Application file:
<NDKHOME>/apps/ndkMathsdemo/Application
You can now to to your <NDKHOME> and run make APP=ndkMathsdemo
The output should look like this on terminal:-
android-ndk-r4$ make APP=ndkMathsdemo
Android NDK: Building for application ‘ndkMathsdemo’
Compile thumb : ndkMathsdemo <= sources/ndkMathdemo/ndkMathdemo.c
SharedLibrary : libndkMathdemo.so
Install : libndkMathsdemo.so => apps/ndk_demo/project/libs/armeabi
You can now refresh your Eclipse project and you should /lib/ directory containing your libndkMathsdemo.sofile.
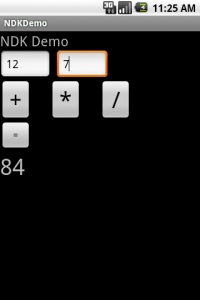
5. Calling Native Code from Java
So now that we have the native C library implemented, compiled, and placed in the right place, let’s see how we can call it from our Activity. It’s actually rather simple – you just have to instantiate the instance of your NativeLib class and from there on, it’s just a regular Java object.
Source Code: NDKDemo.tar