These days, adding maps to mobile apps is a requirement because of features like tracking, navigation, or showing users' locations. Our React Native app development services are designed to help you build location-aware applications efficiently. In this post, I will show you how to setup the react-native-maps in a react native project. I will walk you through the necessary setup, configurations, and permissions, and display a map view. As you complete this guide, you will be ready for whatever app you wish to build, whether it's just a simple map screen. So let's get started!
Prerequisites
Check to see if you have all the React Native tools set up on your system. If your machine is not set up yet, you can complete the official React Native setup guide here - React native.
What You’ll Learn in This Blog Post
In this guide, we’ll walk through the key aspects of working with maps in a React Native CLI project, including:
- Introduction to react-native-maps
- Installation and setup
- Requesting and handling location permissions
- Creating a sample screen with a map view
- Displaying the user’s current location on the map
- Drawing a polyline between two coordinates
- Using Google Maps Direction API for advanced features
Introduction to React Native Maps with react-native-maps Library
React-native-maps is a popular library to integrate maps in Android and iOS applications developed using React Native. It has core components like MapView and Marker. These help you show maps, give pins, and handle user interactions such as taps and gestures. It uses native map services. It also works with Google Maps React Native. On iOS, it works with Apple Maps and Google Maps. This provides you with native performance and a seamless experience.
A variety of customization is in store for you, including types of maps, zoom controls, overlays, and markers. From creating simple maps to inserting sophisticated functions like tracking and navigation, this library is an ideal choice.
You can also explore react native map style customization and react native maps custom style options to improve your app’s visual experience.
Installation and Setup for react-native-maps and Google Maps in React Native
To get started, install the following packages
npm install react-native-mapsnpm install react-native-geolocation-servicenpm install react-native-permissions
Here's what each package does:
react-native-mapsis used to show and control the map view.react-native-geolocation-serviceoffers the device location with greater accuracy.react-native-permissionsis used to request and check location permissions for Android and iOS.
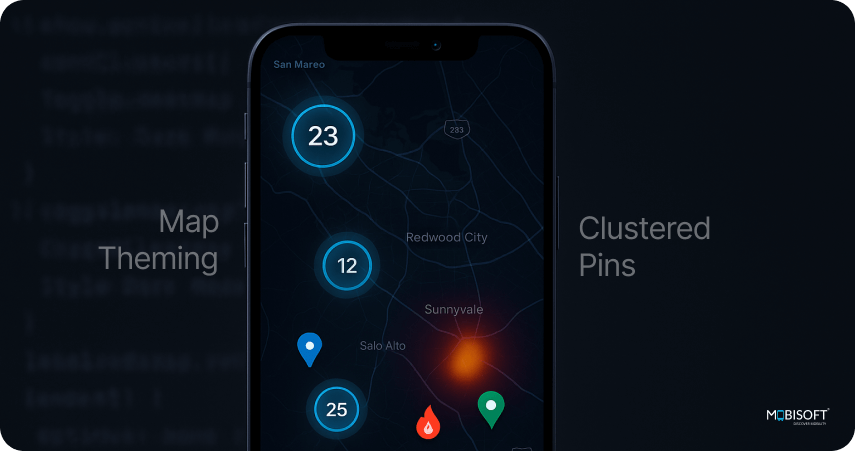
For advanced implementations, you can also consider features like react native maps clustering or support for offline maps using react-native-maps.
If you’d like to take it a step further, here’s how to embed native screens in React Native for seamless cross-platform experiences.
Setup React Native Maps for iOS Only
- Step 1
Add the following dependency to your Podfile located in the ios directory:
pod 'react-native-maps', :path => '../node_modules/react-native-maps', :subspecs => ['Google']- Step 2
Update your Podfile with the following script to handle permission setup properly:
def node_require(script)
  # Resolve script with node to allow for hoisting
  require Pod::Executable.execute_command('node', ['-p',
    "require.resolve(
      '#{script}',
      {paths: [process.argv[1]]},
    )", __dir__]).strip
end

node_require('react-native/scripts/react_native_pods.rb')
node_require('react-native-permissions/scripts/setup.rb')

setup_permissions([
  'LocationAccuracy',
  'LocationAlways',
  'LocationWhenInUse',
])- Step 3
Run the pod install command to install the pods
Setup React Native Maps For Android
- Step 1
Add the following dependency to your **android/app/build.gradle** file inside the dependencies block:
implementation ("com.google.android.gms:play-services-location:21.1.0")
- Step 2
Add the following configuration to your **android/build.gradle** file outside the buildscript block (at the root level):
  allprojects {
   configurations.all {
       resolutionStrategy {
           force 'com.google.android.gms:play-services-location:21.1.0'
       }
   }
}
This makes certain that the same play-services-location version is used consistently in every library, thereby avoiding runtime crashes caused by version mismatch.
Requesting and Handling Location Permissions in React Native Maps Apps
To request or check location permissions, you need to add the appropriate permission
Descriptions in your iOS Info.plist file and Android’s AndroidManifest.xml file.
iOS – Add the following permission descriptions in Info.plist:
<key>NSLocationWhenInUseUsageDescription</key>
<string>This app requires access to your location to display your current position on the map</string>
<key>NSLocationAlwaysUsageDescription</key>
<string>This app requires access to your location to display your current position on the map</string>
<key>NSLocationAlwaysAndWhenInUseUsageDescription</key>
<string>This app requires access to your location to display your current position on the map</string>
Android – Add the following permissions in AndroidManifest.xml (inside the <manifest> tag):
<uses-permission android:name="android.permission.ACCESS_COARSE_LOCATION" />
<uses-permission android:name="android.permission.ACCESS_FINE_LOCATION" />
Let’s move ahead and create a PermissionHandler.ts utility file to manage all permission-related logic. Add the following code in that.
import { PermissionsAndroid, Platform } from "react-native";
import { PERMISSIONS, request, RESULTS } from "react-native-permissions";
export const requestLocationPermission = async (): Promise<boolean> => {
  try {
    if (Platform.OS === "android") {
      const granted = await PermissionsAndroid.request(
        PermissionsAndroid.PERMISSIONS.ACCESS_FINE_LOCATION
      );
      return granted == PermissionsAndroid.RESULTS.GRANTED;
    } else {
      const result = await request(PERMISSIONS.IOS.LOCATION_WHEN_IN_USE);
      console.log(result);
      return (result == RESULTS.GRANTED || result == RESULTS.LIMITED);
    }
  } catch (error) {
    console.warn("Permission error:", error);
    return false;
  }
};
If your app involves uploading files, check out this React file uploader with progress bar tutorial for a smooth user experience.
Creating a Sample Screen with a Map View in React Native Using react-native-maps
In the future, let's create a screen named HomeScreen. I want all the screens in an organized manner, so start by creating a src folder. Inside the src folder, create a folder named screens, and inside that, a file named HomeScreen.tsx.
We will not write any code in the App.tsx file; however, all the user interface and functionality will be written in the HomeScreen.
I am using a StackNavigation to navigate to HomeScreen. You can explore the stackNavigation by clicking here.
Add the following sample code to your HomeScreen
<View style={{ flex: 1 }}>
    <MapView style={{ flex: 1 }} provider="google" initialRegion={{
    latitude: 18.5482582,
    longitude: 73.7713259,
    latitudeDelta: 0.001,
    longitudeDelta: 0.001,
    }}>
    </MapView>
</View>
In the code above:
style={{ flex: 1 }}layout is applied to both the View and MapView components so that the map covers the full available screen space- The
provider="google"dictates that Google Maps has to be used as the provider of the map. This is particularly necessary on Android, where the default provider is indeed Google Maps; however, there are particular circumstances in whereby its explicit naming is necessary. - If the provider is unknown
- On
Android, it defaults to Google Maps. - On
iOS, it uses Apple Maps by default.
- On
By setting the initialRegion, you're also setting the map position and zoom level with latitude, longitude, and delta values.
To streamline such development efforts, you can hire React Native developers who are skilled in working with maps, location services, and native integrations.
Note: Don't forget to initialize the Google Maps API key for React Native for both iOS and Android.
iOS (in AppDelegate.swift) -:
import GoogleMaps
GMSServices.provideAPIKey("YOUR_GOOGLE_MAPS_API_KEY")
Android (in AndroidManifest.xml)-:
Add the following <meta-data> tag inside the <application> tag:
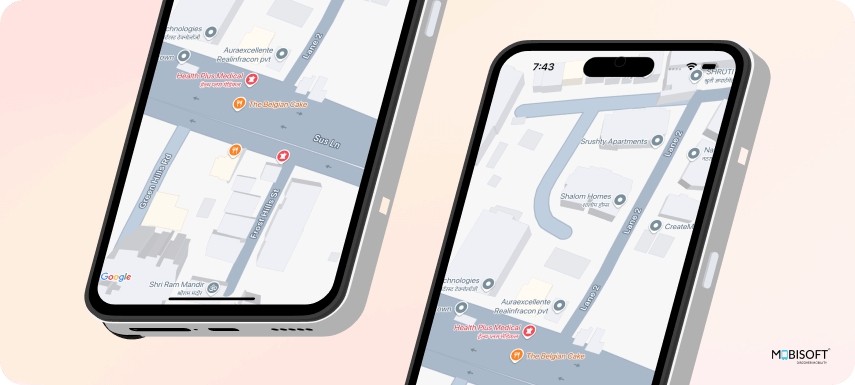
<meta-data android:name="com.google.android.geo.API_KEY"android:value="YOUR_GOOGLE_MAPS_API_KEY"/>After running the app, you should see an output similar to the following:
Displaying the User’s Current Location on the Map with react-native-maps and Geolocation
To display the user's current location on the map, we first need to obtain it. This involves requesting the user's permission to access their location. We’ll utilize the requestLocationPermission function, which was implemented in Step 3.
We can use the useEffect hook along with useState to manage the permission flow and fetch the location, as shown below:
useEffect(() => {
    const getCurrentLocation = async () => {
        const hasPermission = await requestLocationPermission();
        if (!hasPermission) {
            Alert.alert('Location permission not granted');
            return;
        }
        // Fetch and handle the user's current location here
    };
    getCurrentLocation()
}, []);
We’ll use the @react-native-community/geolocation library to retrieve the user’s current location. The getCurrentPosition method allows us to access the device’s GPS and extract the coordinates. If you're building a react native map with markers example, this setup is essential.
Geolocation.getCurrentPosition(position => {
    const { latitude, longitude } = position.coords;
    const userLoction = { latitude, longitude };
}, error => {
    Alert.alert('Error', error.message);
}, {
    enableHighAccuracy: true,
    timeout: 15000,
    maximumAge: 10000,
}
);
This setup ensures high-accuracy location results, with a 15-second timeout and caching allowed for up to 10 seconds.
Let’s create a state variable to store the user’s location using the useState hook. We'll also define a default region object to control the map view and a mapRef to reference the map programmatically. When the component mounts, we request location permission. If granted, we fetch the current position and update both the location and region states accordingly. The map is then animated to the user’s current location using animateToRegion.
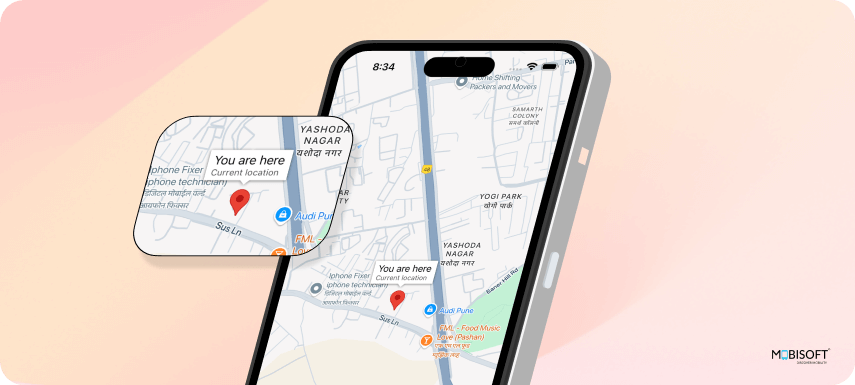
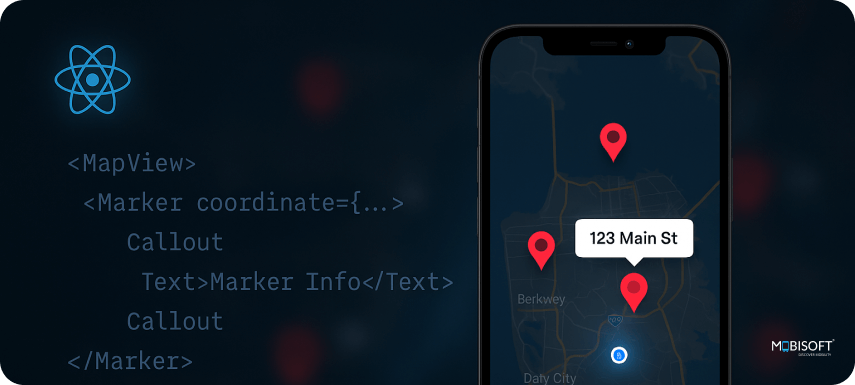
To visually indicate the user's location on the map, we use the <Marker> component from react-native-maps, placing it at the retrieved coordinates.
Here is a full version of the code.
import { useEffect, useRef, useState } from "react";
import { View, Alert } from "react-native";
import MapView, { Marker, Region } from 'react-native-maps';
import Geolocation from 'react-native-geolocation-service';
import type MapViewType from 'react-native-maps';
import { requestLocationPermission } from "../../utils/PermissionHandler";

type Location = {
   latitude: number;
   longitude: number;
};

const HomeScreen = () => {
   const [location, setLocation] = useState<Location | null>(null);
   const [region, setRegion] = useState<Region>({
       latitude: 0,
       longitude: 0,
       latitudeDelta: 0.01,
       longitudeDelta: 0.01,
   });
   const mapRef = useRef<MapViewType | null>(null);

   useEffect(() => {
       const getLocation = async () => {
           const hasPermission = await requestLocationPermission();


           if (!hasPermission) {
               Alert.alert('Permission Denied', 'Location access is required.');
               return null;
           }
           Geolocation.getCurrentPosition(position => {
               const { latitude, longitude } = position.coords;
               const userLoction = { latitude, longitude };
               setLocation(userLoction);
               console.log(position);
               const newRegion = {
                   ...userLoction,
                   latitudeDelta: 0.01,
                   longitudeDelta: 0.01,
               };
               setRegion(newRegion);
               if (mapRef.current) {
                   mapRef.current.animateToRegion(newRegion, 1000);
               }

           }, error => {
               Alert.alert('Error', error.message);
           }, {
               enableHighAccuracy: true,
               timeout: 15000,
               maximumAge: 10000,
           }
           );
       };
       getLocation();
   }, [])

   return (
       <View style={{ flex: 1 }}>
           <MapView ref={mapRef} style={{ flex: 1 }} provider="google"region={region}>
               {location && (
                   <Marker
                       coordinate={location}
                       title="You are here"
                       description="Current location"
                   />
               )}
           </MapView>
       </View>
   )
};

export default HomeScreen;
You will see the output like this
Drawing a Polyline Between Two Coordinates in Google Maps React Native
- We will create a
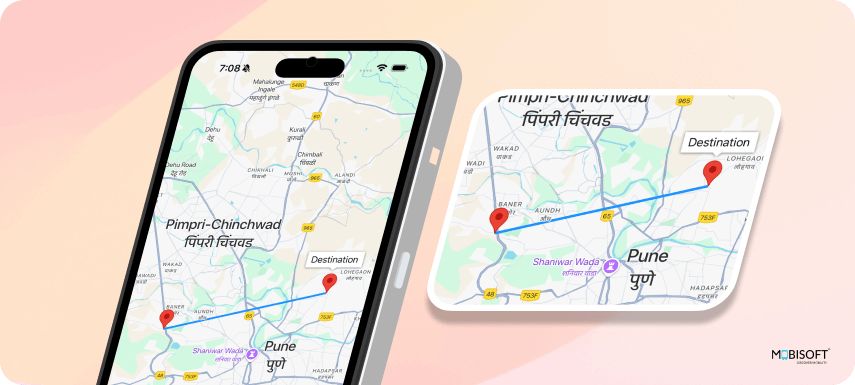
destinationvariable with static latitude and longitude coordinates, which will be used to specify the polyline and display the destination marker on the map.
const destination = {
    latitude: 18.5793481,
    longitude: 73.9063365,
}- Once the location is fetched using the Geolocation API, the
fitToCoordinatesmethod subsequently resizes the map's camera view so that your source and destination markers are in the viewport on the screen, with padding on the edges for breathing room.
Replace your existing animateToRegion code with the following:
if (mapRef.current) {
    mapRef.current.fitToCoordinates(
        [userLoction, destination],
        {
            edgePadding: { top: 80, right: 80, bottom: 80, left: 80 },
            animated: true,
        }
    );
}- Add the following code inside the
<MapView>component to display the destination marker and draw a polyline between the current location and the destination:
<Marker coordinate={destination} title="Destination" />
<Polyline coordinates={[location, destination]} strokeColor="#1E90FF" strokeWidth={4} />
The <Polyline> component visually connects the user's current location to the destination. It uses strokeColor="#1E90FF" to render the path in a light blue color and strokeWidth={4} to define the thickness of the line, ensuring the route is visible on the map.
You will see the result like this
Using Google Maps Direction API for Advanced Features in React Native Google Maps Integration
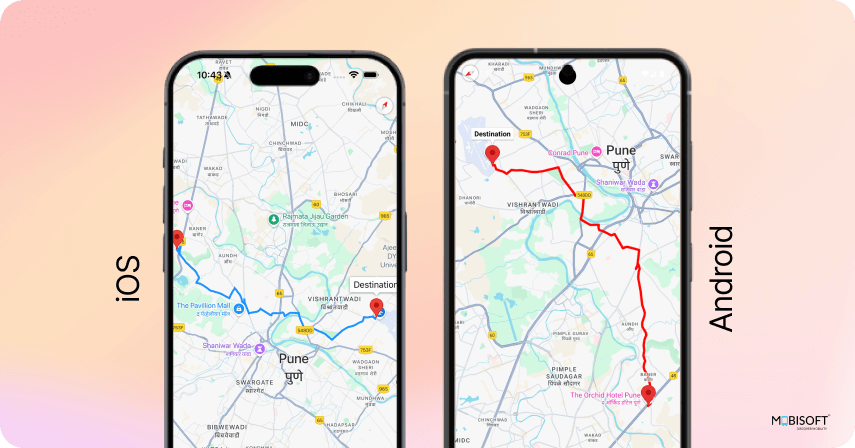
Now, let us proceed to add the Google Directions API so that we can show the route that connects the user's location to the destination. This is a common use case in react native map with markers example projects.
To do this, add the following functions to your HomeScreen component. The initial task requests directions from the Directions API and decodes the resultant response. The route obtained from the API is provided as an encoded polyline, which needs to be decoded into an array of points of latitude and longitude before it can be drawn on the map.
Although the third-party library @mapbox/polyline could be employed to decode the polyline, in this particular instance, we have decided to implement a custom decode function within the code. This method avoids the need for extra dependencies and employs a decoding methodology based on Google's open-source algorithm.
 const fetchRouteCoordinates = async (source: LatLng,
       destination: LatLng) => {
       try {
           const API_KEY = 'YOUR_GOOGLE_MAPS_API_KEY';
           const url = `https://maps.googleapis.com/maps/api/directions/json?origin=${source.latitude},${source.longitude}&destination=${destination.latitude},${destination.longitude}&key=${API_KEY}`;

           const response = await fetch(url);
           const json = await response.json();

           if (json.routes.length) {
               const points = decodePolyline(json.routes[0].overview_polyline.points);
               return points;
           } else {
               Alert.alert('Route not found');
               return [];
           }
       } catch (error) {
           Alert.alert('Error fetching route', String(error));
           return [];
       }
   };

   // Polyline decoder
   const decodePolyline = (t: string, e = 5) => {
       let points = [];
       let index = 0,
           lat = 0,
           lng = 0;

       while (index < t.length) {
           let b, shift = 0, result = 0;
           do {
               b = t.charCodeAt(index++) - 63;
               result |= (b & 0x1f) << shift;
               shift += 5;
           } while (b >= 0x20);
           let dlat = (result & 1) ? ~(result >> 1) : result >> 1;
           lat += dlat;

           shift = 0;
           result = 0;
           do {
               b = t.charCodeAt(index++) - 63;
               result |= (b & 0x1f) << shift;
               shift += 5;
           } while (b >= 0x20);
           let dlng = (result & 1) ? ~(result >> 1) : result >> 1;
           lng += dlng;

           points.push({
               latitude: lat / 1e5,
               longitude: lng / 1e5,
           });
       }

       return points;
   };
The output will appear as shown below
Want to continue building powerful features? Check out our React Native push notifications tutorial to learn how to boost user engagement.
Note: Don’t forget to add your GOOGLE_API_KEY in the AppDelegate, AndroidManifest.xml, and within your Directions API fetch URL. Proper API integration is critical for optimal react native maps performance optimization.
Conclusion
We now have a fully configured React Native CLI application that uses Google Maps to display routes using the Directions API. This setup includes location permissions, direction retrieval, and polyline rendering.
This robust foundation is ideal for implementing advanced use cases like:
- Delivery tracking
- Cab booking
- Navigation assistance
You can also extend this by using react-native-maps with geolocation, custom map controls, or even offline maps support for added functionality.
To experience this in action, download the source code on GitHub and start building your next React Native Maps solution. You can also explore our full-stack mobile app development services to bring your product to market faster.




 July 29, 2025


