In this tutorial, we will learn how to setup a PostgreSQL server for your development environment. Typically, for the production deployment we will use Amazon RDS as the database. However, for development deployments, we can use a standalone PgSQL server.
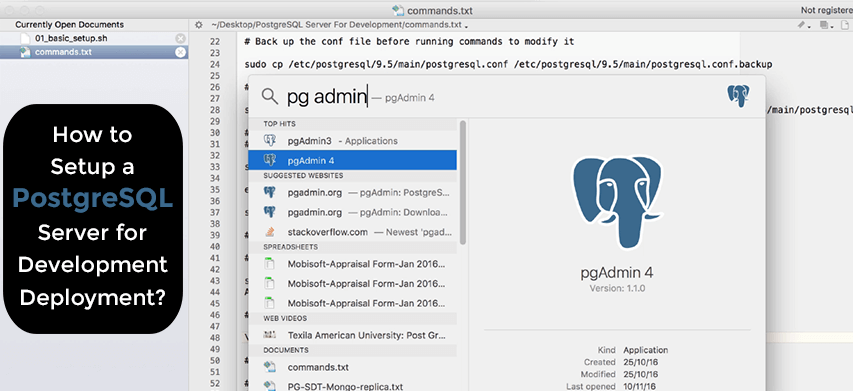
So, first you have to Create a Regular EC2 server and Launch an Instance to start your server.
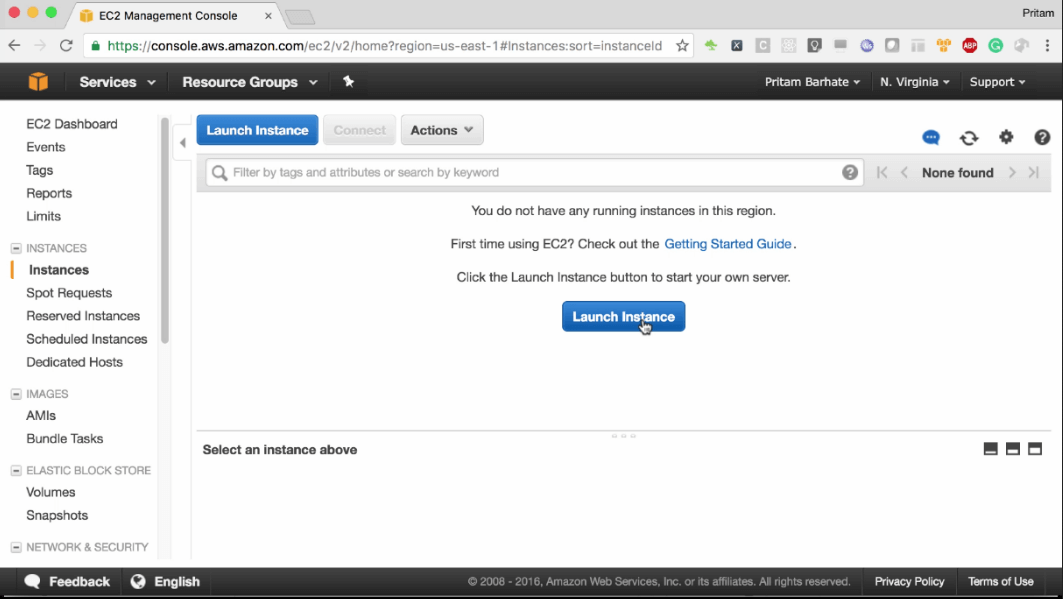
For further process, follow the steps below:
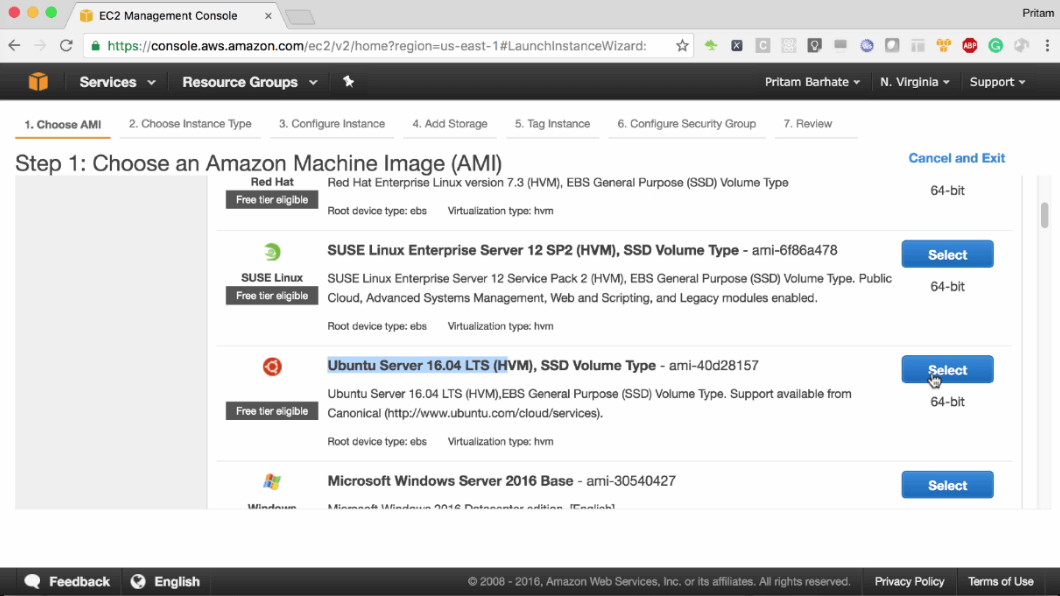
Step 1: Choosing The Amazon Machine Image
- Select “Ubuntu Server 16.04 LTS(HVM), SSD Volume Type” as the Amazon Machine Image
Step 2: Choosing The Instance Type
- Select “t2.micro server” as the Instance Type, since it is just going to run the database.
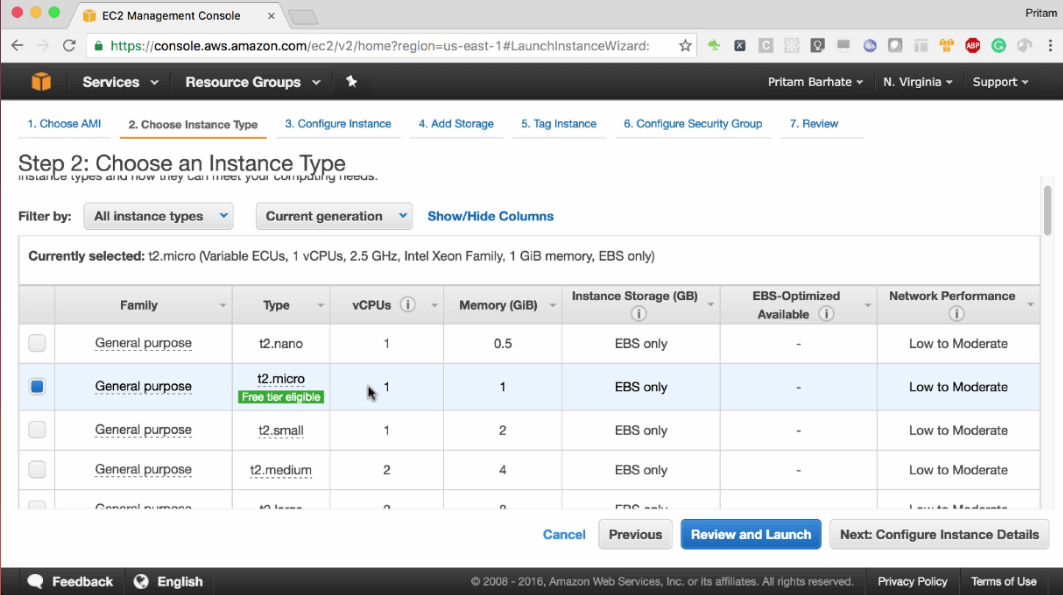
- If you are installing both Java as well as PostgreSQL, then choose “t2.small” which comes with 2GB of memory as opposed to “t2. micro” server with 1GB of memory.
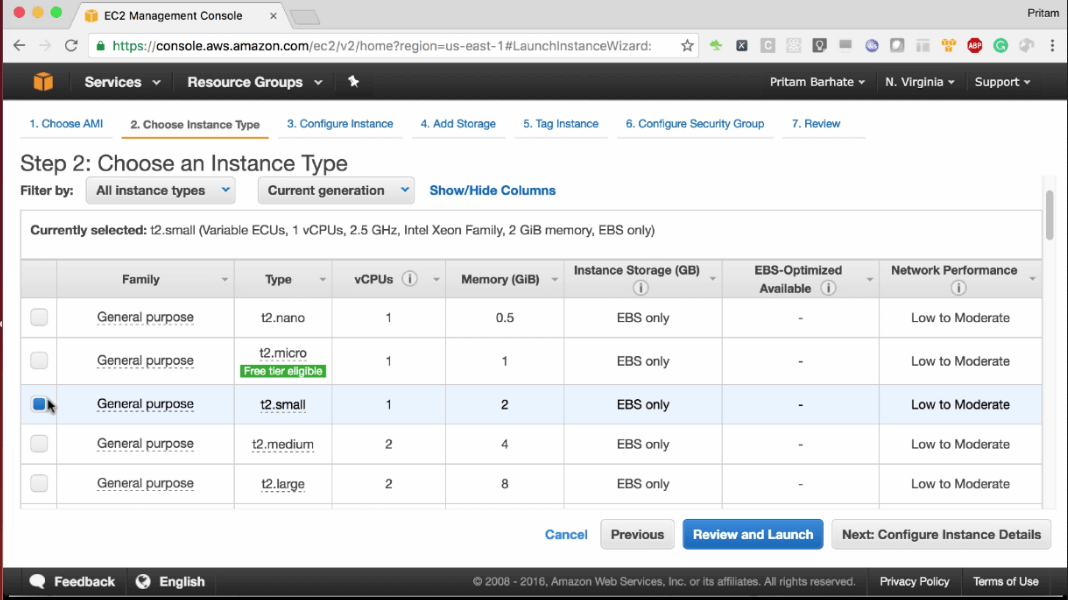
- Click on “Next: Configure Instance Details”
Step 3: Configuring Instance Details
- Always select “Shutdown behaviour” as “Stop”
- “Enable Termination Protection” by selecting the Checkbox, which will protect you against accidental termination
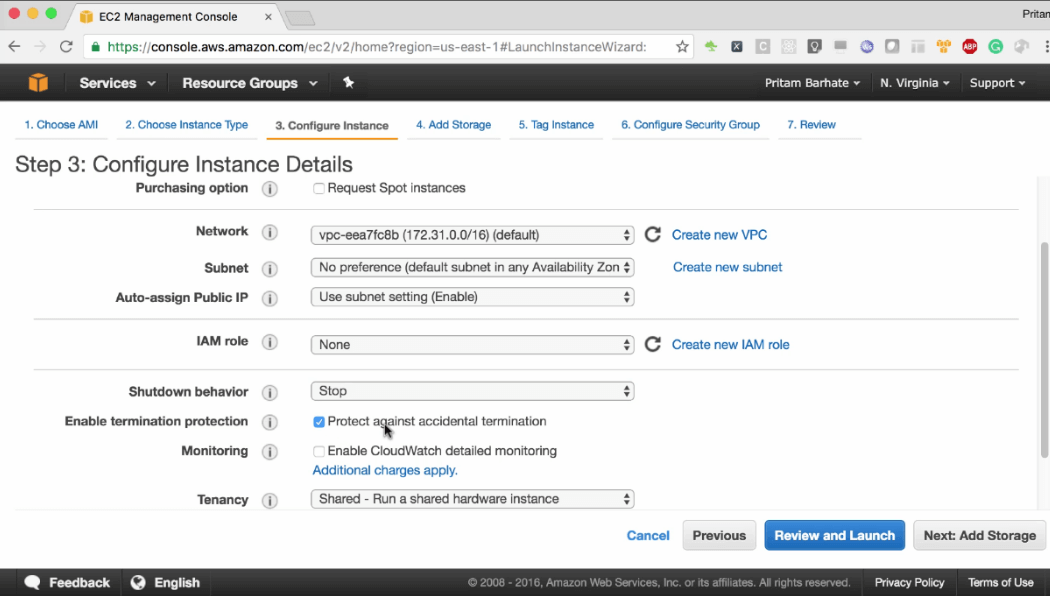
- Click on “Next: Add Storage”
Step 4: Adding Storage
- Enter “Size” as “25GB”
- Select Volume Type as “General Purpose SSD(GP2)”
- Select the Checkbox for “Delete On Termination”, this means when the server is deleted, the Volume will also be deleted.
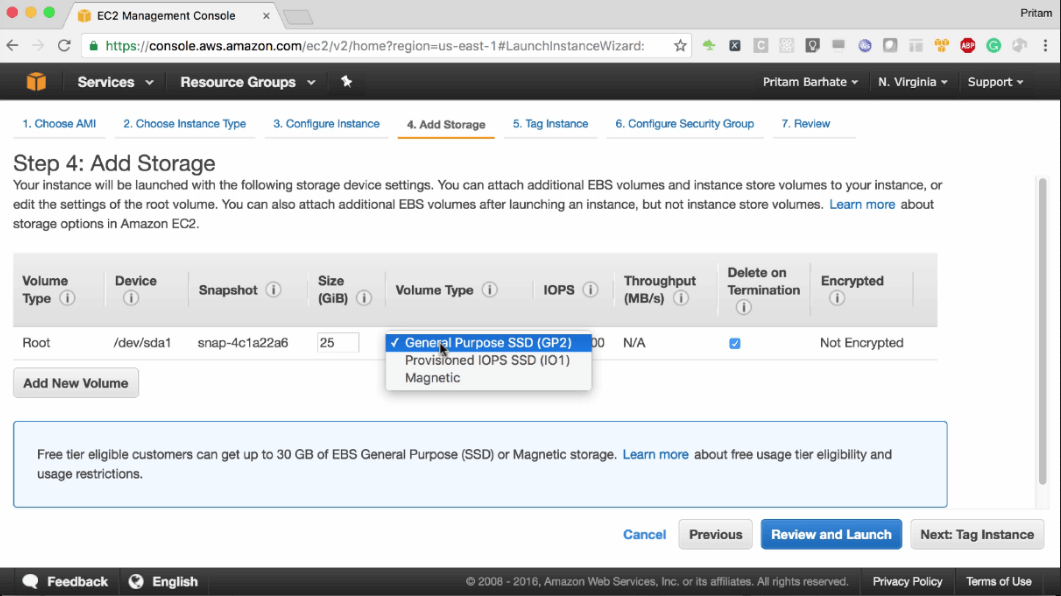
- Click on “Next: Tag Instance”
Step 5: Tagging Instance
- Give a meaningful tag to the server, so that you can understand its use just from the name.
- Click on “Next: Configure Security Group”
Step 6: Configuring Security Group
- Since you need to run the database, then you have to Create the “Security Group Name” as “DevDb” and “Description” as “Development db security group”
- Select the “Type” as “SSH” and “Port Range” as “22”
- Add one more rule and Select “PostgreSQL” from the Drop down list and Select “Port Range” as “5432” and “source” as “Anywhere”
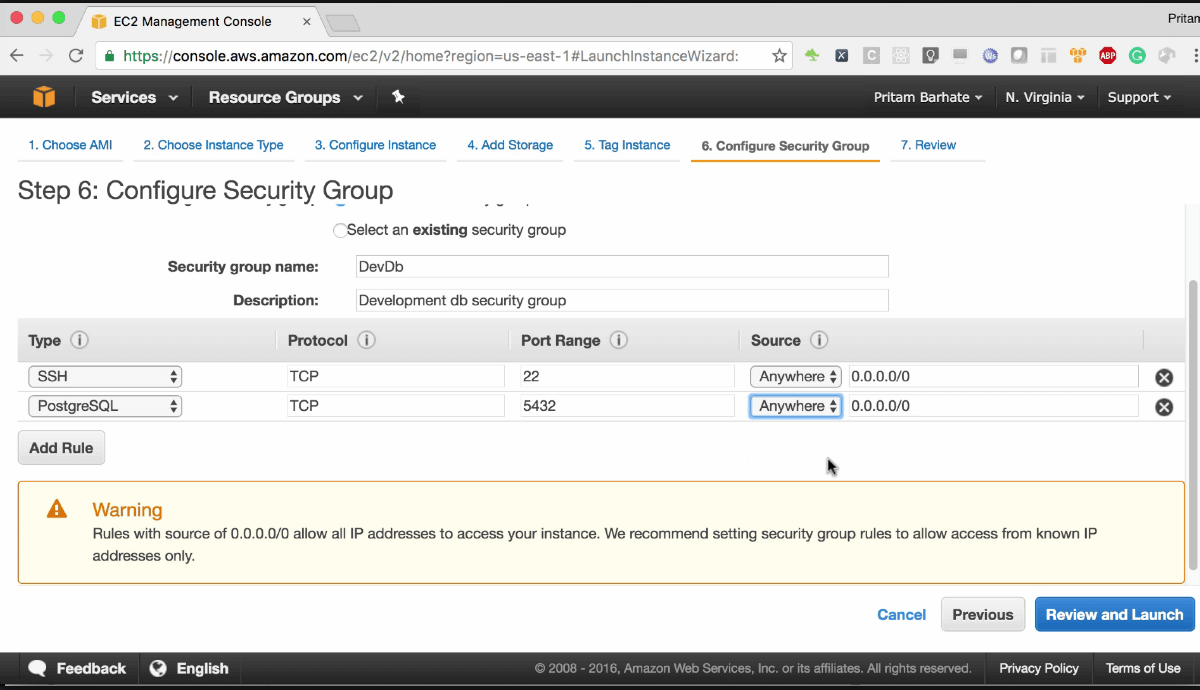
Since this is a development database, you don’t need to restrict the access from your office or Master server.
- Click “Review and Launch”
Step 7: Review Instance Launch
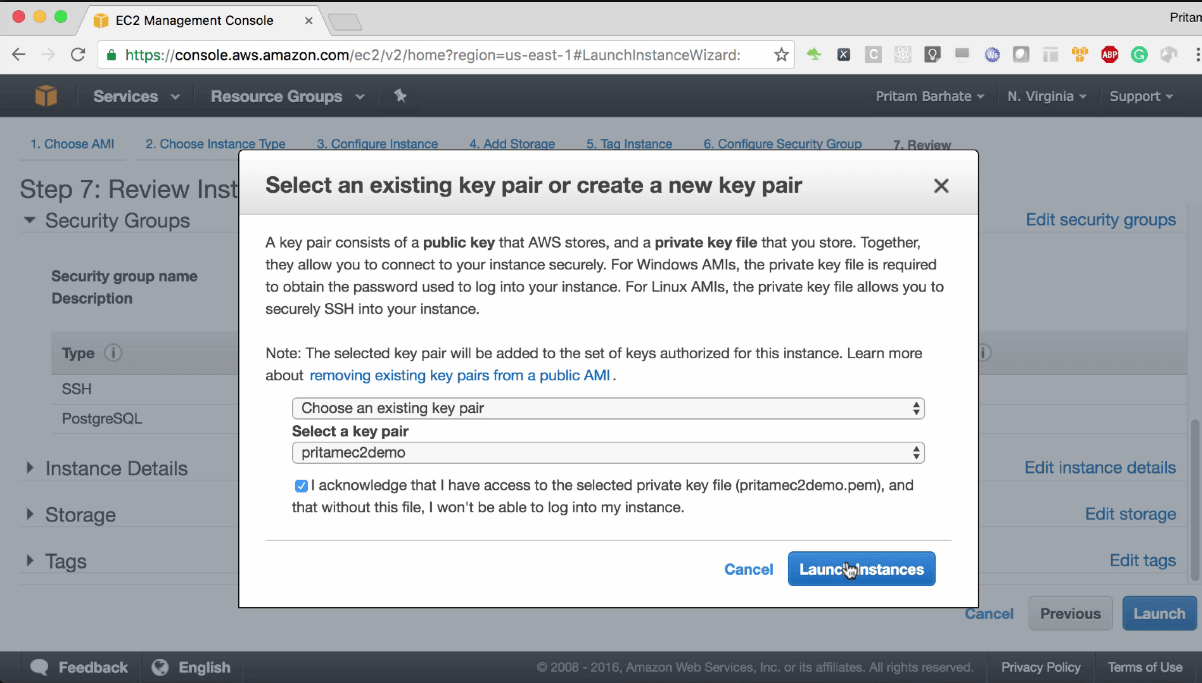
- After reviewing all the details, Click on “Launch” and a Dialog box will popup
- In the Dialog box, “Select a Key Pair” (for e.g. pritamec2demo) from the Drop Down list.
- Select the “Checkbox” for the acknowledgement of the access.
- Click “Launch Instances”
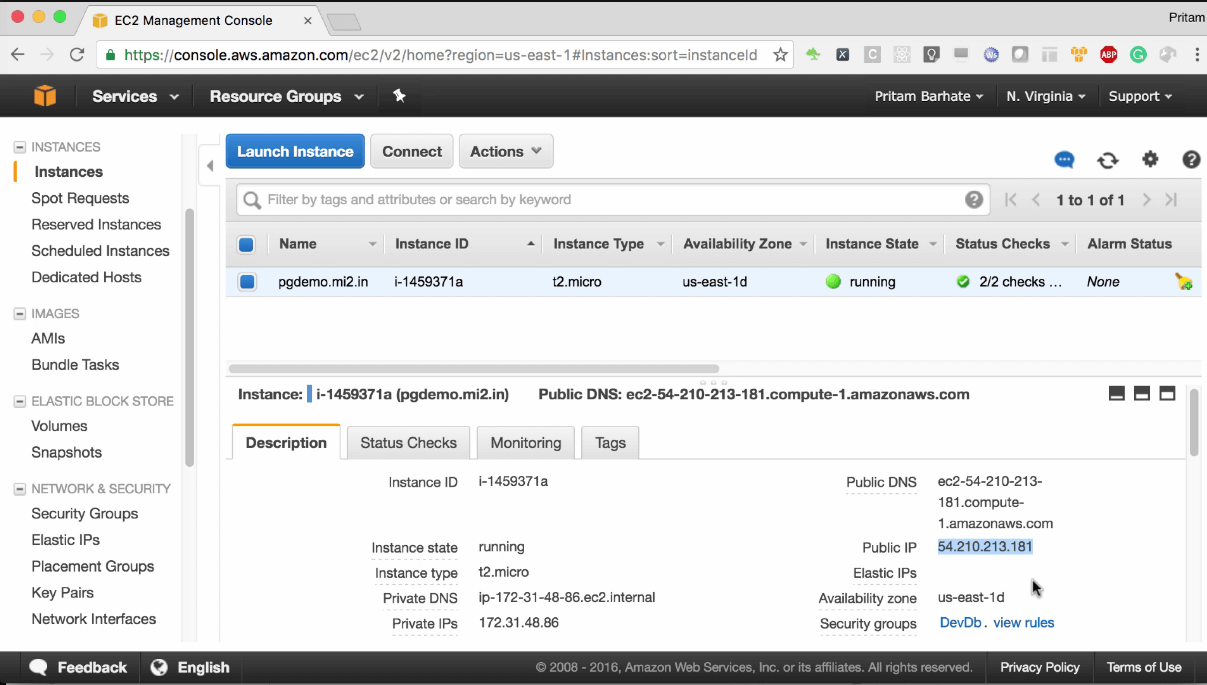
- The Instance will be launching and you can check the Instance status in “Instance State” Tab.
- Typically, you have to use “Elastic IP” for your server, but since it is just for the development server we will just use “Public IP” (e.g. 54.210.213.181)
Connecting To The Server
In the directory where your pem file, (for e.g. pritamec2demo.pem) is present, use the login command “ssh -i pritamec2demo.pem ubuntu@54.210.213.181” and connect to the server. As it is a new server, you will need to do the “Basic Server Setup”.
Note: Make sure that port 5432 is open in the security group. If you are creating a development instance, then most likely you will use the same server for application server (PHP / Java) and your database.
If you have already set up development app server then just use the same one, just modify the security group, and open the port 5432 from anywhere in the security group.
Instead of doing the Basic Server Setup manually, you can do it using the script. It is better to create a script in advance. Save the script folder and name it (e.g “basicsetup.sh”)
Use the following command for Basic Server Setup using the script “basicsetup.sh”
- For this you have to run the command,
“vi basicsetup.sh” - Copy the script and paste it in the command window with the insert mode
- Run
“chmod +x basicsetup.sh”.This will make the file executable. - Run the file using the command with a format
“./basicsetup.sh hostname FQDN public_ip”
As the host name is ‘pgdemo’, FQDN is ‘pgdemo.mi2.in’, and public_ip is ’54.210.213.181’ then the command used to run the file will be:
“./basicsetup.sh pgdemo pgdemo.mi2.in 54.210.213.181”- Enter ‘y’ if the details are correct
Note: Since you are setting up a database, having the correct local set to 'en_US.UTF-8' is important. And if the script is ready, it almost takes care of all the basic things that you need to do on the server.
- Restart the server by running the command
“sudo init 6”
Once you have started the server, just proceed with the setup:
- Install PostgreSQL from the Ubuntu package repository
For this you can use the command:
sudo apt-get install -y postgresql postgresql-contribNote: Here ‘-y’ means that you are sure that you want to install, so the installation will not prompt you once again.
- Back up the conf. file before running commands to modify it
For this you can run the following command
sudo cp /etc/postgresql/9.5/main/postgresql.conf /etc/postgresql/9.5/main/postgresql.conf.backup- Replace the listen address from localhost to ‘*’
For this you can run the following command:
sudo sed -i -e "s/#listen_addresses = 'localhost'/listen_addresses = '*'/g" /etc/postgresql/9.5/main/postgresql.confThis means, you can connect to the server from anywhere.
- Allow the server to be accessed/logged in from anywhere
For that you need to modify ‘pg_hba.conf’ file by running the following command:
echo 'host all all 0.0.0.0/0 md5' | sudo tee -a /etc/postgresql/9.5/main/pg_hba.conf- Open the ‘pg_hba.conf’ file
For this you can run the following command
sudo vi /etc/postgresql/9.5/main/pg_hba.conf- Enter Shift + G to go to the last line
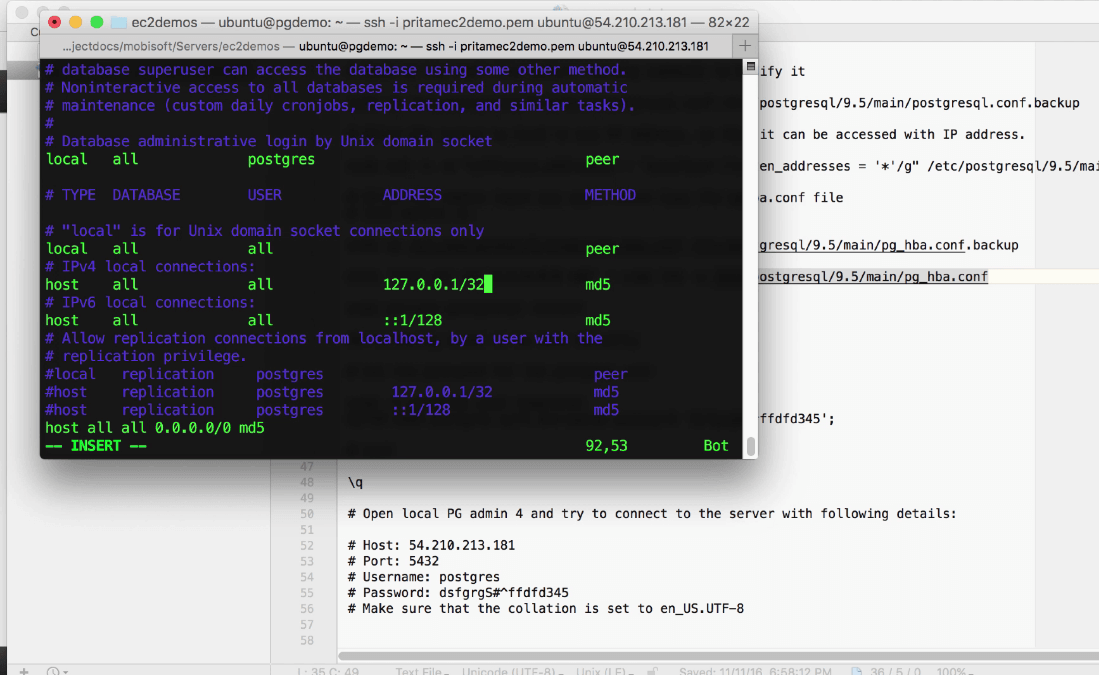
Note: Here ‘host all all 0.0.0.0/0 md5’ means that all the databases and all the users are allowed to connect remotely from anywhere on the internet and the password should be encoded using md5 hash.
For the local host address (e.g: 127.0.0.1), if the ‘/’ is set to 32 (e.g. 127.0.0.1/32). It means that all the 4 numbers of the IPv4 address must be matched.
If it is specified as 24, then a server having the address with matching first 3 numbers of IPv4 address will be allowed to connect.
Similarly, 16 means first 2 numbers of IPv4 address must match and 8 means first number of IPv4 address must match in order to connect.
- Restart the PostgreSQL server
You need to run the following command
sudo service postgresql restart- Connect to the database (e.g. template1)
As you know, the default user is ‘postgres’. So you need to allow password authentication for this server.
For that you need to connect to the ‘template1’ database by running the following command:
sudo -u postgres psql template1You will run this command as ‘postgres’ user and open the ‘psql’ program for the ‘template1’ database.
Note: When you install the PostgreSQL server, the ‘postgres’ user is automatically added to your Linux server.
- Set a new password for the postgres user
Run the following command:
ALTER USER postgres with encrypted password 'dsfgrgS#^ffdfd345';Note: Here, ‘dsfgrgS#^ffdfd345’ has been taken as a password for reference. You need to generate your own password.
- Exit by running ‘/q’
Now you will check if you can connect from your local machine
Follow the below steps:
Go to >> pgAdmin 4
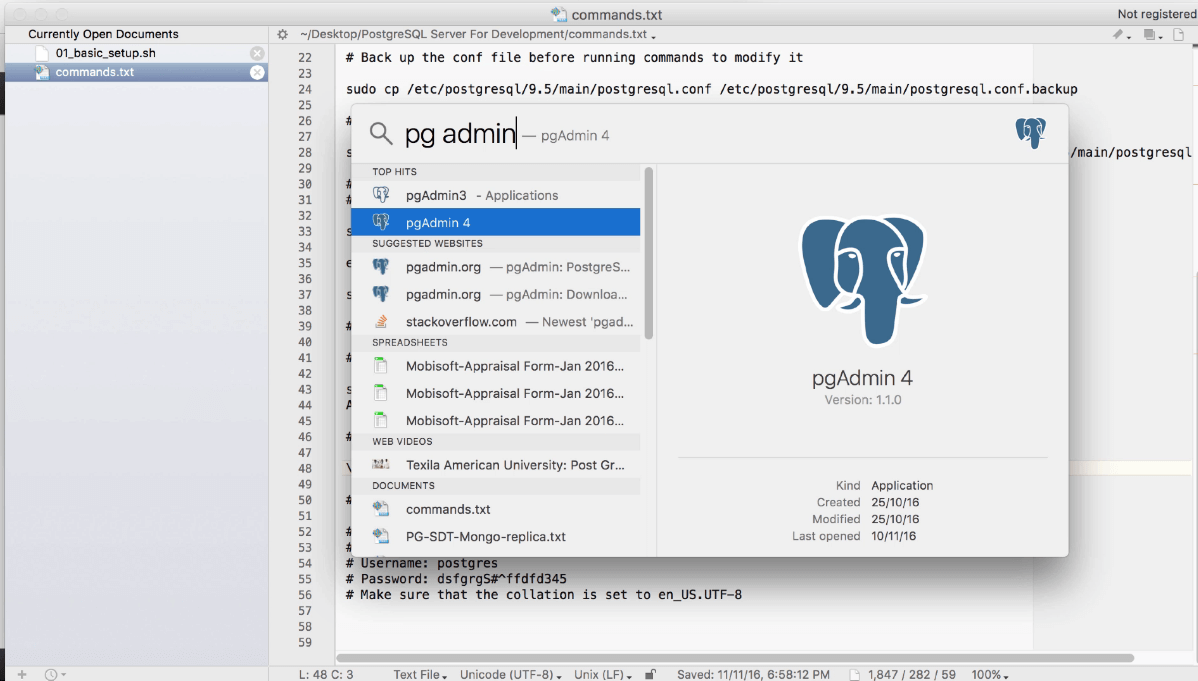
Note: Since this postgres 9.5, you will require latest pgAdmin which is now a web app embedded inside a Native shell, which is a kind of a hybrid program and not much different from what we do while creating PhoneGap applications.
Now perform the following steps in pgAdmin 4
- Create a new server
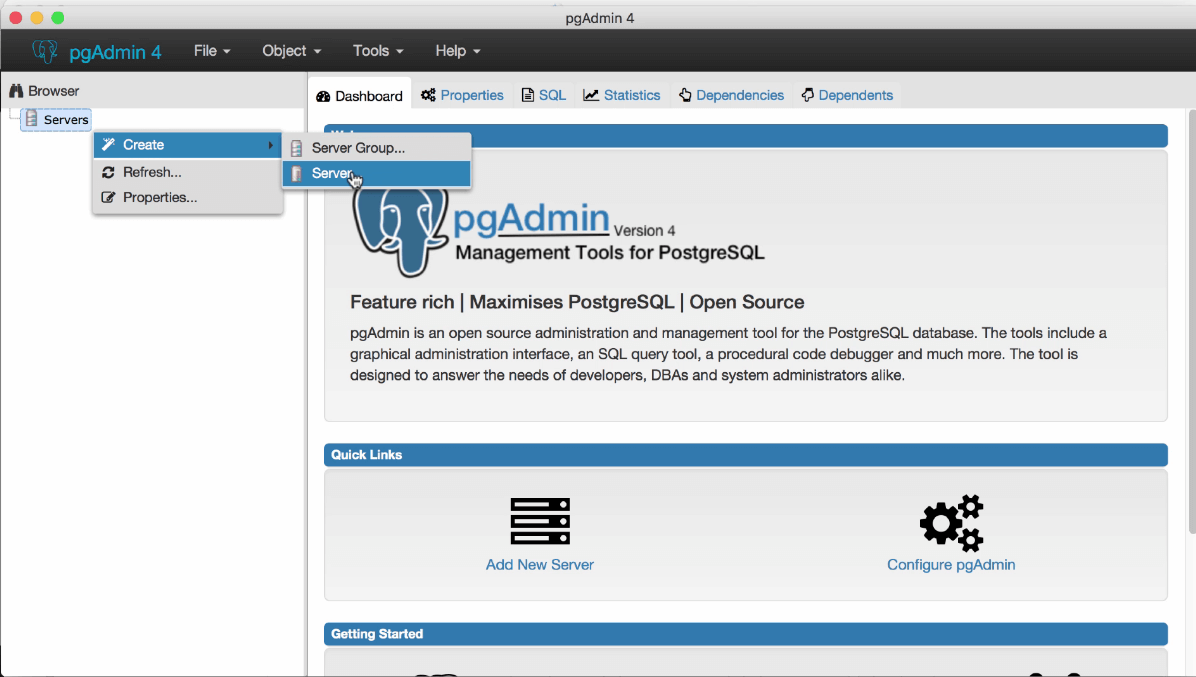
- In the ‘Create-Server’ dialog box, enter ‘Name’ as ‘PG Demo Server’
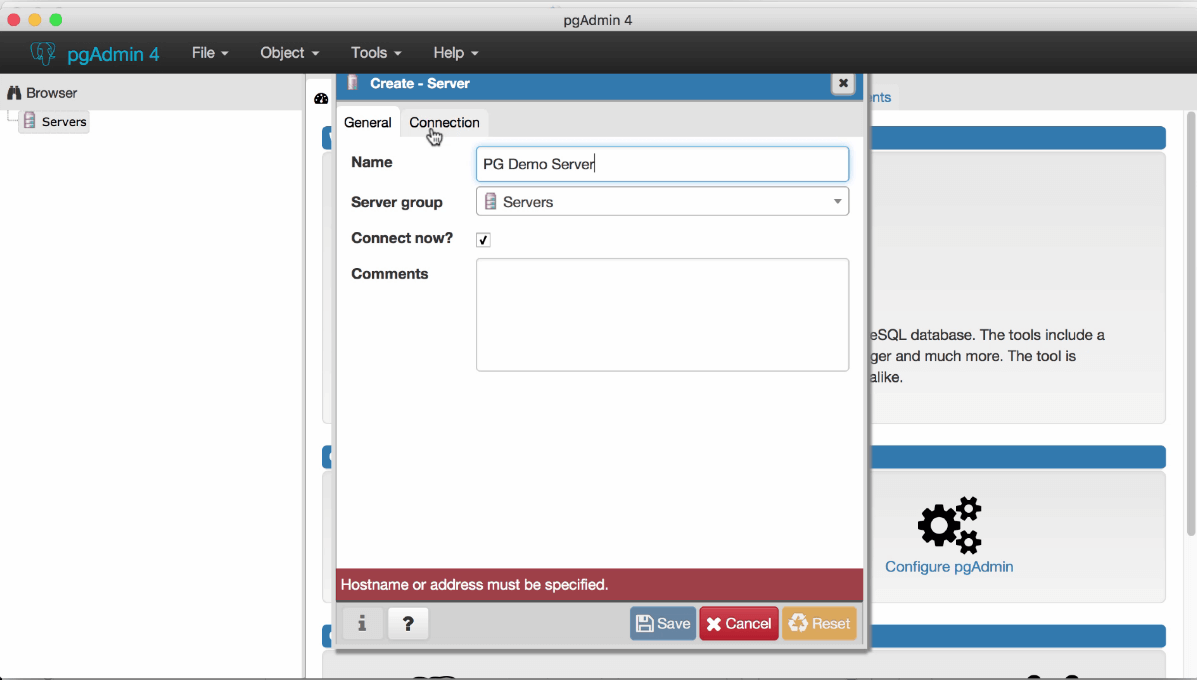
- Go to >> Connection Tab
- Enter your Elastic IP (e.g. 54.210.213.181) as the ‘Host name/address’
- Enter ‘Port’ as 5432, ‘User name’ (e.g. postgres) and ‘Password’ which you have previously generated.
- Click on ‘Save’
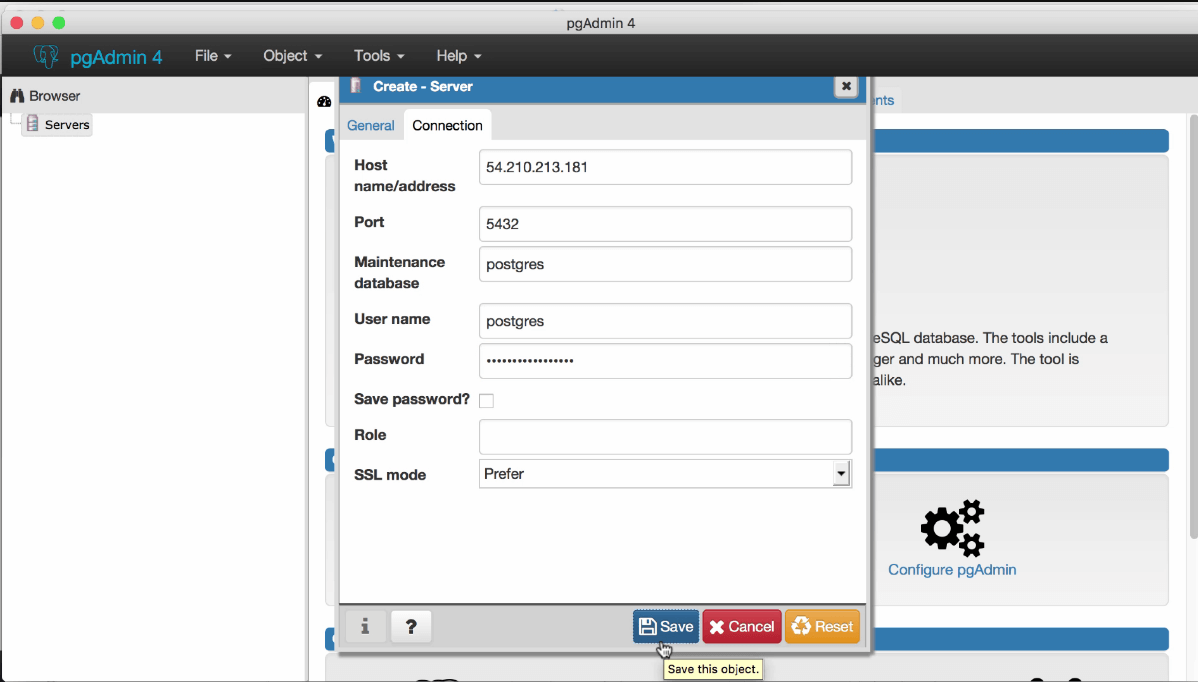
Now you can connect to the server
Create a new Database
- Go to >> Servers >> PG Demo Server >> Database >> Create >> Database
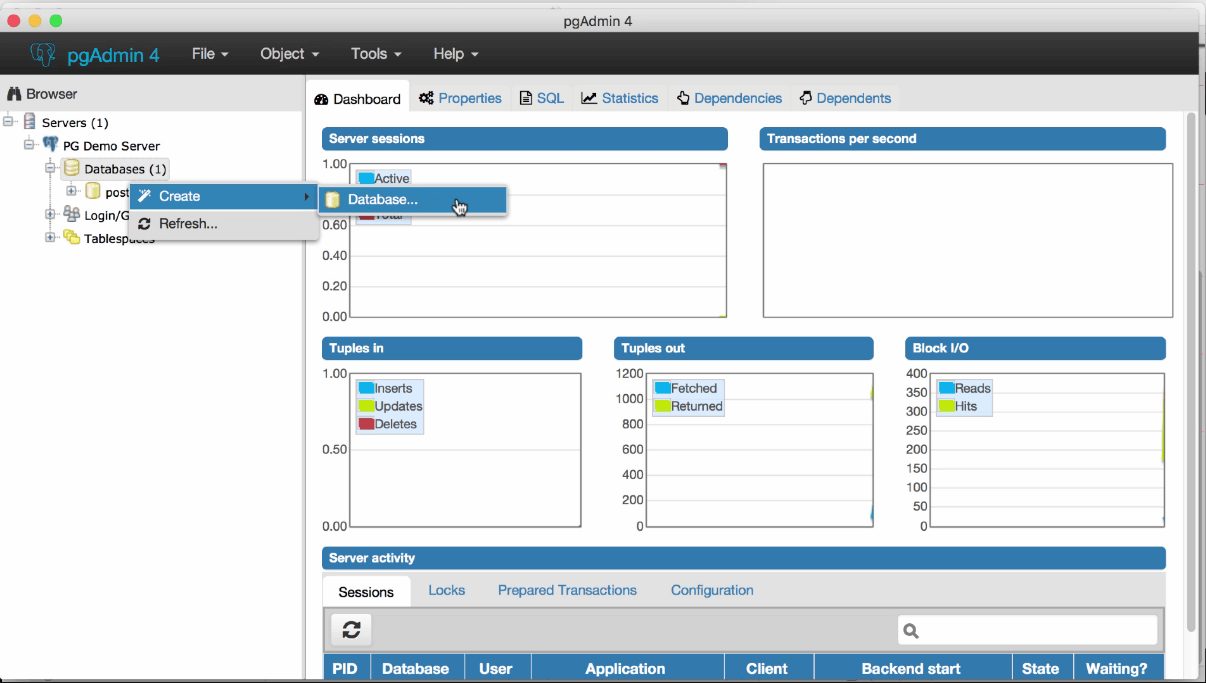
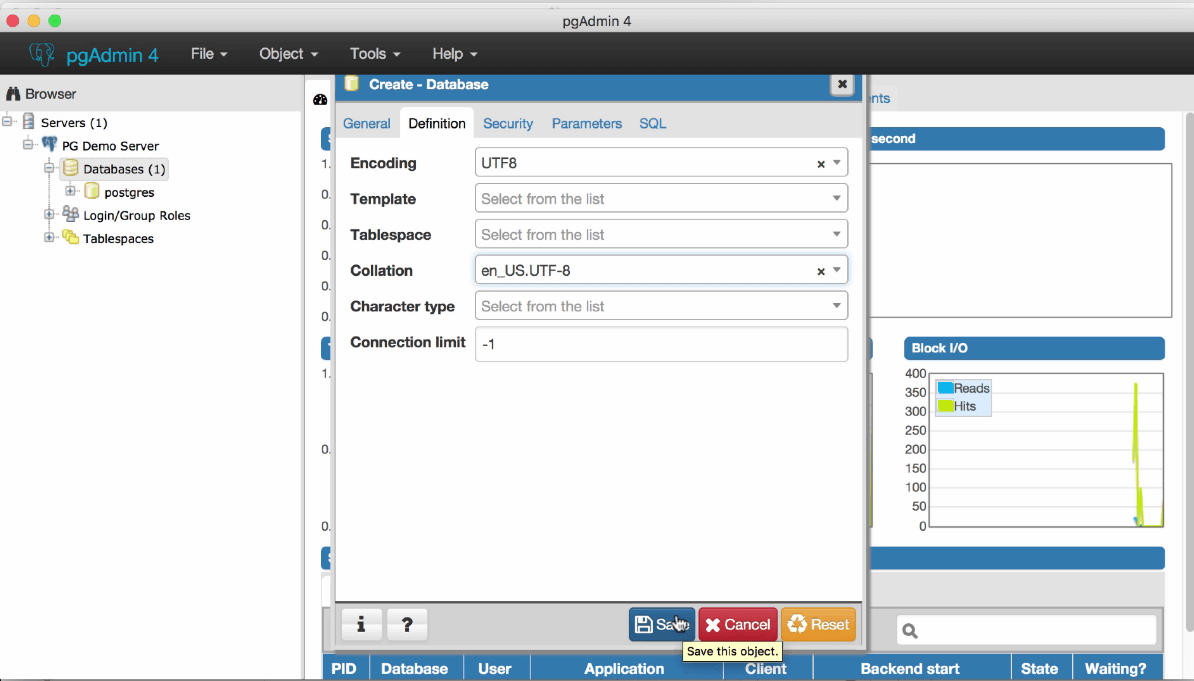
- In the ‘Create-Database’ dialog box, enter the ‘Database name’ (e.g. dev_db)
- Go to >> Definition tab and select ‘Encoding’ as UTF8 from the drop down list
- Set ‘Collation’ as ‘en_US.UTF-8’. This will help in proper sorting and searching of International character sets.
- Click on ‘Save’, that will run the query.
Now you can see that you database has been connected
If you Go to the ‘SQL’ tab, you can check the information about database name, encoding and collation as you entered.
So your development PostgreSQL server is ready for use. However, in some Projects you might want to use a spatial extension for PostgreSQL which is called PostGIS.
You can install PostGIS by performing the following steps:
Step 1: Install PostGIS
Run the following command:
sudo apt-get install -y postgis postgresql-9.5-postgis-2.2Step 2: Enable PostGIS for Database
Run the following command:
sudo -u postgres psql -c "CREATE EXTENSION postgis; CREATE EXTENSION postgis_topology;" dev_dbThis command usually runs “CREATE EXTENSION” query on the database. As you are running this command on the server, that’s why you need to run it as postgres user.
Step 3: Once the extension is installed,
Go to >> pgAdmin 4 >> Servers >> pg Demo Server >> Databases >> dev_db and click ‘Refresh’ from the options.
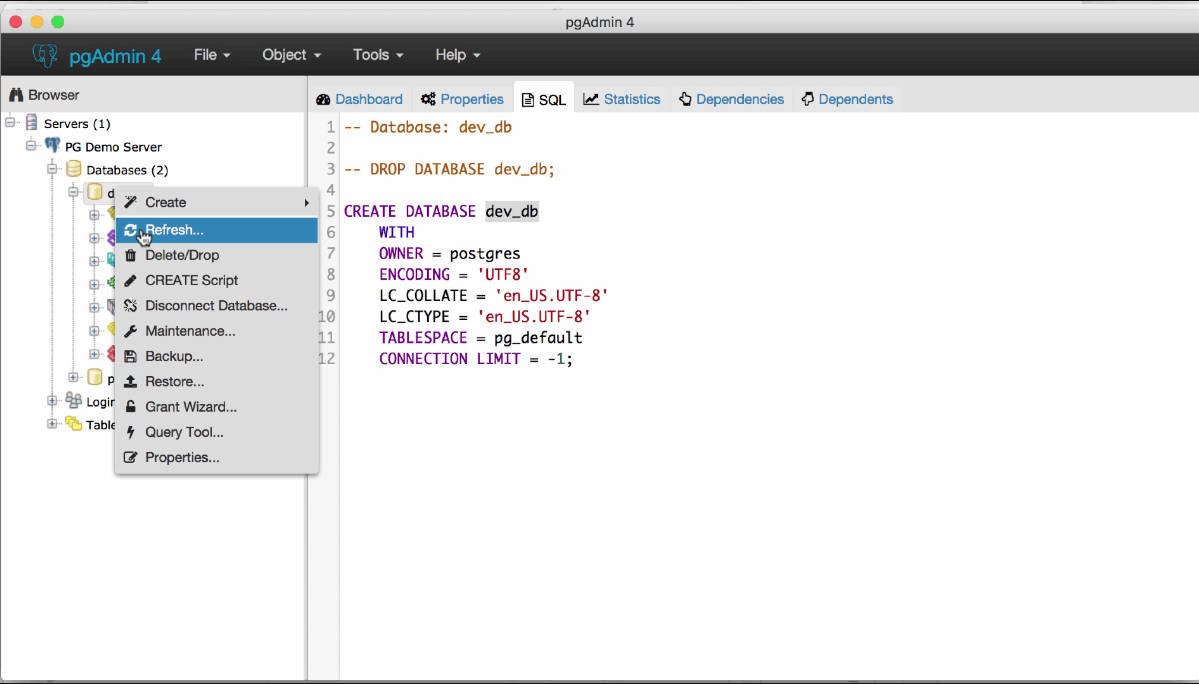
- Check if all the extensions are present

Step 4: Create a Table with Spatial Column
- Go to >> Tools >> Query Tool
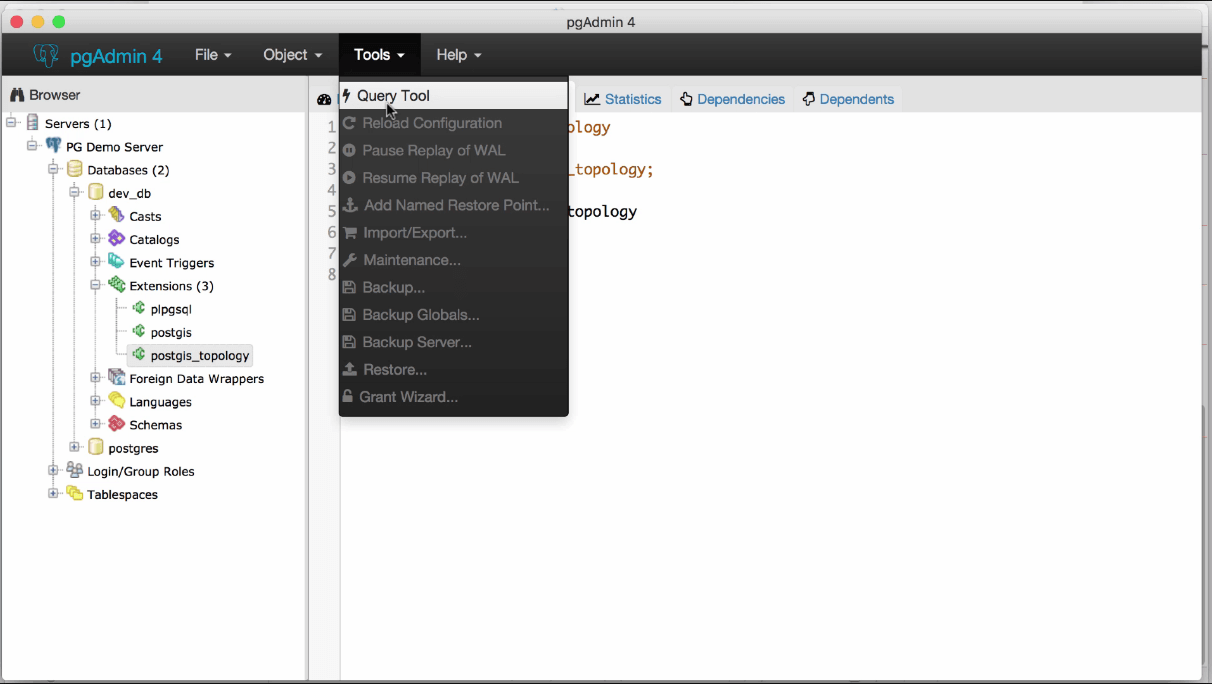
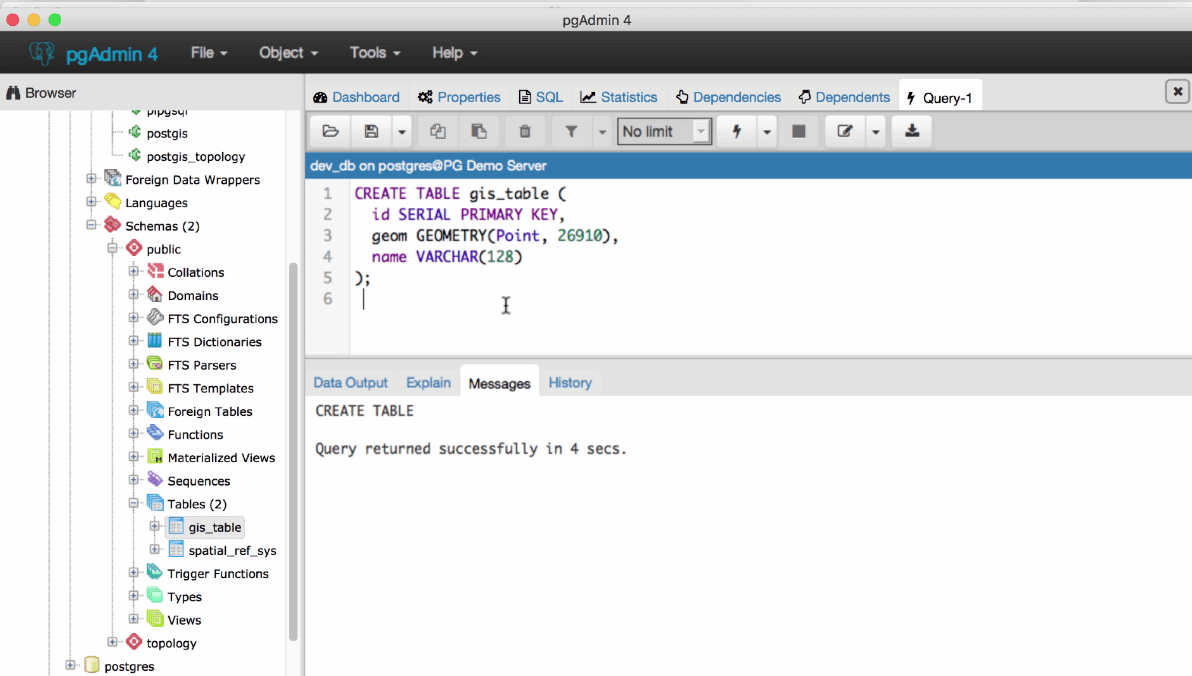
- Create a table use the below query:
CREATE TABLE gis_table (
   id SERIAL PRIMARY KEY,
   geom GEOMETRY(Point, 26910),
   name VARCHAR(128)
); - Execute the query
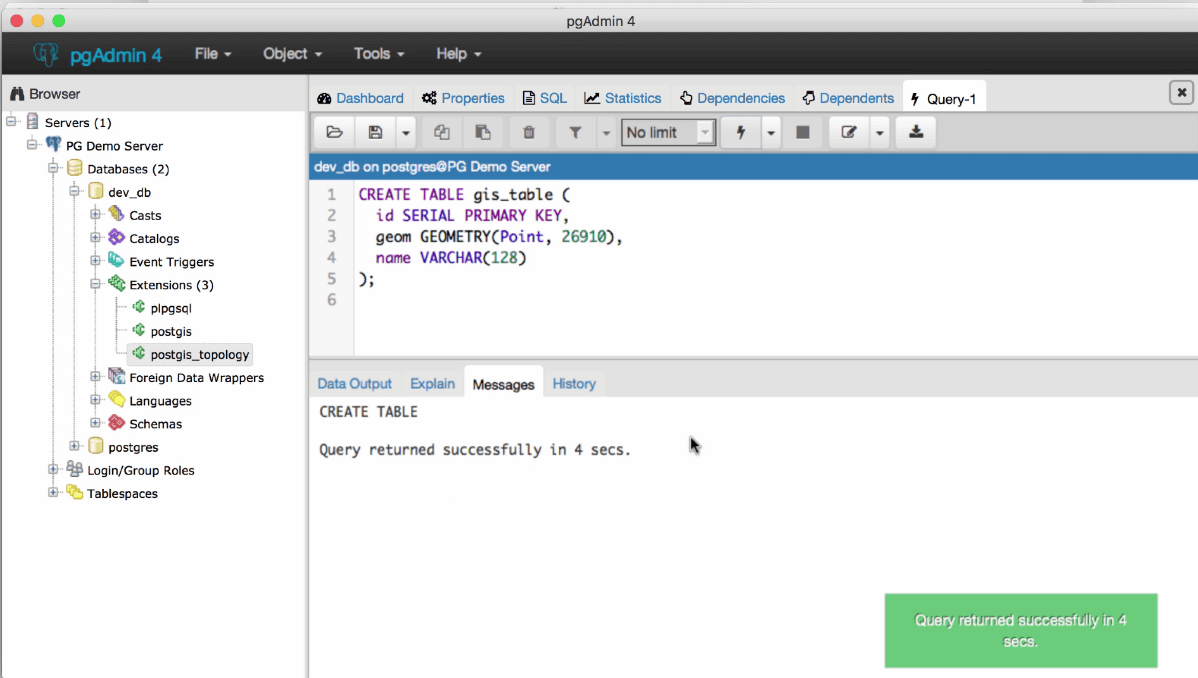
To check the created table in dev_db database,
- Go to >> Schemas >> public >> Tables, and you will see that ‘GIS Table’ is present
Step 5: Add a Spatial Index
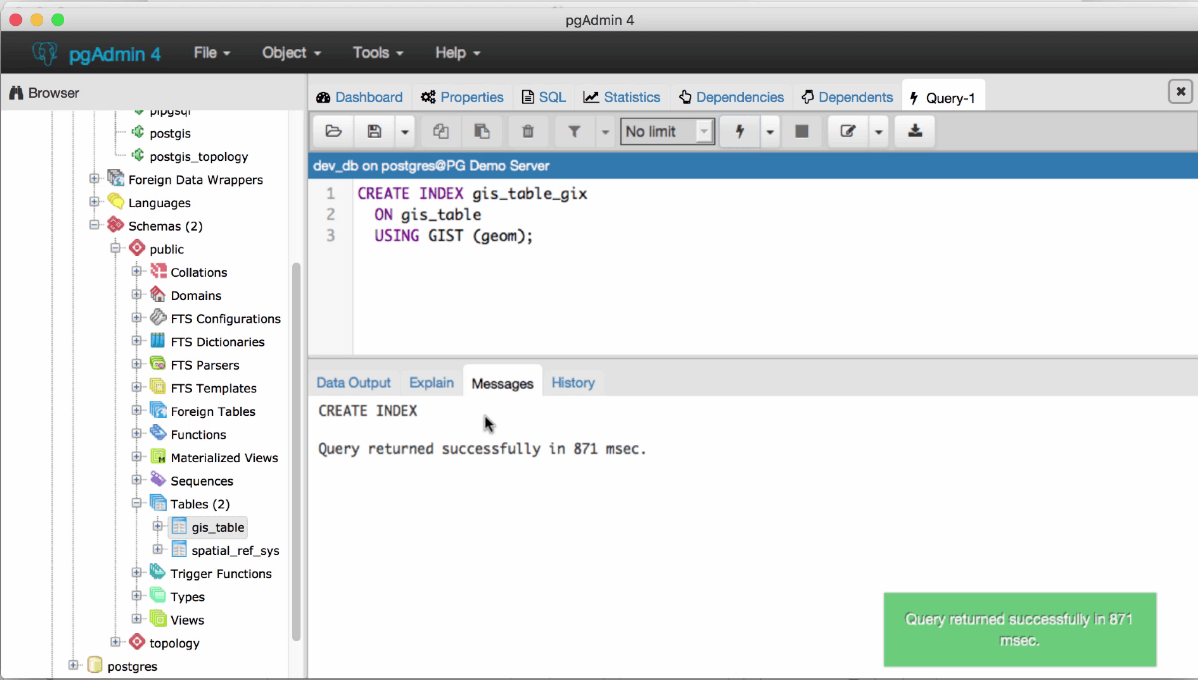
- In the Query Tool, use the below query
CREATE INDEX gis_table_gix
ON gis_table
USING GIST (geom);- Execute the query
Step 6: Add a Test Record
- In the Query Tool, use the below query
INSERT INTO gis_table (geom) VALUES (
 ST_GeomFromText('POINT(0 0)', 26910);
);- Execute the query
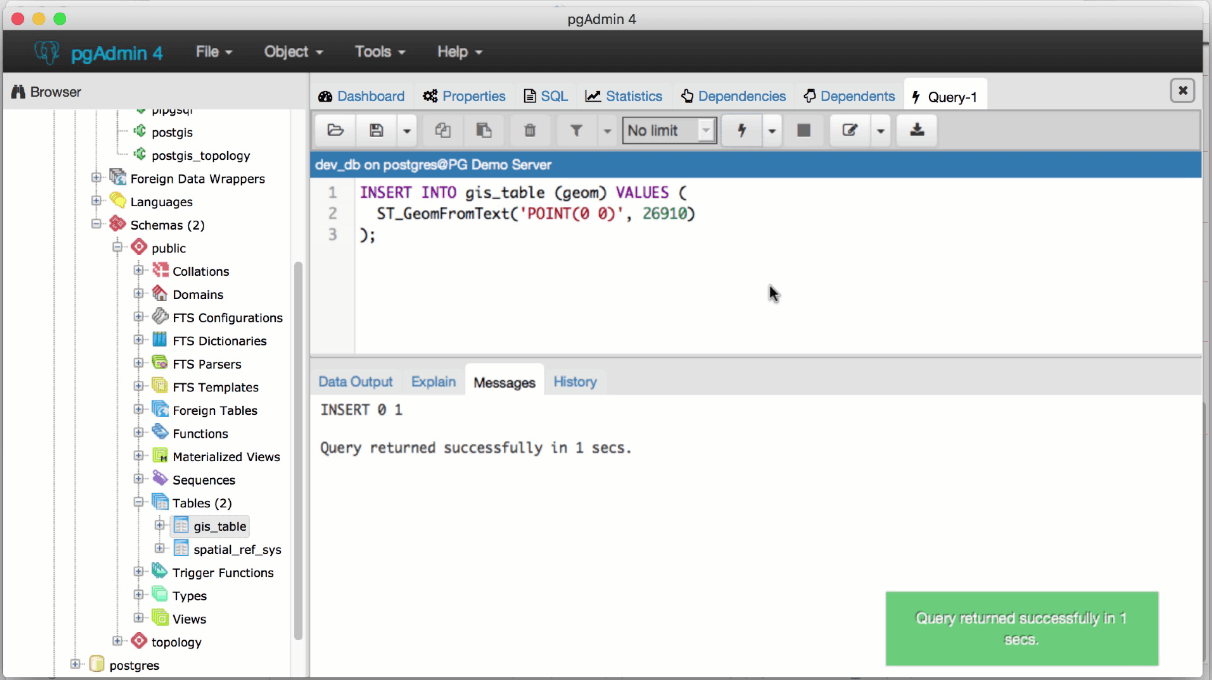
Note: POINT(0 0) is a valid Geolocation. A lot of people don’t consider it in validations.
Step 7: Adding Nearby Points
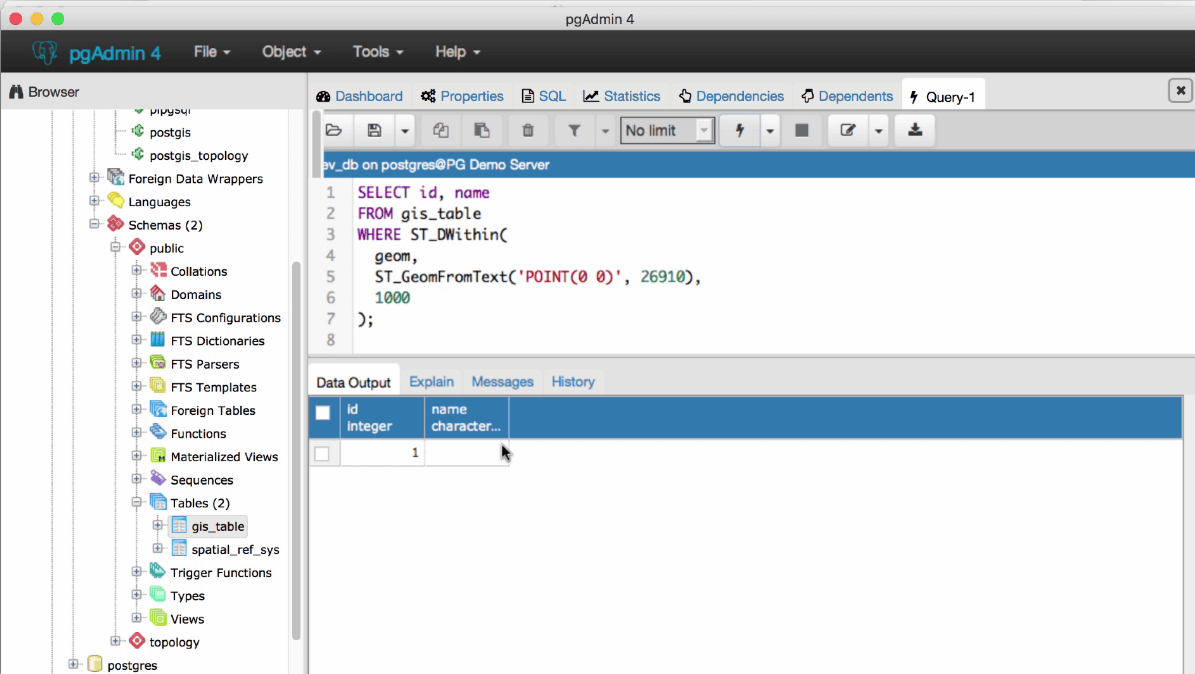
- In the Query Tool, use the below query
SELECT id, name FROM gis_table
WHERE ST_DWithin(
geom,
ST_GeomFromText('POINT(0 0)', 26910),
1000
);- Execute the query. It returns 1 record for a visit
With this, the PostgreSQL server and PostGIS Geospatial extension installation is completed.
 January 8, 2018


