In this tutorial, We will learn how to setup an AWS EC2 Instance from scratch. We will configure the Ubuntu 16.04 OS on the server. Also we will do some essential configuration like setting up the hostname, correct locale and NTP service.

This requires the following steps:
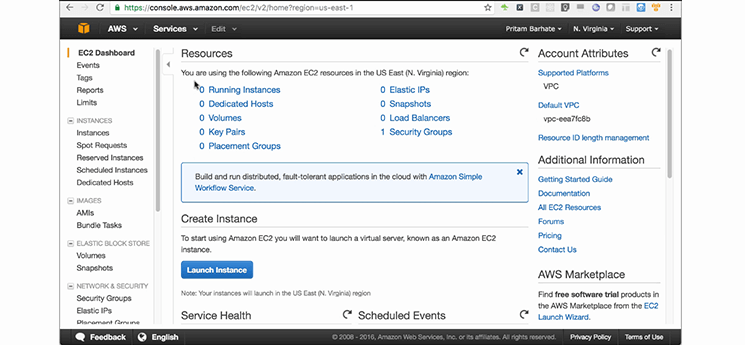
For this particular tutorial, I have logged into my AWS EC2 account in N.Virginia zone.
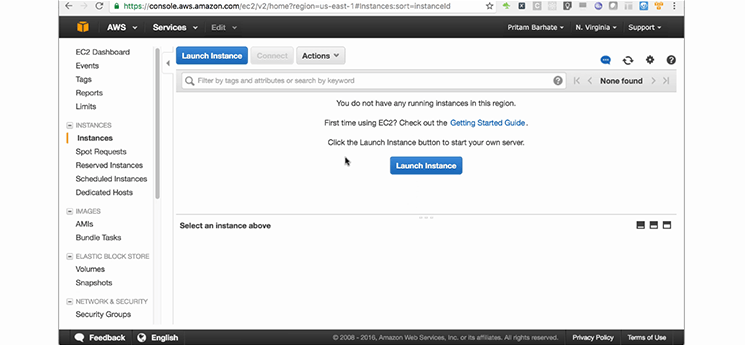
When you Go to > EC2 dashboard. Here, In case we have no instances running (0 Running Instances), we need Go to > instances and select Launch Instances.
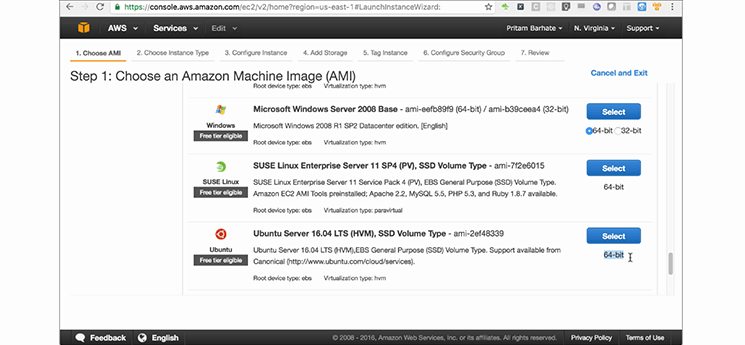
Step no.1
Choose an Amazon Machine Image (Ami)
Go to > Ubuntu Server 16.04 Lts (HVM), SSD, Volume type-ami- 2ef48339, which is the latest Ami from Ubuntu and which will have support for next 5 years (approx).
Select and use > 64-bit version.
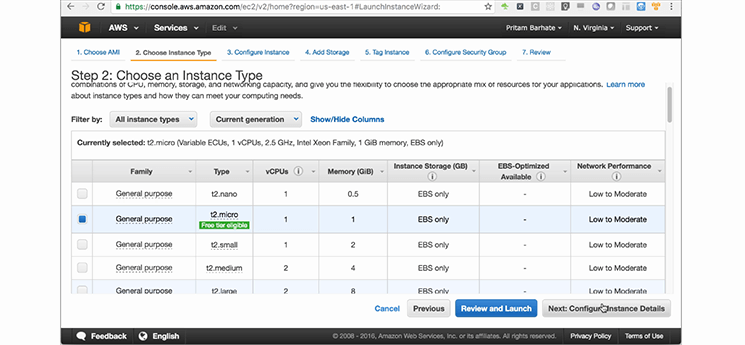
Step no.2
Choose an Instance Type
For this tutorial,
Use a t2.micro instance (low to moderate). Go to> Next
Step no.3
Configure Instance Details
Here number of instance is ‘1’. Let it be as default VPC and the default Subnet.
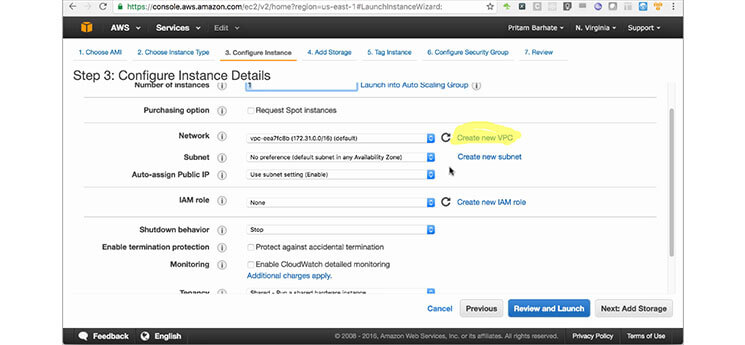
Go to > ‘Shutdown Behavior’.
For Production server,in option ‘Shutdown Behavior’, let it be as ‘stop’.
Go to > ‘Protect Against Accidental Termination’ and enable it, in order to prevent server being terminated quite easily.
Here, We are not going to enable ‘CloudWatch Detailed Monitoring’.
Go to> Add storage
Step no.4
Add Storage
By default, EC2 comes with an 8 GiB disk size
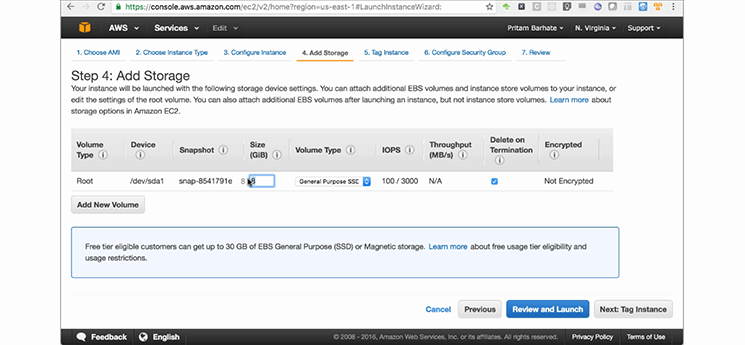
8GiB is not sufficient for most of the server scenarios as you want to have some room for things like log files and backups. So we need to choose a provision for 25 GiB disk space in general.
Always use General Purpose SSD (GP2) unless you have a reason to choose a ‘Magnetic’ Disk.
‘Provisional IOPS SSD (IO1) is a specialized type of disk which is very expensive and should be used only for high performance database requirements with the client approval.
You should use ‘Delete On Termination’ always.

This way it will be ensured that this volume would be deleted once the server is deleted.
Step no. 5
Tag Instance
Give a good name to the server. Good policy is to use the final domain name that you’re going to assign to the server.
Step no. 6
Configure Security Group
By default, generally you have one Security Group but you should create a new Security Group as per the purpose of the server. For example, you might want to create Security Group for Web servers differently from that of the database servers.
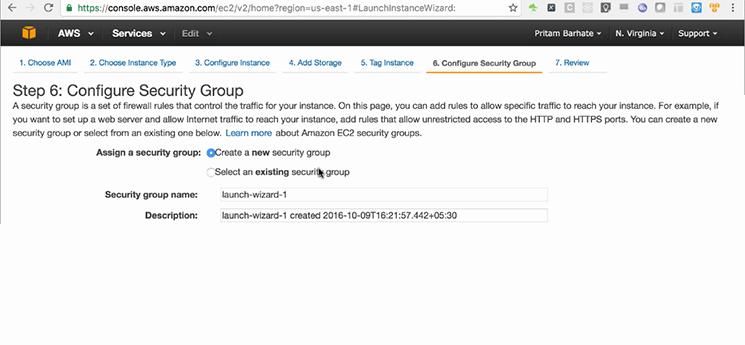
I am going to create a new Security Group and name it as “WebServers” and change the description to “WebServers Security Group”
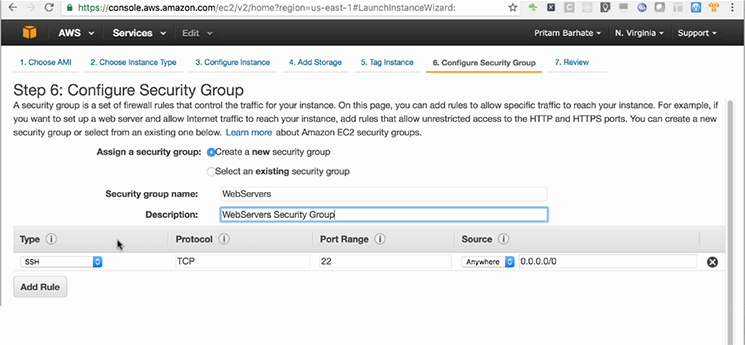
By default, this allows you to have SSH access. From here, you can control the sources, as in, from where the users would be able to do SSH login. So, for general servers, we keep it to “Anywhere”
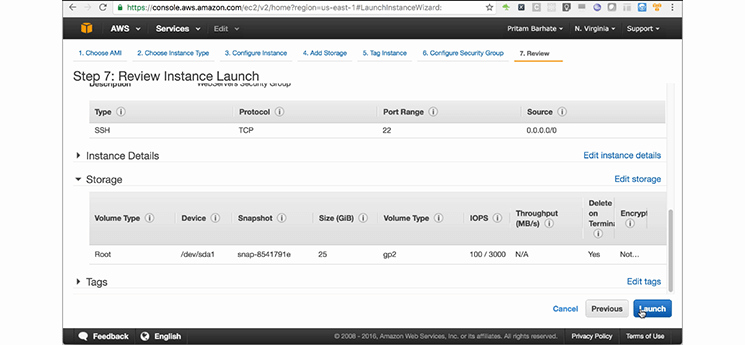
Step no. 7
Review and Launch
Review and if everything is in order, then select ‘Launch’. When you select ‘Launch’ a pop up will appear which will give you an option of either using existing Key Pair or create a new Key Pair.
It is generally preferred that instead of using the same key pair for all servers, you should create a new one for certain groups of servers. Though, you might want to keep one key pair per account where you need to have only 3-4 servers per account which might be the case for small webapps.
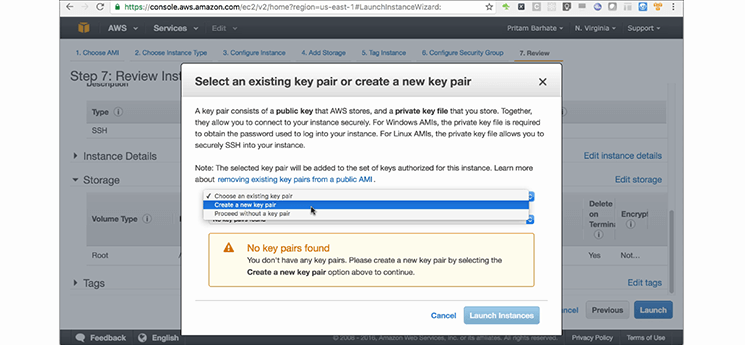
Now, for creating a new Key pair
Go to > “ Create a new pair” and then name it as ‘demoserver’.
Download the newly created Key Pair. Once, it is downloaded, you can Launch Instance.
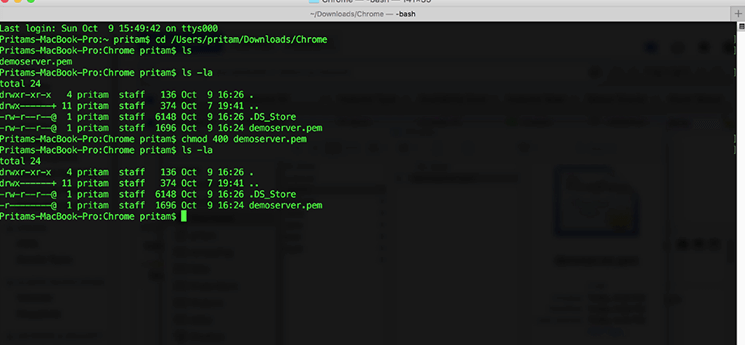
Once the server get launched we can login using SSH. For that, I would require to access the Pem file. If you run this command, you might see that the permission for the Pem file is-
rw-r--r--
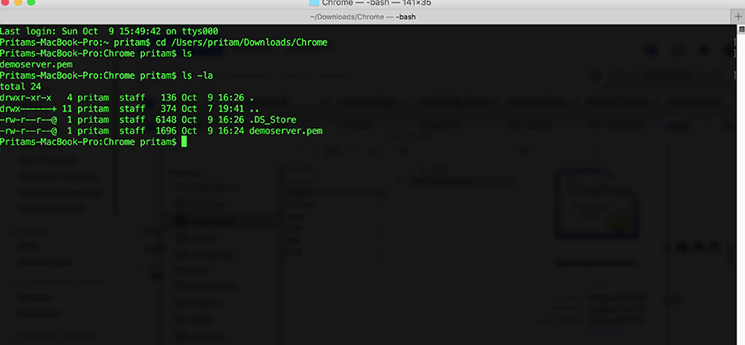
This means that other people can also read this Pem file. This is not allowed for SSH Pem files. So, we will have to change the permission for this Pem file to 400.
$ chmod 400 demoserver.pem
Now, only the current user can read this Pem file and these are permission that a Pem file expects.
Now, our server is running but it doesn’t have the Elastic IPs.
In ec2, when you stop a server and start it all over again, the Public IP of the server changes. This is generally not desirable for most of the deployment. So, in this case, you would want to assign an Elastic IP address which doesn’t change during server stop/start.
For this, Go to> Elastic IPs and select ‘Allocate a new address’.
Right click on the newly allocated address and choose ‘Associate Address’. In this, select the name of the server you want to associate the IP address with. In this case I will choose i-02719532.
Now, I’ll login to server:
$ ssh -i demoserver.pem ubuntu@50.17.127.41
Since, I am in the same directory where the Pem file is present. I do not need the full path for the pem file.
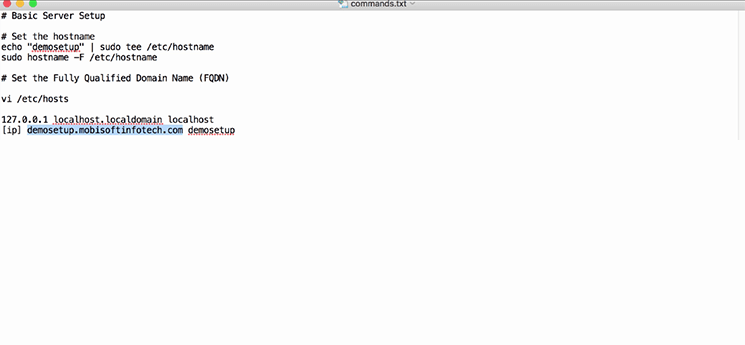
I would now require to setup a hostname with this command
$ echo $HOST_NAME | sudo tee /etc/hostname
This basically, inserts “demosetup” word in ‘/etc/hostname’ path. After this, run
$ sudo hostname -F /etc/hostname
So, if we restart the server we will see this hostname reflected here (instead of the IP) but before that we will run some more commands. So that we do not have to restart time and again.
The setting up of Fully Qualified Domain Name (FQDN) is optional but is a good to have practise so that if some server software depends on this FQDN then it will find it here.
Though, it is good to have the FQDN setup to the final sub-domain that you would want to the server to have, it is not really required. It can be any arbitrary FQDN. So, I’ll first have to edit following file:
$ sudo vi /etc/hosts
Then we need to add the following line below the localhost line that should be already present in the file:
50.17.127.41 demosetup.mobisoftinfotech.com demosetup
Next, Upgrade the system
Run the command:
$ sudo apt-get update
‘apt-get update command’ updates sources for various packages. The actual upgrade happens with the upgrade command. To upgrade the installed packages run:
$ sudo apt-get upgrade
It is a good practise to update your system before doing any other setup so that all the security patches are applied to the server.
Now, we should Set the locale for the system. And we will set the locale to
en_US.UTF-8’
This is very important for database systems so that if you’re supporting multilingual databases, the data is represented correctly.
$ echo 'LC_ALL=en_US.UTF-8' | sudo tee -a /etc/environment
$ echo 'LANG=en_US.UTF-8' | sudo tee -a /etc/environment
This service ensures the clock is always synchronized with the remote servers. This will always give you perfect time for all data related operations.
This is important mainly for database system as well as for programs which need date calculations. Almost all enterprises systems need correct date to be setup on the server. So, this is very important to configure on the server.
Now we need to force the system clock to sync with the NTP. For that we need to run following commands:
$ sudo service ntp stop
$ sudo ntpdate -s time.nist.gov
$ sudo service ntp start
Now, we are ready to restart our system.
We will run the command to ‘restart the system’:
$ sudo init 6
We will have to wait for a couple of minutes for our system to reboot. Once the system is up and running, do the SSH login and you can see that the hostname is set to demosetup.
At this point, our Basic server setup is complete!
Author’s Bio

Pritam Barhate, with an experience of 10+ years in technology, heads Technology Innovation at Mobisoft Infotech. He has a rich experience in design and has been a consultant for a variety of industries and startups. At Mobisoft Infotech, he primarily focuses on technology resources and develops the most advanced solutions. Follow him @pritambarhate