An iOS developer has to use multiple codes that are made by others. However, it is not easy to implement everything right from scratch. CocoaPods, a dependency management tool, is one of the best options to incorporate that can help ease your work. It resolves dependencies between libraries, search for the resulting source code and then link it all together in a workspace to build your project.
CocoaPods manages your Xcode projects by eliminating library dependencies
It stresses on improved discovery, engagement, and creating a third party open-source library by making a centralized ecosystem.
Why do you need a dependency management tool? Is there a need?
- Library codes occupy unwanted space within a project
- There is lack of centralization to check all libraries at one place
- Updating a new version of the library could turn out to be a difficult task, especially if many libraries together need to be updated
- Downloading libraries and including them in your project may at times persuade you to make changes to the code, which further makes it difficult to update it in future
How to get started?
Steps to install dependency management:
- Update Ruby on your machine.
- Install Cocoa-Pods on your machine.
- Set up cocoa-pods
- Init pods – This will create podfile
- Open podfile and mention pods
- Install pods
- Open workspace and start coding.
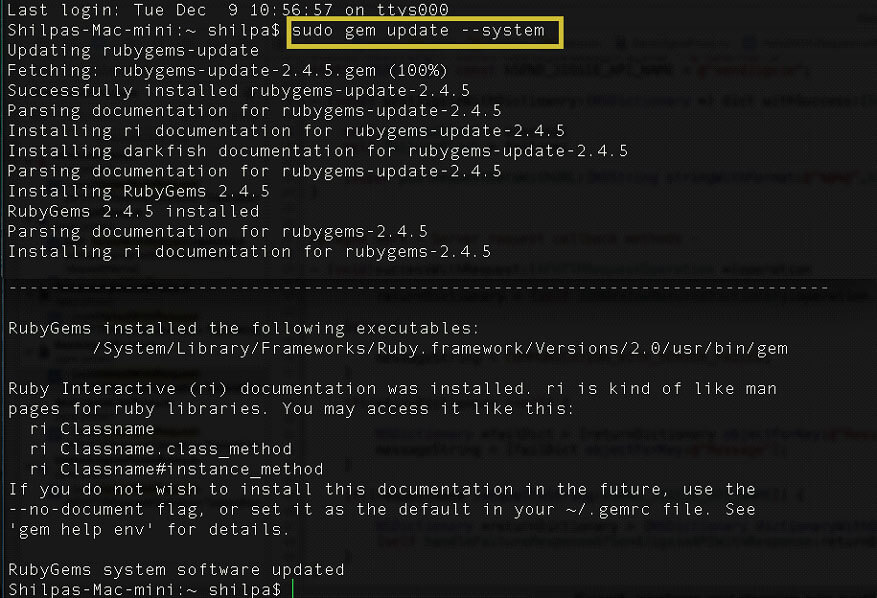
Update Ruby
- Ruby are by default available on mac machine from version Mac OS x 10.7
- So one just needs to update the Ruby to latest version using terminal with the below command
- sudo gem update – -system
Install Cocoa-Pods
- Just open terminal and paste the command “sudo gem install cocoapods“.
- This will install cocoa-pods on the machine.
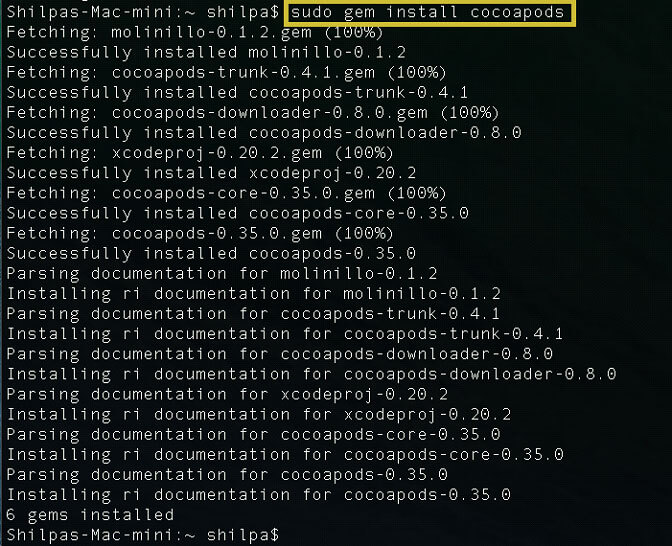
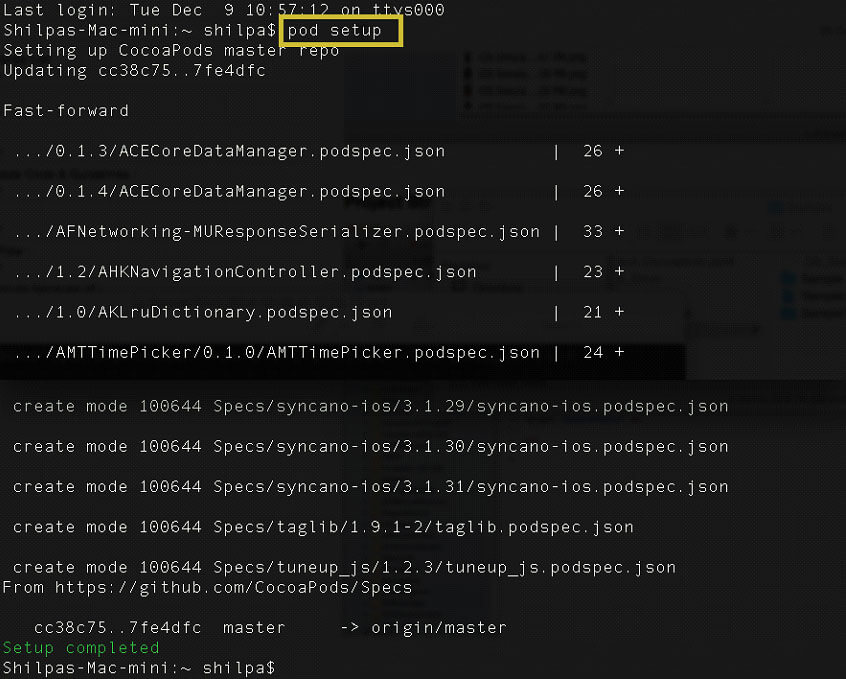
- Installation will take some time. After completion paste below command to complete setup.
- pod setup
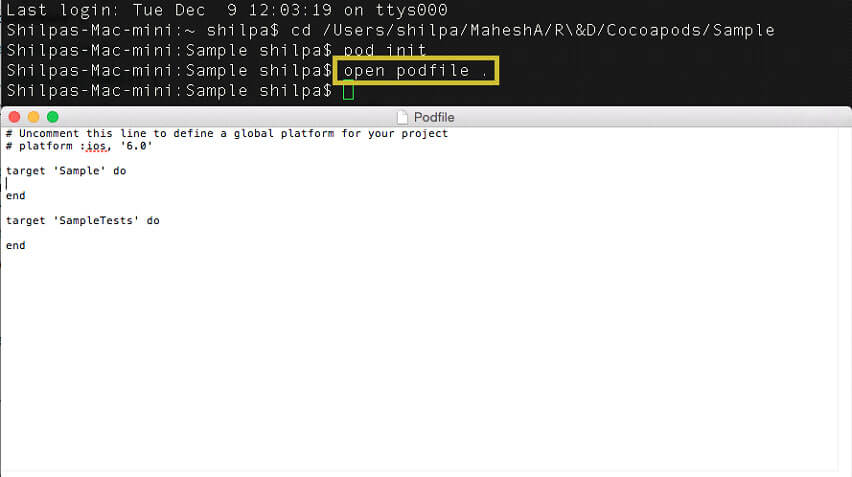
Init – Open – Specify Pods
- First go to project folder using cd “path”command.
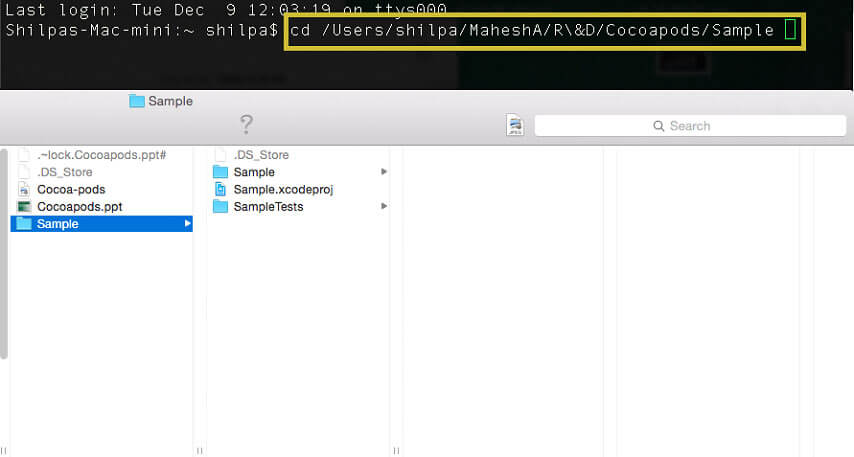
- To create Podfile use – pod init

- To open podfile use – open Podfile .
- Specify platform and libraries into podfile.
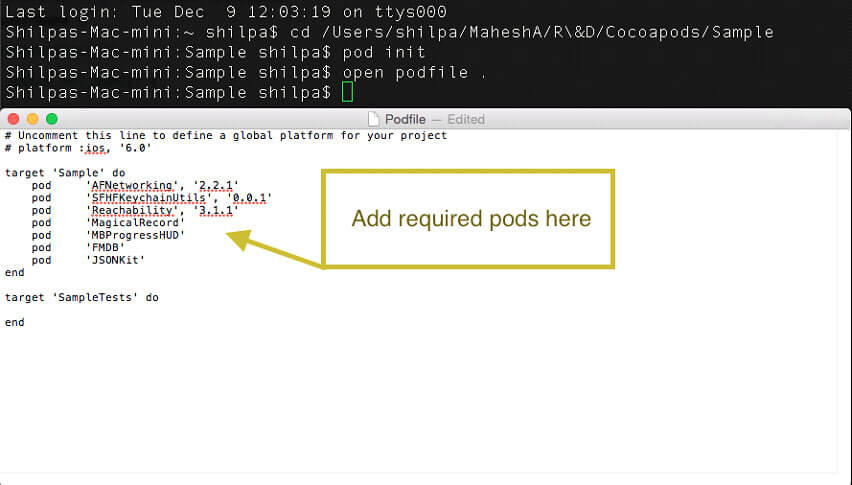
- For example : pod ‘AFNetworking’, ‘2.2.1’
Install Pods
- Once the Podfile is ready with all libraries and platform specification, install Pods using the command – pod install
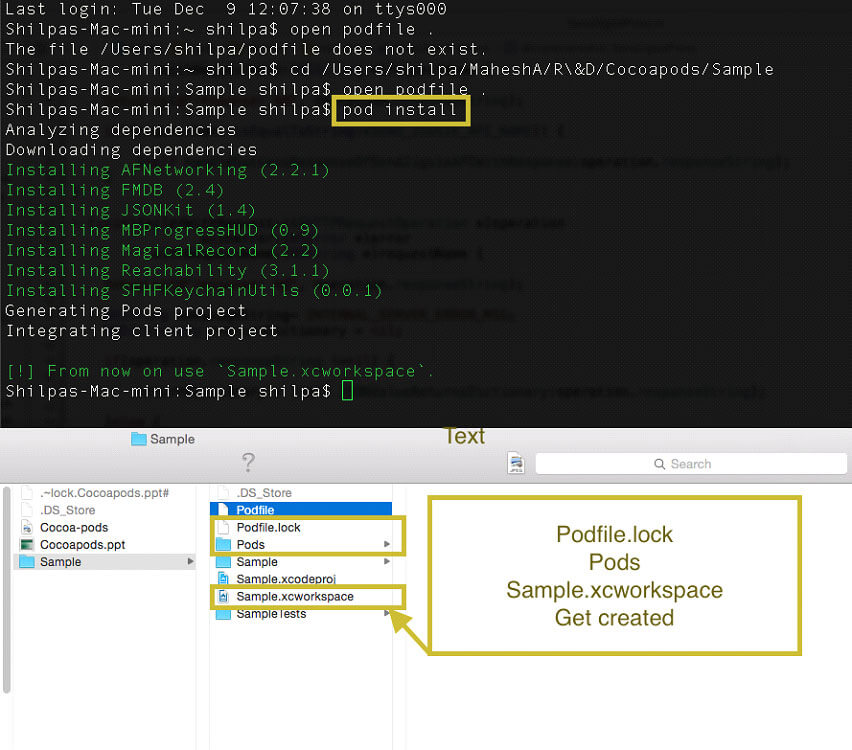
- This will create “projectName.xcworkspace” file. This file has to open in xcode always
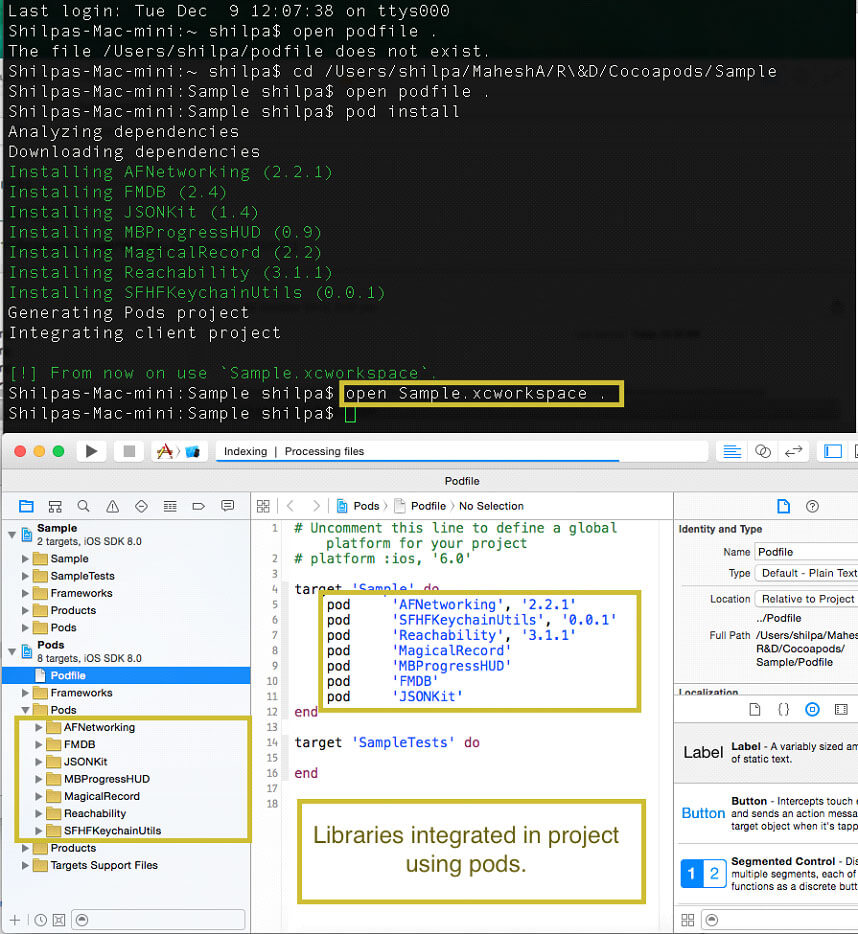
- Now your project is having all libraries to be integrated using Cocoapods.
Now that you are clear of the basics of using CocoaPods, you may as well create your own pod specs. This is one of the practices Mobisoft follows to develop an iOS application. Follow us for regular update.