TypeScript is a powerful programming language that enhances the development of complex web applications by adding a static type system to JavaScript. React is a popular JavaScript library used for building user interfaces. Combining these two technologies can take your web development to the next level.

In this article, you will learn the basics of TypeScript with React in the first sections of the article. And then you will learn to build a contact manager app using React and TypeScript.
So by the end of this article, you will have a clear understanding of how to properly use TypeScript with React. If you want to refer the code for this entire project, you can download it from here.
So let’s get started.
React And TypeScript Basics
When learning React with TypeScript, the first thing you should understand is the file extension.
Every React + TypesSript file need to have a .tsx extension.
If the file does not contain any JSX-specific code, then you can use the .ts extension instead of the .tsx extension.
To create a component in React with TypeScript, you can use the FC type from the react package and use it after the component name.
Create a new file with the name Header.tsx and add the following code:
import { FC } from 'react';
const Header: FC = () => {
  return <h1>Welcome, Mike!</h1>;
};
export default Header;
Code language: TypeScript (typescript)
Here, we’re just displaying a welcome message in a functional component.
Now, If we want to pass a dynamic name as a prop we can do that like this:
import { FC } from 'react';

interface HeaderProps {
  name: string;
}

const Header: FC<HeaderProps> = ({ name }) => {
  return <h4>Welcome, {name}!</h4>;
};

export default Header;Code language: TypeScript (typescript)
Here, we have declared HeaderProps as an interface that has a name property and for the Header component, we have added angle brackets to use that interface.
This way TypeScript will know that the Header component needs a name prop which is a required prop.
And we can call the component like this:
<Header name='Jerry' />Code language: TypeScript (typescript)If you miss any of the required props like name in our case, then TypeScript will throw an error as can be seen below:

So whatever props the component interface is designed to take has to be provided unless they’re optional.
If some of the properties are optional and not required all the time then we can use the ? operator to indicate that it’s an optional prop like this:
interface HeaderProps {
  name: string;
  isMarried?: boolean;
}Code language: TypeScript (typescript)
Here, isMarried is made an optional prop because of the ? at the end and we can use it like this:
const Header: FC<HeaderProps> = ({ name, isMarried }) => {
  return (
    <>
      <h4>Welcome, {name}!</h4>
      <p>Marital status: {isMarried ? 'Married' : 'Not Provided'}</p>
    </>
  );
};
Code language: TypeScript (typescript)
So, If the isMarried prop is provided, you will see the Married status otherwise Not Provided status as shown below:
In the above code, we have used an interface to declare the type of props passed.
But you can also create a type as shown below:
type HeaderProps = {
  name: string,
  isMarried?: boolean
};Code language: TypeScript (typescript)
And use it the same way as used for the interface.
It’s up to you which one to choose, however in most of the code, you will see the interface used instead of the type.
Alternative Way of Declaring Component Props Types
In the above code, we have used : FC to specify the props types.
There is another way you will find in some of the React + TypeScript codebases.
So instead of declaring a Header component like this:
const Header: FC<HeaderProps> = ({ name, isMarried }) => {
  // ...
};Code language: TypeScript (typescript)
we can declare it like this:
const Header = ({ name, isMarried }: HeaderProps) => {
  // ...
};Code language: TypeScript (typescript)
As you can see, we have specified the TypeScript type while destructuring the props.
How to Work With Event Handlers
It’s common to have some event handlers in the component for events like click event, change event, etc.
So let’s see how to work with them when using TypeScript.
Take a look at the below code:
import { FC, useState } from 'react';
const UserSearch: FC = () => {
  const [searchTerm, setSearchTerm] = useState('');
  const handleSearch = (event) => {};
  return (
    <>
      <input
        type='text'
        name='searchTerm'
        value={searchTerm}
        placeholder='Type something!'
        onChange={handleSearch}
      />
      {searchTerm && <div>SearchTerm: {searchTerm}</div>}
      <hr />
    </>
  );
};
export default UserSearch;Code language: TypeScript (typescript)
Here, we’re displaying an input field where users enter something and we’re displaying that value below that input.
But as you can see, we’ve not specified any type for the `event` parameter of the handleSearch function which we explicitly need to specify otherwise we will get a TypeScript error as shown below:
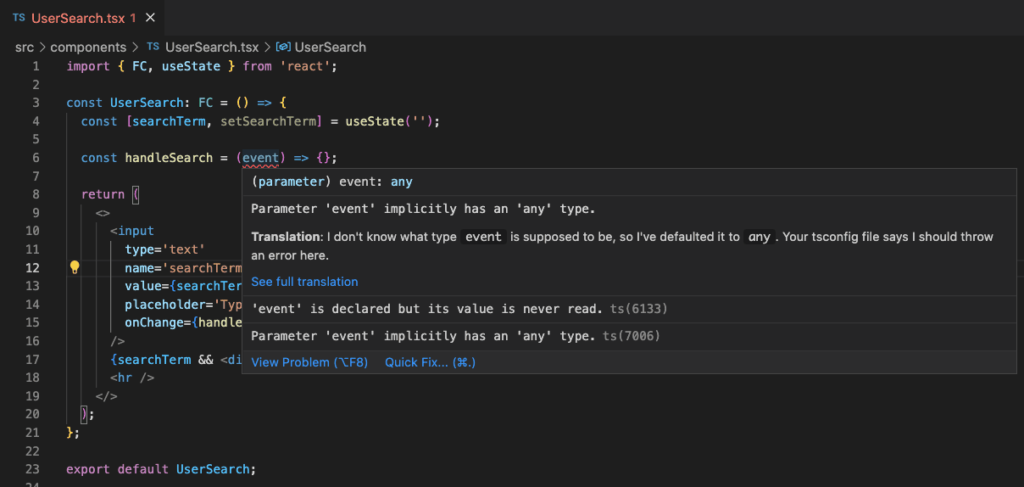
As you can see in the above screenshot, when the mouse hovered over the event parameter, TypeScript gives an error saying, “Parameter event implicitly has an any type.”
To fix that, we first need to identify the exact type of event.
To do that, temporarily change the below code:
onChange = { handleSearch };Code language: TypeScript (typescript)to this code:
onChange = { (event) => {} };Code language: TypeScript (typescript)Here, we’re using an inline function so, If you mouse over the event parameter, you will see the event type `React.ChangeEvent<HTMLInputElement>` which we can use for the event parameter as shown below:
So by just adding an inline function, you can easily identify the event type of any event handler added.
Now, as we got the event type, we can set the searchTerm value using the setSearchTerm function as shown below:
const handleSearch = (event: React.ChangeEvent<HTMLInputElement>) => {
  setSearchTerm(event.target.value);
};Code language: TypeScript (typescript)
And the search is working as shown below:
Now, you know the basics of React + TypeScript, let’s build a contact manager app so will you get hands-on experience with React + TypeScript.
How to Setup a TypeScript + React Project
**You can see the final demo of the application we’re building here.
To set up the app we will be using Vite. It’s a popular and faster alternative to create-react-app.
We’ll use Vite because create-react-app becomes slow when the application grows and takes a lot of time to refresh the page when we make any changes in the application code. Also, by default, it adds a lot of extra packages which we rarely need.
Vite just rebuilds the things we changed, instead of rebuilding the entire application which saves a lot of time during development.
Keep in mind that Vite requires Node.js version 14.18+, so make sure to install a Node version greater than or equal to 14.18.
The easiest and simplest way to install and switch Node.js versions is to use [nvm].
Even if you’re using create-react-app, all the code you will learn in this tutorial should run exactly the same without any errors.
To create a new Vite project with React and TypeScript, execute the npm init vite command from the terminal.
It will ask you for the project name, framework, and variant.
– For project name, you can enter contact-manager-app-typescript or any name of your choice.
– For framework, select React from the list of options
– For variant, select TypeScript from the list of options
Once the project is created, you can open that project in your favorite IDE like Visual Studio Code.
The project folder structure will look like this:
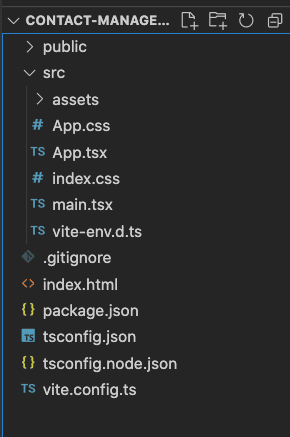
Now, execute the yarn install or npm install command from inside the project folder to install all the packages from the package.json file.
Once all the packages are installed, you can execute the yarn run dev or npm run dev command to start the created React application.
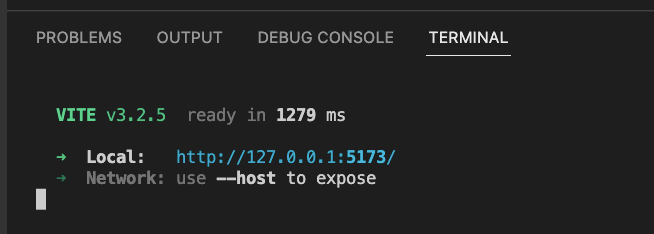
As you can see the application can be accessed on the URL http://localhost:5173/.
Initial Project Setup
Install the bootstrap, react-bootstrap and react-icons npm packages by executing the following command from the project folder:
yarn add bootstrap@5.2.3 react-bootstrap@2.7.0 react-icons@4.7.1Code language: TypeScript (typescript)or with npm:
npm install bootstrap@5.2.3 react-bootstrap@2.7.0 react-icons@4.7.1Code language: TypeScript (typescript)Here, we’re installing the latest and specific versions of packages so you will not have any issues running the application If in the future there is a newer version of any of the packages.
Now, open the index.css file and add the following contents inside it:
* {
  padding: 0;
  margin: 0;
  box-sizing: border-box;
}
body {
  font-family: Inter, sans-serif;
  padding: 1rem;
  letter-spacing: 1px;
  background-color: #f7f6f9;
  color: #7b774e;
}
.main-container {
  margin: 1rem auto;
  display: flex;
  justify-content: start;
  align-items: baseline;
}
.btn,
.btn:active,
.btn:hover {
  border: none;
  background-color: #3b8855d6;
}
.icon {
  cursor: pointer;
}
.errorMsg {
  color: #f21e08;
  background: #fff0f0;
  padding: 10px;
}
h1 {
  text-align: center;
}
.contact-form {
  margin: 1rem auto;
  width: 45%;
}
.modal-dialog .contact-form {
  width: 100%;
}
.submit-btn {
  margin-top: 1rem;
  letter-spacing: 1px;
}
.contacts-list-table-container {
  max-width: 100%;
  height: 500px;
  overflow: auto;
}
.contacts-list {
  display: flex;
  width: 45%;
  flex-direction: column;
  justify-content: flex-start;
  align-items: center;
}
.contacts-list-title {
  margin-bottom: 1.2rem;
}
.contacts-list-table,
.contacts-list-table tr,
.contacts-list-table th,
.contacts-list-table td {
  padding: 5px 20px;
}
.contacts-list-table {
  border-collapse: collapse;
  width: 100%;
}
.contacts-list-table th,
.contacts-list-table td {
  border: 1px solid #dddddd;
  text-align: left;
  padding: 8px;
}
.contacts-list-table tr:nth-child(even) {
  background: #ecebee;
}
.contacts-list-header {
  position: sticky;
  top: 0;
  background: #ecebee;
}
@media screen and (max-width: 900px) {
  .contact-form,
  .contacts-list,
  .main-container {
    flex-direction: column;
    align-items: center;
    width: 100%;
  }
}Code language: CSS (css)
Now, open the main.tsx file and add the bootstrap CSS import before the index.css import as shown below:
import 'bootstrap/dist/css/bootstrap.min.css';
import './index.css'Code language: TypeScript (typescript)
How to Create the Initial Pages
Now, create a components folder inside the src folder and create a Header.tsx file inside it.
import { FC } from 'react';
const Header: FC = () => {
  return (
    <header>
      <h1>Contact Manager App</h1>
    </header>
  );
};
export default Header;Code language: TypeScript (typescript)
Here, we have declared the Header component using FC which is a TypeScript way of declaring a component as a functional component.
If you want, you can skip the : FC as the code will work without mentioning it also but it’s always good to specify it explicitly.
Now, Open the App.tsx file and replace it with the following contents:
import Header from './components/Header';
function App() {
  return (
    <div className='App'>
      <Header />
    </div>
  );
}
export default App;Code language: TypeScript (typescript)
Now, If you start the application using yarn run dev or npm run dev and access it at URL http://localhost:5173/, you will see the following screen:
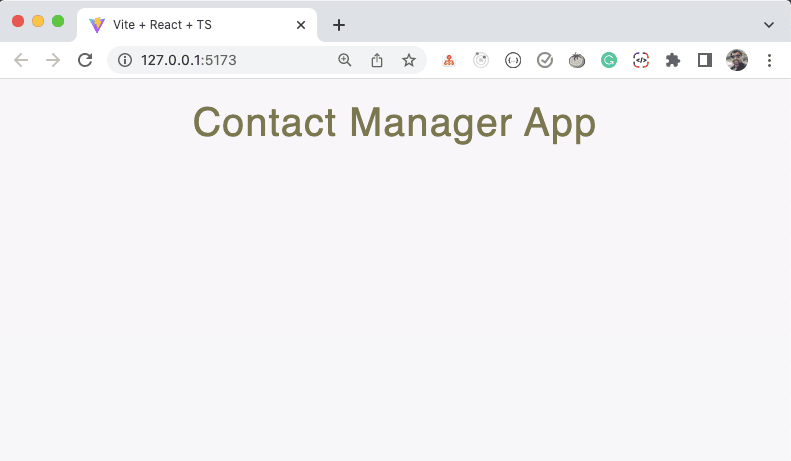
If you want, you can open the index.html file and change the title of the page to Contact Manager App instead of the Vite + React + TS.
Now, create a new file ContactForm.tsx inside the components folder and add the following code inside it:
import { FC, useState } from 'react';
import { Button, Form } from 'react-bootstrap';
const ContactForm: FC = () => {
const [contact, setContact] = useState({
firstName: '',
lastName: '',
phone: ''
});
const handleOnChange = (event) => {
const { name, value } = event.target;
setContact((prevState) => {
return {
...prevState,
[name]: value
};
});
};
const handleOnSubmit = (event) => {
event.preventDefault();
};
return (
<Form onSubmit={handleOnSubmit} className='contact-form'>
<Form.Group controlId='firstName'>
<Form.Label>First Name</Form.Label>
<Form.Control
className='firstName'
name='firstName'
value={contact.firstName}
type='text'
onChange={handleOnChange}
/>
</Form.Group>
<Form.Group controlId='lastName'>
<Form.Label>Last Name</Form.Label>
<Form.Control
className='lastName'
name='lastName'
value={contact.lastName}
type='text'
onChange={handleOnChange}
/>
</Form.Group>
<Form.Group controlId='phone'>
<Form.Label>Phone</Form.Label>
<Form.Control
className='phone'
name='phone'
value={contact.phone}
type='number'
onChange={handleOnChange}
/>
</Form.Group>
<Form.Group controlId='submit'>
<Button variant='primary' type='submit' className='submit-btn'>
Add Contact
</Button>
</Form.Group>
</Form>
);
};
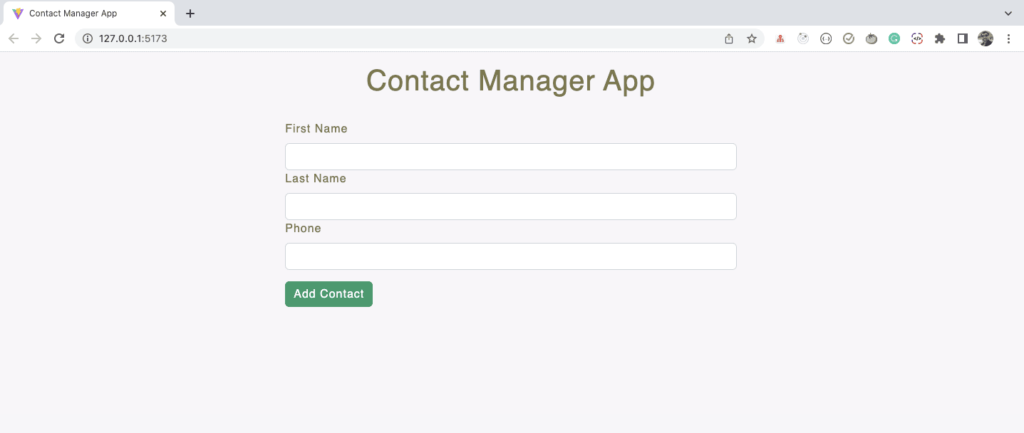
export default ContactForm;Code language: TypeScript (typescript)In the above code, we’re displaying a form with three input fields namely, first name, last name, phone, and a submit button.
For displaying the inputs, we’re using the Form.Control component from react-bootstrap so the UI will look nice and we don’t need to write a lot of CSS ourselves.
All the above code is a pure React code without any TypeScript Code, so you will see red underlines for the event parameter of the handleOnChange and handleOnSubmit methods as can be seen in the below screenshot:
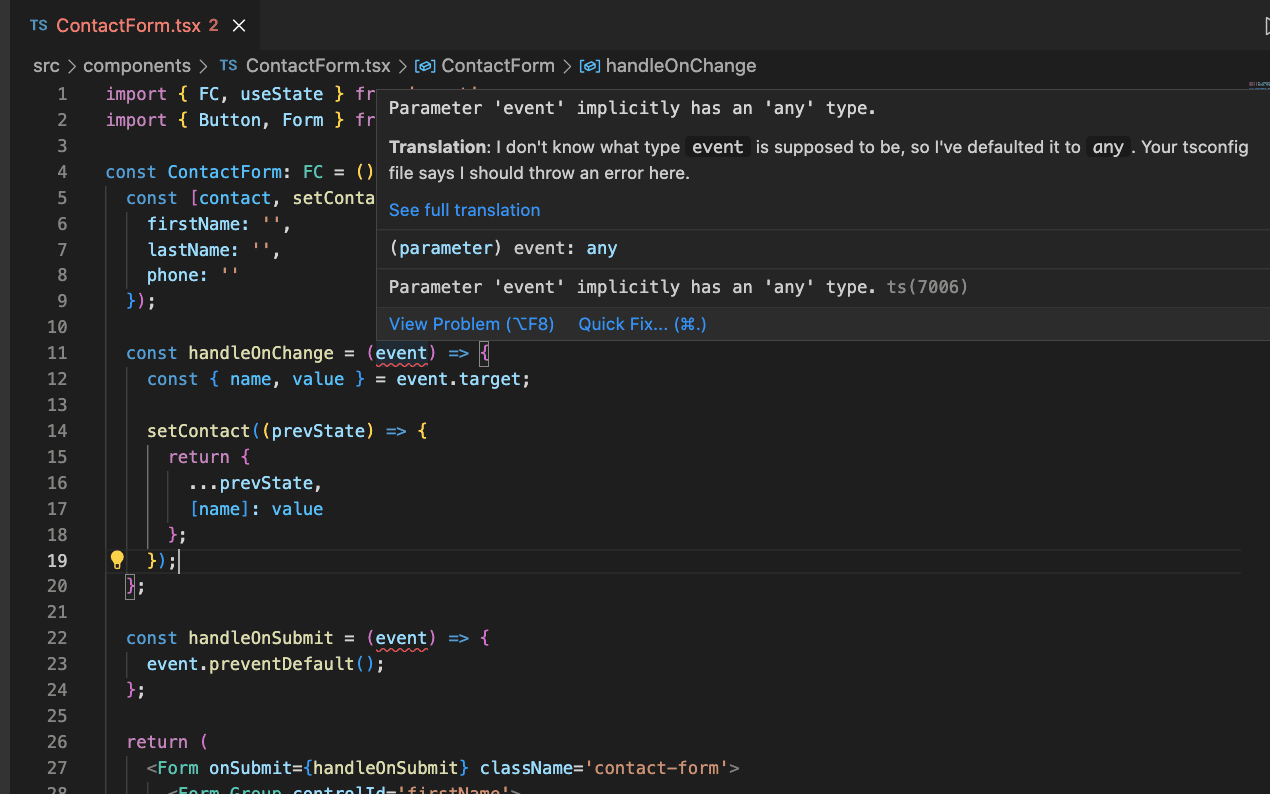
As you can see in the above screenshot, when you mouse hover over the event parameter, you can see the TypeScript error saying, “Parameter event implicitly has an any type.”
To fix that, we first need to identify the exact type of event we need to provide.
To do that, temporarily change the below code:
onChange = { handleOnChange };Code language: TypeScript (typescript)to this code:
onChange = { (event) => {} };Code language: TypeScript (typescript)Here, we’re using an inline function so, if you mouse over the event parameter, you will see the event type React.ChangeEvent<FormControlElement> which we can use for the event parameter as shown below:
However, as we know, the element for which the onChange handler is added is an input element so instead of React.ChangeEvent<FormControlElement>, we can use React.ChangeEvent<HTMLInputElement> so we don’t need to import any extra TypeScript specific type.
With this change, you can see the TypeScript error is gone.
Similarly, we can find out the event parameter type for the onSubmit handler as shown below:
So using this simple way, we can find out the event type of any change or submit handler function.
Now, you can revert the onChange and onSubmit handlers from inline functions to the respective handler function:
onChange = { handleOnChange };
onSubmit = { handleOnSubmit };Code language: TypeScript (typescript)
Now, open the App.tsx file, and let’s add the ContactForm component below the Header component.
So your App.tsx file will look like this:
import ContactForm from './components/ContactForm';
import Header from './components/Header';
function App() {
  return (
    <div className='App'>
      <Header />
      <div className='main-container'>
        <ContactForm />
      </div>
    </div>
  );
}
export default App;Code language: TypeScript (typescript)
And If you check the application, you will see the following screen:
Let’s add a console.log statement in the handleOnSubmit method as shown below so we can see the data submitted.
const handleOnSubmit = (event: React.FormEvent<HTMLFormElement>) => {
  event.preventDefault();
  console.log(contact);
};Code language: TypeScript (typescript)
As you can see, we’re correctly able to store the details in the state with the name contact and display it on the console.
How to Use useReducer Hook For Storing Contacts
Now, we need to display the added contacts on the page.
To do that, we first need to store all the contacts together.
So, we will use the useReducer hook for that using which we can easily handle the edit and delete contact functionality.
If you’re not aware of the useReducer hook, then check out this article.
Create a new folder with the name reducer inside the src folder and create a contactsReducer.ts file inside it with the following contents:
export const contactsReducer = (state, action) => {
  switch (action.type) {
    case 'ADD_CONTACT':
      return {
        ...state,
        contacts: [...state.contacts, action.payload]
      };
    default:
      return state;
  }
};Code language: TypeScript (typescript)
Note that the file extension is .ts and not .tsx because there is no JSX code inside it.
When you save the file, you will see a red underline for the state and action parameters as shown below:
So let’s define the TypeScript types for the state and action parameters as shown below:
export interface Contact {
  firstName: string;
  lastName: string;
  phone: string;
}
export interface Action {
  type: 'ADD_CONTACT'
  payload: Contact;
}
export interface State {
  contacts: Contact[];
}
export const contactsReducer = (state: State, action: Action): State => {
  switch (action.type) {
    case 'ADD_CONTACT':
      return {
        ...state,
        contacts: [...state.contacts, action.payload]
      };
    default:
      return state;
  }
};Code language: TypeScript (typescript)
In the above code, we’re also explicitly defining State as the return type of the contactsReducer function as can be seen after the arrow syntax (=>):
export const contactsReducer = (state: State, action: Action): State => {Code language: TypeScript (typescript)If you have worked with redux before, you might know that action always contains a type property and an optional payload.
So we have defined an Action interface to indicate the action type.
As the contact form contains the firstName, lastName, and phone properties, we’re declaring an interface Contact indicating that it will be the type of payload.
We’re also exporting those interfaces so we can use them in other files if required.
Also, we have defined state as an object with a contacts property.
The contacts property will be an array containing only the firstName, lastName, and phone properties so we have defined it as shown below:
export interface State {
  contacts: Contact[];
}Code language: TypeScript (typescript)
So the contacts property will always contain an array of objects of the Contact type.
Now, open the App.tsx file and use the contactsReducer as the first argument for the useReducer hook as shown below:
import { useReducer } from 'react';
import ContactForm from './components/ContactForm';
import Header from './components/Header';
import { contactsReducer, State } from './reducer/contactsReducer';
const initialState: State = {
  contacts: []
};
function App() {
  const [state, dispatch] = useReducer(contactsReducer, initialState);
  return (
    <div className='App'>
      <Header />
      <div className='main-container'>
        <ContactForm />
      </div>
    </div>
  );
}
export default App;Code language: TypeScript (typescript)
The useReducer hook returns an array containing two values. The first value of the array will be the actual state value and the second value will be the dispatch function which we can use to dispatch actions to the reducer.
So we’re using array destructuring to access the state value and dispatch function.
In the above code, we have defined initialState of type State which is imported from the contactsReducer.ts file.
Now, let’s pass the dispatch function as a prop to the ContactForm component so we can dispatch the action to add a contact to the contacts array as shown below:
// ...
const [state, dispatch] = useReducer(contactsReducer, initialState);
return (
  <div className='App'>
    <Header />
    <div className='main-container'>
      <ContactForm dispatch={dispatch} />
    </div>
  </div>
);Code language: TypeScript (typescript)
After passing the prop, you will see a TypeScript error as shown below:
We’re getting a TypeScript error because whenever we pass any prop to the component, we need to mention the type of the `dispatch` prop in the component props list.
If you mouse over the dispatch coming from the useReducer hook, you will see the actual type of dispatch as can be seen below:
To define the type of the dispatch prop, open the ContactForm.tsx file and declare a ContactFormProps interface above the component declaration like this:
interface ContactFormProps {
  dispatch: React.Dispatch<Action>;
}Code language: TypeScript (typescript)
And use it inside the angle brackets after : FC.
So instead of the below code:
const ContactForm: FC = () => {Code language: TypeScript (typescript)Use the below code:
const ContactForm: FC<ContactFormProps> = () => {Code language: TypeScript (typescript)So the above line will indicate that the ContactForm component will receive a prop with the name dispatch whose type is React.Dispatch<Action>.
Also, don’t forget to add an import for the Action type at the top of the file like this:
import { Action } from '../reducer/contactsReducer';Code language: TypeScript (typescript)Now, we can use the dispatch prop like this:
const ContactForm: FC<ContactFormProps> = (props) => {
  const { dispatch } = props;
  // ....
};Code language: TypeScript (typescript)
Or use inline destructuring like this:
const ContactForm: FC<ContactFormProps> = ({ dispatch }) => {
  // ....
};Code language: TypeScript (typescript)
Now, inside the handleOnSubmit method, we can dispatch the ADD_CONTACT action.
So, change the handleOnSubmit method to the below code:
const handleOnSubmit = (event: React.FormEvent<HTMLFormElement>) => {
  event.preventDefault();
  dispatch({
    type: 'ADD_CONTACT',
    payload: contact
  });
};Code language: TypeScript (typescript)
Here, we’re passing the contact state value as a payload property to the contactsReducer.
So when we dispatch the ADD_CONTACT action, the first switch case from the contactsReducer function will be executed where we’re returning a new object by spreading out all the properties of initialState (currently only contacts) and we’re adding new contact like this:
{
  ...state,
  contacts: [...state.contacts, action.payload]
}Code language: TypeScript (typescript)
Now, open the App.tsx file and add console.log after the useReducer hook line to display the state value as shown below:
console.log('state', state);Code language: TypeScript (typescript)So your App.tsx file will look like this:
import { useReducer } from 'react';
import ContactForm from './components/ContactForm';
import Header from './components/Header';
import { contactsReducer, State } from './reducer/contactsReducer';
const initialState: State = {
  contacts: []
};
function App() {
  const [state, dispatch] = useReducer(contactsReducer, initialState);
  console.log('state', state);
  return (
    <div className='App'>
      <Header />
      <div className='main-container'>
        <ContactForm dispatch={dispatch} />
      </div>
    </div>
  );
}
export default App;Code language: TypeScript (typescript)
Now, If you check the application, you can see the state value coming from the useReducer hook.
As you can see, the provided contact details are successfully added in the contacts property which is declared in the initialState object of the App.tsx file.
How to Display Added Contacts List
Now, instead of displaying the contacts in the console, let’s create a component to display that list.
Create a new file ContactList.tsx inside the components folder with the following code:
import { FC } from 'react';
import { Contact } from '../reducer/contactsReducer';
interface ContactListProps {
  contacts: Contact[];
}
const ContactList: FC<ContactListProps> = ({ contacts }) => {
  return (
    <div className='contacts-list'>
      <h3 className='contacts-list-title'>List of Contacts</h3>
      <div className='contacts-list-table-container'>
        <table className='contacts-list-table'>
          <thead className='contacts-list-header'>
            <tr>
              <th>First Name</th>
              <th>Last Name</th>
              <th>Phone</th>
            </tr>
          </thead>
          <tbody>
            {contacts.map(({ firstName, lastName, phone }) => (
              <tr>
                <td>{firstName}</td>
                <td>{lastName}</td>
                <td>{phone}</td>
              </tr>
            ))}
          </tbody>
        </table>
      </div>
    </div>
  );
};
export default ContactList;Code language: TypeScript (typescript)
Now, open the App.tsx file and use the ContactList component after the ContactForm component. So the App.tsx file will look like this now:
import { useReducer } from 'react';
import ContactForm from './components/ContactForm';
import ContactList from './components/ContactList';
import Header from './components/Header';
import { contactsReducer, State } from './reducer/contactsReducer';
const initialState: State = {
  contacts: []
};
function App() {
  const [state, dispatch] = useReducer(contactsReducer, initialState);
  console.log('state', state);
  return (
    <div className='App'>
      <Header />
      <div className='main-container'>
        <ContactForm dispatch={dispatch} />
        <hr />
        {state.contacts.length > 0 && <ContactList contacts={state.contacts} />}
      </div>
    </div>
  );
}
export default App;Code language: TypeScript (typescript)
In the above code, we’re checking If the contacts array in the state has a length greater than zero.
If yes, then we’re passing the contacts` as a prop to the ContactList component.
And as we have already declared contacts as a prop inside the ContactListProps interface of the ContactList component, we will not get any TypeScript error.
Now, If you check the application, you can see the contact list displayed on the right side of the screen.
But If you check the console, you will see a warning in the console as shown below:
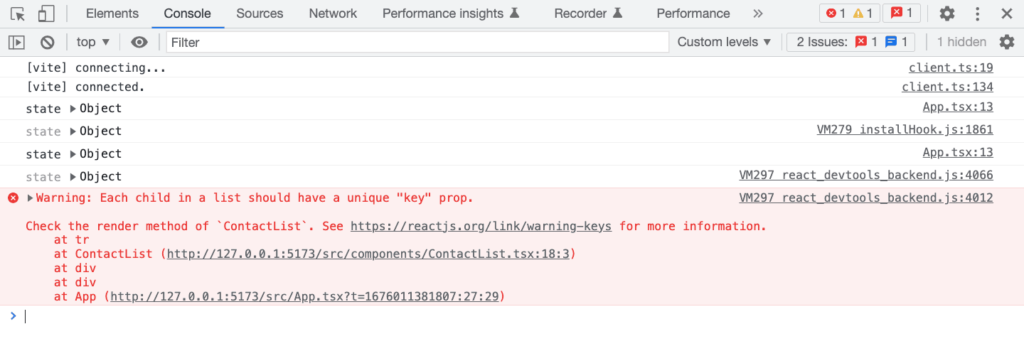
If you don’t add a unique key while using the array map method during rendering, then it will cause a performance issue, If the order of the items displayed using the map method is changed.
So to fix this, you might think of using the array index as the key in the ContactList.tsx file like this:
{
  contacts.map(({ firstName, lastName, phone }, index) => (
    <tr key={index}>
      <td>{firstName}</td>
      <td>{lastName}</td>
      <td>{phone}</td>
    </tr>
  ));
}Code language: TypeScript (typescript)
Even though it will fix the issue for now, it will cause an issue later once the order of the displayed contacts changes when we add the delete contact functionality.
So to permanently fix this issue, we need to define a unique id for each contact that we can use as a key.
## How to Add a Unique Id For Each Contact
Open the ContactForm.tsx file and change the below code:
dispatch({
  type: 'ADD_CONTACT',
  payload: contact
});Code language: TypeScript (typescript)
to this code:
dispatch({
  type: 'ADD_CONTACT',
  payload: {
    id: Date.now(), // returns current timestamp
    ...contact
  }
});Code language: TypeScript (typescript)
So now, for the payload, we will have extra id property in addition to the firstName, lastName, and phone properties.
But if you save the file, you will see the TypeScript error as shown below:
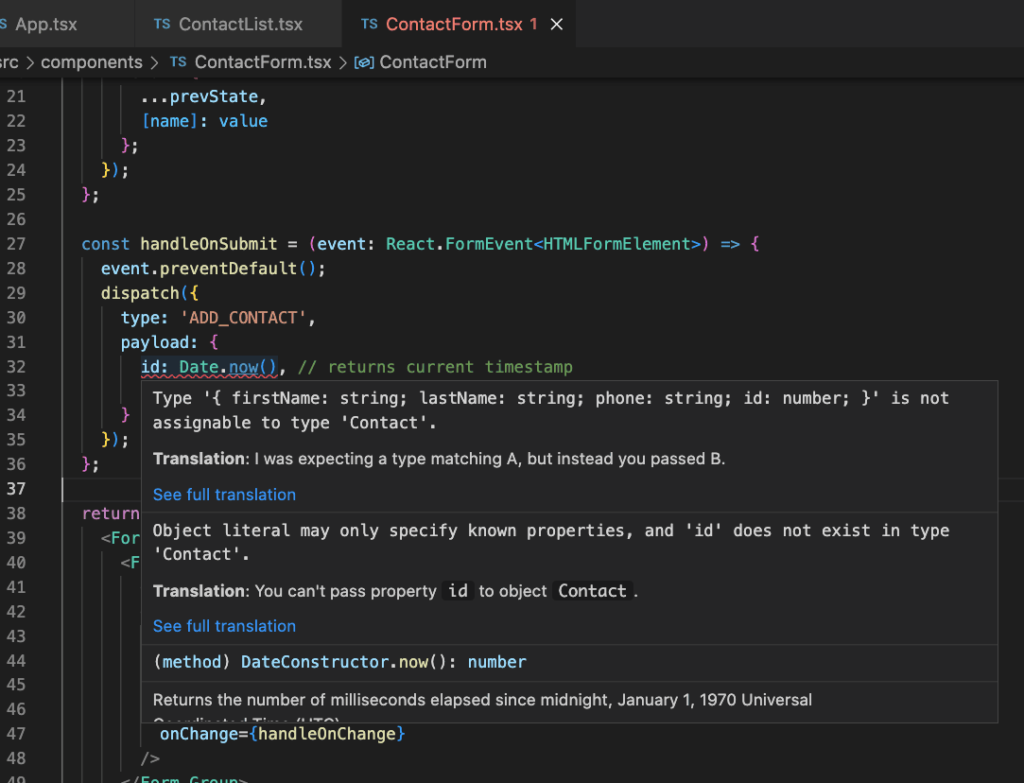
As the error says, the Contact interface we defined in the contactsReducer.ts file does not include the id property.
So let’s add that.
Open the contactsReducer.ts file and add id to the Contact interface like this:
export interface Contact {
  id: number;
  firstName: string;
  lastName: string;
  phone: string;
}Code language: TypeScript (typescript)
Now, the error from the ContactForm.tsx file will be gone.
Now open the ContactList.tsx file and use id as the key as shown below:
{contacts.map(({ id, firstName, lastName, phone }) => (
  <tr key={id}>
    <td>{firstName}</td>
    <td>{lastName}</td>
    <td>{phone}</td>
  </tr>
))}Code language: TypeScript (typescript)
This is the correct way to assign a value for the key prop.
So while using the array map method, always make sure to have a unique id for each individual item that is displayed.
Now, If you check the application, you will not see any warning in the console after adding a contact.
So now, we’re successfully able to add and display contacts on the screen.
Creating a Separate Component For Displaying Individual Contacts
When working in React, you should always create a separate component for displaying different information so it’s easy to re-use and test that component when required.
So let’s create a ContactItem.tsx file inside the components folder and move the contents from the map method of the ContactList.tsx file inside it.
So your ContactItem.tsx file will look like this:
import { FC } from 'react';
import { Contact } from '../reducer/contactsReducer';
const ContactItem: FC<Contact> = ({ firstName, lastName, phone }) => {
  return (
    <tr>
      <td>{firstName}</td>
      <td>{lastName}</td>
      <td>{phone}</td>
    </tr>
  );
};
export default ContactItem;Code language: TypeScript (typescript)
And change the map method from the ContactList.tsx file from the below code:
{
  contacts.map(({ id, firstName, lastName, phone }) => (
    <tr key={id}>
      <td>{firstName}</td>
      <td>{lastName}</td>
      <td>{phone}</td>
    </tr>
  ));
}
```
to this code:
```js
{
  contacts.map(({ id, firstName, lastName, phone }) => (
    <ContactItem
      key={id}
      id={id}
      firstName={firstName}
      lastName={lastName}
      phone={phone}
    />
  ));
}Code language: TypeScript (typescript)
Note that, we have added a key to the ContactItem component instead of adding it to the tr tag.
Also, import the ContactItem component at the top of the ContactList.tsx file like this:
import ContactItem from './ContactItem';Code language: TypeScript (typescript)In the above code, we’re passing individual props to the ContactItem component from inside the array map method.
There is an easier way to achieve the same using the below code:
{
  contacts.map((props) => <ContactItem key={props.id} {...props} />)
}Code language: TypeScript (typescript)
Here, instead of inline destructuring, we’re using the props parameter and we’re spreading out all the properties of the props object using the spread operator.
Now, If you check the application, you will see that it still works without any issues.
How to Create UI for Edit and Delete Functionality
For displaying the edit and delete button, let’s use the [react-icons](https://react-icons.github.io/react-icons/) library which is a popular way to include icons in your React app.
We have already installed the react-icons npm package at the start of this article.
Now, open the ContactList.tsx file and add two extra th for edit and delete in the thead like this:
<thead className='contacts-list-header'>
  <tr>
    <th>First Name</th>
    <th>Last Name</th>
    <th>Phone</th>
    <th>Edit</th>
    <th>Delete</th>
  </tr>
</thead>Code language: TypeScript (typescript)
Now, open the `ContactItem.tsx` file and replace it with the following contents:
import { FC } from 'react';
import { AiFillDelete, AiFillEdit } from 'react-icons/ai';
import { Contact } from '../reducer/contactsReducer';
const ContactItem: FC<Contact> = ({ firstName, lastName, phone }) => {
  return (
    <tr>
      <td>{firstName}</td>
      <td>{lastName}</td>
      <td>{phone}</td>
      <td>
        <AiFillEdit size={20} className='icon' />
      </td>
      <td>
        <AiFillDelete size={20} className='icon' />
      </td>
    </tr>
  );
};
export default ContactItem;Code language: TypeScript (typescript)
Now, If you check the application, you can see the edit and delete icons in the contacts list table as shown below:
Now let’s add the actual functionality to edit the contact.
To display the edit modal popup, we will use the react-bootstrap modal component
So, create a new file EditModal.tsx inside the components folder with the following content inside it:
import { FC } from 'react';
import { Modal } from 'react-bootstrap';
import { Action, Contact } from '../reducer/contactsReducer';
import ContactForm from './ContactForm';
interface EditModalProps {
  showModal: boolean;
  dataToEdit: Contact | undefined;
  toggleModal: () => void;
  dispatch: React.Dispatch<Action>;
}
const EditModal: FC<EditModalProps> = ({
  toggleModal,
  dataToEdit,
  showModal,
  dispatch
}) => {
  return (
    <Modal show={showModal} onHide={toggleModal}>
      <Modal.Header closeButton>
        <Modal.Title>Update Contact</Modal.Title>
      </Modal.Header>
      <Modal.Body>
        <ContactForm
          dispatch={dispatch}
          dataToEdit={dataToEdit}
          toggleModal={toggleModal}
        />
      </Modal.Body>
    </Modal>
  );
};
export default EditModal;Code language: TypeScript (typescript)
As you can see above, we’re re-using the ContactForm component inside the Modal component so as to avoid writing the same code again and again.
The EditModal component accepts four props:
– toggleModal which is a function that will toggle the state value used to hide or show the modal
– dataToEdit will be an object containing contact details of the contact to be edited
– showModal will be a boolean value indicating whether to show or hide the modal
– dispatch function which will be helpful to dispatch the edit contact action
Therefore, we have also declared the interface specifying all the props and their types:
interface EditModalProps {
  showModal: boolean;
  dataToEdit: Contact | undefined;
  toggleModal: () => void;
  dispatch: React.Dispatch<Action>;
}Code language: TypeScript (typescript)
Right now, the ContactForm component accepts only the dispatch prop so let’s add the remaining required prop in the definition of the type.
Open the ContactForm.tsx file and change the interface to the below code:
interface ContactFormProps {
  dispatch: React.Dispatch<Action>;
  dataToEdit: Contact | undefined;
  toggleModal: () => void;
}Code language: TypeScript (typescript)
Also, add an import for the Contact and Action at the top of the file:
import { Action, Contact } from '../reducer/contactsReducer';Code language: TypeScript (typescript)Update the ContactForm component to the below code:
const ContactForm: FC<ContactFormProps> = ({
  dispatch,
  dataToEdit,
  toggleModal
}) => {
  const [contact, setContact] = useState({
    firstName: dataToEdit?.firstName ? dataToEdit.firstName : '',
    lastName: dataToEdit?.lastName ? dataToEdit.lastName : '',
    phone: dataToEdit?.phone ? dataToEdit.phone : ''
  });
  // ...
};Code language: TypeScript (typescript)
In the above code, we’re accessing dataToEdit and toggleModal as props and in the useState hook, we’re checking for each property using the ternary operator to check If it exists.
If it exists, then we’re using that value as the input field value otherwise we’re using an empty value.
Now, change the handleOnSubmit method to the below code:
const handleOnSubmit = (event: React.FormEvent<HTMLFormElement>) => {
  event.preventDefault();
  if (!dataToEdit) {
    dispatch({
      type: 'ADD_CONTACT',
      payload: {
        id: Date.now(), // returns current timestamp
        ...contact
      }
    });
  } else {
    // dispatch edit contact action
    toggleModal();
  }
};Code language: TypeScript (typescript)
When the application is loaded and If we have not clicked on the edit icon, then the dataToEdit will be undefined otherwise it will include the details of the contact to be edited.
So we’re first checking If we’re editing the contact. If not, then we’re dispatching the ADD_CONTACT action otherwise we’re just closing the modal for now.
We will add code to dispatch edit action soon.
Here, we’re calling the toggleModal function to close the modal once we dispatch the ADD_CONTACT action.
Now, change the Add Contact button from this code:
<Button variant='primary' type='submit' className='submit-btn'>
  Add Contact
</Button>Code language: TypeScript (typescript)
to this code:
<Button variant='primary' type='submit' className='submit-btn'>
  {dataToEdit ? 'Update Contact' : 'Add Contact'}
</Button>Code language: TypeScript (typescript)
So, by default we will show the Add Contact button text for the contact form and If we click on the edit icon, we will set the dataToEdit prop value so we will see the Update Contact text in the modal while editing the contact.
Now, open the App.tsx file and replace it with the following content:
import { useEffect, useReducer, useState } from 'react';
import ContactForm from './components/ContactForm';
import ContactList from './components/ContactList';
import EditModal from './components/EditModal';
import Header from './components/Header';
import { Contact, contactsReducer, State } from './reducer/contactsReducer';
const initialState: State = {
  contacts: []
};
function App() {
  const [state, dispatch] = useReducer(contactsReducer, initialState);
  const [showModal, setShowModal] = useState(false);
  const [dataToEdit, setDataToEdit] = useState<Contact | undefined>(undefined);
  useEffect(() => {
    if (!showModal) {
      setDataToEdit(undefined);
    }
  }, [showModal]);
  const toggleModal = () => {
    setShowModal((show) => !show);
  };
  const handleEdit = (id: number) => {
    setDataToEdit(state.contacts.find((contact) => contact.id === id));
    toggleModal();
  };
  return (
    <div className='App'>
      <Header />
      <div className='main-container'>
        <ContactForm
          dispatch={dispatch}
          dataToEdit={dataToEdit}
          toggleModal={toggleModal}
        />
        <hr />
        {state.contacts.length > 0 && (
          <ContactList
            contacts={state.contacts}
            handleEdit={handleEdit}
            dispatch={dispatch}
          />
        )}
      </div>
      <EditModal
        showModal={showModal}
        dataToEdit={dataToEdit}
        toggleModal={toggleModal}
        dispatch={dispatch}
      />
    </div>
  );
}
export default App;Code language: TypeScript (typescript)
In the above code, we have declared two extra states:
const [showModal, setShowModal] = useState(false);
const [dataToEdit, setDataToEdit] = useState<Contact | undefined>(undefined);Code language: TypeScript (typescript)
The first useState will handle the showing or hiding of the modal and the second useState will hold the value of the edited contact which will be an object.
The object will be undefined initially and If the value is set, it will be of type Contact with id, firstName, lastName, and phone properties.
That’s why we have declared the type initially using angle brackets so we will not get any TypeScript error in the future while using dataToEdit or setDataToEdit.
Next, in the useEffect hook, we’re setting the dataToEdit value back to undefined once we close the modal i.e when showModal value is false.
Then, in the toggleModal function we’re using updater syntax of state to change the value of showModal state from true to false and vice-versa.
So when we call the toggleModal function, If the modal is already open because showModal is true then the modal will be closed and if it’s already closed then calling the toggleModal function will display that modal.
If you were curious, why we declared the dataToEdit state type as Contact | undefined like this:
const [dataToEdit, setDataToEdit] = useState<Contact | undefined>(undefined);Code language: TypeScript (typescript)Then the answer lies in the handleEdit function:
const handleEdit = (id: number) => {
  setDataToEdit(state.contacts.find((contact) => contact.id === id));
  toggleModal();
};Code language: TypeScript (typescript)
Inside the handleEdit function, we’re checking If the passed contact id matches with any of the already added contacts in the state and we’re setting it to the dataToEdit value using the setDataToEdit method.
The array find method returns undefined if it couldn’t find the match.
So TypeScript will throw an error If we don’t define `undefined` as one of the values for the dataToEdit state.
That’s the reason, we included `undefined` as one of the values of data stored in the dataToEdit state variable.
As you can see in the App.tsx file, we’re passing dispatch and handleEdit as props to the ContactList component.
So let’s accept them in the ContactList component.
Open the ContactList.tsx file and replace it with the following contents:
import { FC } from 'react';
import { Action, Contact } from '../reducer/contactsReducer';
import ContactItem from './ContactItem';
interface ContactListProps {
  contacts: Contact[];
  handleEdit: (id: number) => void;
  dispatch: React.Dispatch<Action>;
}
const ContactList: FC<ContactListProps> = ({
  contacts,
  handleEdit,
  dispatch
}) => {
  return (
    <div className='contacts-list'>
      <h3 className='contacts-list-title'>List of Contacts</h3>
      <div className='contacts-list-table-container'>
        <table className='contacts-list-table'>
          <thead className='contacts-list-header'>
            <tr>
              <th>First Name</th>
              <th>Last Name</th>
              <th>Phone</th>
              <th>Edit</th>
              <th>Delete</th>
            </tr>
          </thead>
          <tbody>
            {contacts.map((contact) => (
              <ContactItem
                key={contact.id}
                {...contact}
                handleEdit={handleEdit}
                dispatch={dispatch}
              />
            ))}
          </tbody>
        </table>
      </div>
    </div>
  );
};
export default ContactList;Code language: TypeScript (typescript)
As we know, handleEdit will accept the id as a parameter and it does not return anything, therefore, we’ve defined it in the ContactListProps interface as shown below:
interface ContactListProps {
  // ...
  handleEdit: (id: number) => void;
  // ...
}Code language: TypeScript (typescript)
Then we’re taking out the handleEdit and dispatch as props and we’re passing them to the ContactItem component as shown below:
<ContactItem
  key={contact.id}
  {...contact}
  handleEdit={handleEdit}
  dispatch={dispatch}
/>Code language: TypeScript (typescript)
Now, open the ContactItem.tsx file and replace it with the following content:
import { FC } from 'react';
import { AiFillDelete, AiFillEdit } from 'react-icons/ai';
import { Action, Contact } from '../reducer/contactsReducer';
interface ExtraProps {
  handleEdit: (id: number) => void;
  dispatch: React.Dispatch<Action>;
}
const ContactItem: FC<Contact & ExtraProps> = ({
  id,
  firstName,
  lastName,
  phone,
  handleEdit,
  dispatch
}) => {
  return (
    <tr>
      <td>{firstName}</td>
      <td>{lastName}</td>
      <td>{phone}</td>
      <td>
        <AiFillEdit size={20} onClick={() => handleEdit(id)} className='icon' />
      </td>
      <td>
        <AiFillDelete
          size={20}
          onClick={() => {
            const confirmDelete = window.confirm(
              `Are you sure you want to delete contact for user ${firstName} ${lastName}?`
            );
            if (confirmDelete) {
              // dispatch action
            }
          }}
          className='icon'
        />
      </td>
    </tr>
  );
};
export default ContactItem;Code language: TypeScript (typescript)
Previously, the ContactItem component was only accepting properties from the Contact interface so we declared the ContactItem component like this:
const ContactItem: FC<Contact> = (
  {
    // ...
  }
) => {
  // ...
};Code language: TypeScript (typescript)
But now, we’re also passing handleEdit and dispatch props, so we have declared an additional interface like this:
interface ExtraProps {
  handleEdit: (id: number) => void;
  dispatch: React.Dispatch<Action>;
}Code language: TypeScript (typescript)
And we’re using the TypeScript intersection operator & to combine types together like this:
const ContactItem: FC<Contact & ExtraProps> = (
  {
    // ...
  }
) => {
  // ...
};Code language: TypeScript (typescript)
If you want, you can also create a new type and use it like this:
interface ExtraProps {
  handleEdit: (id: number) => void;
  dispatch: React.Dispatch<Action>;
}
type ContactProps = ContactType & ExtraProps;
const Contact: FC<ContactProps> = (
  {
    // ...
  }
) => {
  // ...
};Code language: TypeScript (typescript)
Now, If you check the application, you can see that we’re able to see the contact details of the contact we’re editing in the modal as shown below:

How to Implement Edit Contact Functionality
Now, we have the UI for edit and delete, let’s add code for actual edit and delete functionality.
Open the contactsReducer.ts file and add a switch case for the UPDATE_CONTACT action.
case 'UPDATE_CONTACT':
  const { id, updates } = action.payload;
  return {
    ...state,
    contacts: state.contacts.map((contact) => {
      if (contact.id === id) {
        return {
          ...contact,
          ...updates
        };
      }
      return contact;
    })
  };Code language: TypeScript (typescript)
As you can see above, we’re sending the id of the contact to update and the actual updates object which contains the updated data.
And we’re using the array map method to update the contact with a matching id.
But after saving the file, you can see that, we’re getting a TypeScript error after adding this case.

The error is coming because, in the Action interface, we mentioned that the payload is of type Contact with id, firstName, lastName, and phone properties.
But in the UPDATE_CONTACT switch case, we’re destructuring the id and updates properties because that’s what we need.
So to fix the error, we need to tell TypeScript that, the payload can either be of Contact type or a type which has id and updates properties.
Therefore, create a new interface above the Action as shown below:
export interface Update {
  id: number;
  updates: Contact;
}Code language: TypeScript (typescript)
And change the Action interface from this code:
export interface Action {
  type: 'ADD_CONTACT'
  payload: Contact;
}Code language: TypeScript (typescript)
to this code:
export interface Action {
  type: 'ADD_CONTACT' | 'UPDATE_CONTACT'
  payload: Contact | Update;
}Code language: TypeScript (typescript)
So now, payload can be either of Contact type or Update type and type can be either ADD_CONTACT or UPDATE_CONTACT.
But after making this change, you will see other TypeScript errors as shown below:
The errors are coming because TypeScript is not able to differentiate whether to use Contact or Update as the payload type.
So change ADD_CONTACT switch case from the below code:
case 'ADD_CONTACT':
  return {
    ...state,
    contacts: [...state.contacts, action.payload]
  };
```
to this code:
```js
case 'ADD_CONTACT':
  return {
    ...state,
    contacts: [...state.contacts, action.payload as Contact]
  };Code language: TypeScript (typescript)
Here, we’re doing type casting using the as keyword to tell TypeScript the type of action.payload specifically.
And now change the UPDATE_CONTACT switch case from the below code:
case 'UPDATE_CONTACT':
  const { id, updates } = action.payload;
    return {
      ...state,
      contacts: state.contacts.map((contact) => {
        if (contact.id === id) {
          return {
            ...contact,
            ...updates
          };
        }
        return contact;
      })
    };Code language: TypeScript (typescript)
to this code:
case 'UPDATE_CONTACT':
  const { id, updates } = action.payload as Update;
    return {
      ...state,
      contacts: state.contacts.map((contact) => {
        if (contact.id === id) {
          return {
            ...contact,
            ...updates
          };
        }
        return contact;
      })
    };Code language: TypeScript (typescript)
Here, we have specified the action.payload type as Update.
Now, you can see there are no TypeScript errors coming.
So your entire contactsReducer.ts file will look like this:
export interface Contact {
  id: number;
  firstName: string;
  lastName: string;
  phone: string;
}
export interface Update {
  id: number;
  updates: Contact;
}
export interface Action {
  type: 'ADD_CONTACT' | 'UPDATE_CONTACT'
  payload: Contact | Update;
}
export interface State {
  contacts: Contact[];
}
export const contactsReducer = (state: State, action: Action): State => {
  switch (action.type) {
    case 'ADD_CONTACT':
      return {
        ...state,
        contacts: [...state.contacts, action.payload as Contact]
      };
    case 'UPDATE_CONTACT':
      const { id, updates } = action.payload as Update;
      return {
        ...state,
        contacts: state.contacts.map((contact) => {
          if (contact.id === id) {
            return {
              ...contact,
              ...updates
            };
          }
          return contact;
        })
      };
    default:
      return state;
  }
};Code language: TypeScript (typescript)
Now, let’s dispatch the UPDATE_CONTACT action to actually update the contact.
Open the ContactForm.tsx file and inside the handleOnSubmit method, in the else block, before the toggleModal function call, add the below code:
dispatch({
  type: 'UPDATE_CONTACT',
  payload: {
    id: dataToEdit.id,
    updates: {
      id: Date.now(),
      ...contact
    }
  }
});Code language: TypeScript (typescript)
And inside the if condition after the dispatch call, add the below code:
setContact({
  firstName: '',
  lastName: '',
  phone: ''
});Code language: TypeScript (typescript)
Here, we’re resetting the form state, so once we dispatch the ADD_CONTACT action, we will clear out all the user-entered data.
so your handleOnSubmit method will look like this:
const handleOnSubmit = (event: React.FormEvent<HTMLFormElement>) => {
  event.preventDefault();
  if (!dataToEdit) {
    dispatch({
      type: 'ADD_CONTACT',
      payload: {
        id: Date.now(), // returns current timestamp
        ...contact
      }
    });
    setContact({
      firstName: '',
      lastName: '',
      phone: ''
    });
  } else {
    dispatch({
      type: 'UPDATE_CONTACT',
      payload: {
        id: dataToEdit.id,
        updates: {
          id: Date.now(),
          ...contact
        }
      }
    });
    toggleModal();
  }
};Code language: TypeScript (typescript)
Now, If you check the application, you can see that, we’re successfully able to edit the contact.
How to Implement Delete Contact Functionality
Now, let’s work on adding delete contact functionality.
Open the contactsReducer.ts file and add a switch case for the DELETE_CONTACT action.
case 'DELETE_CONTACT': {
    const { id } = action.payload;
    return {
      ...state,
      contacts: state.contacts.filter((contact) => contact.id !== id)
    };
  }Code language: TypeScript (typescript)
For deleting a contact, we’re sending only the id of the contact to be deleted in the payload property and using the array filter method to remove that specific contact.
Now, in the same file, change the Action interface to the following code:
export interface Action {
  type: 'ADD_CONTACT' | 'UPDATE_CONTACT' | 'DELETE_CONTACT'
  payload: Contact | Update;
}Code language: TypeScript (typescript)
Here, we’ve just added the DELETE_CONTACT as an extra type.
Now, Open the ContactItem.tsx file, and inside the confirmDelete if condition dispatch the DELETE_CONTACT action as shown below:
if (confirmDelete) {
  dispatch({
    type: 'DELETE_CONTACT',
    payload: { id }
  });
}Code language: TypeScript (typescript)
But If you save the file, you will see a TypeScript error as shown below:
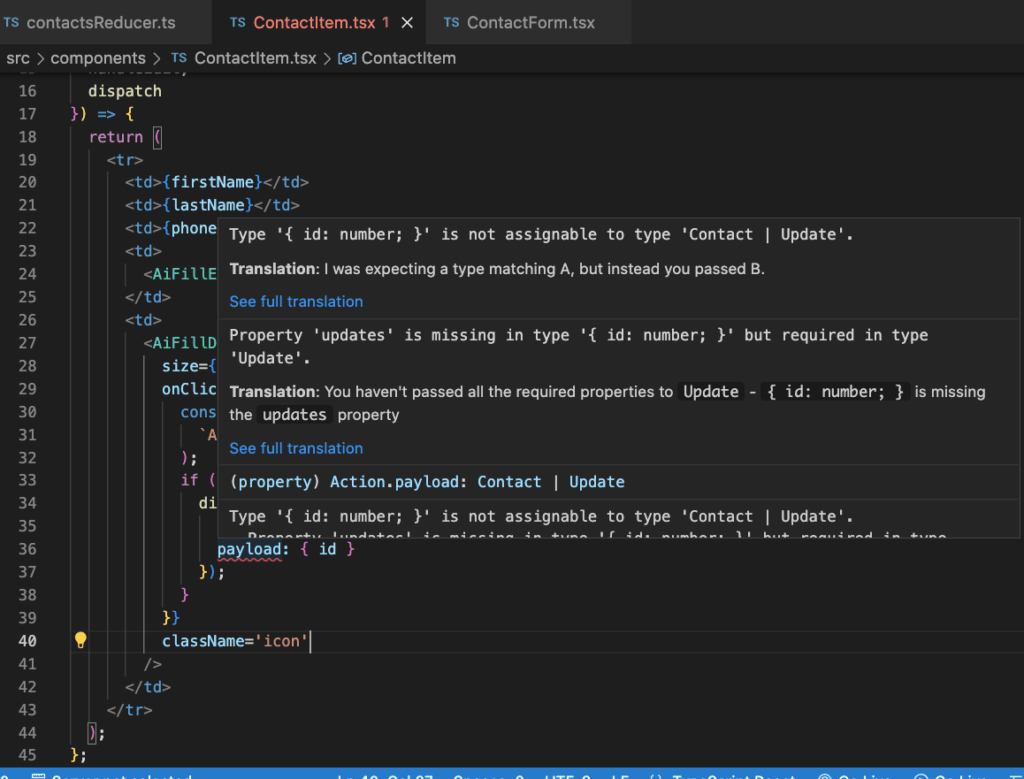
We’re getting the error because, in the Action interface of the contactsReducer.ts file, we’re saying that the payload can be either Contact or Update but for payload, we’re just passing an object with id inside it for DELETE_CONTACT action and we’re missing the updates property.
So to fix this error, change the Update interface from this code:
export interface Update {
  id: number;
  updates: Contact;
}Code language: TypeScript (typescript)
to this code:
export interface Update {
  id: number;
  updates?: Contact;
}Code language: TypeScript (typescript)
Here, we’ve made the updates property optional by adding a question mark symbol. So TypeScript is happy now as we’re providing id and updates property can be ignored.
With this change, the error in the ContactItem.tsx file will go away.
Now, If you check the application, you can see that the delete contact functionality is working fine.
How to Add Form Validations
Now, we’re done with the CRUD (Create, Read, Update, and Delete) functionality of the application.
But we’re missing the validation part while adding or updating the contact.
So let’s add that.
Declare a new state inside the ContactForm.tsx file:
const [errorMsg, setErrorMsg] = useState('');Code language: TypeScript (typescript)And change the handleOnSubmit method to the below code:
const handleOnSubmit = (event: React.FormEvent<HTMLFormElement>) => {
  event.preventDefault();
  const { firstName, lastName, phone } = contact;
  if (
    firstName.trim() === '' ||
    lastName.trim() === '' ||
    phone.trim() === ''
  ) {
    setErrorMsg('All the fields are required.');
    return;
  } else if (!phone.trim().match(/^\d{10}$/g)) {
    setErrorMsg('Please enter a valid 10 digit phone number.');
    return;
  }
  if (!dataToEdit) {
    dispatch({
      type: 'ADD_CONTACT',
      payload: {
        id: Date.now(), // returns current timestamp
        ...contact
      }
    });
    setContact({
      firstName: '',
      lastName: '',
      phone: ''
    });
    setErrorMsg('');
  } else {
    dispatch({
      type: 'UPDATE_CONTACT',
      payload: {
        id: dataToEdit.id,
        updates: {
          id: Date.now(),
          ...contact
        }
      }
    });
    toggleModal();
  }
};Code language: TypeScript (typescript)
In the above code, we’re checking If the user has entered all the values in the form.
If any of the values are missing, then we’re setting the error message using the setErrorMsg function and we’re skipping the next code execution using the return statement.
So the next code will not be executed If there is some error.
We’re also checking If the phone number is having a length of 10 characters or not.
And If it’s not an edit mode, then after dispatching the ADD_CONTACT action, we’re clearing the error message by calling setErrorMsg('');
So, If there was any previous error message, It will be cleared out, after the contact is added successfully.
Now, let’s display the error message on the screen.
while returning the JSX, inside the `Form` tag and before the Form.Group tag, add the following statement:
{errorMsg && <p className='errorMsg'>{errorMsg}</p>}Code language: TypeScript (typescript)So your entire ContactForm.tsx file will look like this:
import { FC, useState } from 'react';
import { Button, Form } from 'react-bootstrap';
import { Action, Contact } from '../reducer/contactsReducer';
interface ContactFormProps {
  dispatch: React.Dispatch<Action>;
  dataToEdit: Contact | undefined;
  toggleModal: () => void;
}
const ContactForm: FC<ContactFormProps> = ({
  dispatch,
  dataToEdit,
  toggleModal
}) => {
  const [contact, setContact] = useState({
    firstName: dataToEdit?.firstName ? dataToEdit.firstName : '',
    lastName: dataToEdit?.lastName ? dataToEdit.lastName : '',
    phone: dataToEdit?.phone ? dataToEdit.phone : ''
  });
  const [errorMsg, setErrorMsg] = useState('');
  const handleOnChange = (event: React.ChangeEvent<HTMLInputElement>) => {
    const { name, value } = event.target;
    setContact((prevState) => {
      return {
        ...prevState,
        [name]: value
      };
    });
  };
  const handleOnSubmit = (event: React.FormEvent<HTMLFormElement>) => {
    event.preventDefault();
    const { firstName, lastName, phone } = contact;
    if (
      firstName.trim() === '' ||
      lastName.trim() === '' ||
      phone.trim() === ''
    ) {
      setErrorMsg('All the fields are required.');
      return;
    } else if (!phone.trim().match(/^\d{10}$/g)) {
      setErrorMsg('Please enter a valid 10 digit phone number.');
      return;
    }
    if (!dataToEdit) {
      dispatch({
        type: 'ADD_CONTACT',
        payload: {
          id: Date.now(), // returns current timestamp
          ...contact
        }
      });
      setContact({
        firstName: '',
        lastName: '',
        phone: ''
      });
      setErrorMsg('');
    } else {
      dispatch({
        type: 'UPDATE_CONTACT',
        payload: {
          id: dataToEdit.id,
          updates: {
            id: Date.now(),
            ...contact
          }
        }
      });
      toggleModal();
    }
  };
  return (
    <Form onSubmit={handleOnSubmit} className='contact-form'>
      {errorMsg && <p className='errorMsg'>{errorMsg}</p>}
      <Form.Group controlId='firstName'>
        <Form.Label>First Name</Form.Label>
        <Form.Control
          className='firstName'
          name='firstName'
          value={contact.firstName}
          type='text'
          onChange={handleOnChange}
        />
      </Form.Group>
      <Form.Group controlId='lastName'>
        <Form.Label>Last Name</Form.Label>
        <Form.Control
          className='lastName'
          name='lastName'
          value={contact.lastName}
          type='text'
          onChange={handleOnChange}
        />
      </Form.Group>
      <Form.Group controlId='phone'>
        <Form.Label>Phone</Form.Label>
        <Form.Control
          className='phone'
          name='phone'
          value={contact.phone}
          type='number'
          onChange={handleOnChange}
        />
      </Form.Group>
      <Form.Group controlId='submit'>
        <Button variant='primary' type='submit' className='submit-btn'>
          {dataToEdit ? 'Update Contact' : 'Add Contact'}
        </Button>
      </Form.Group>
    </Form>
  );
};
export default ContactForm;Code language: TypeScript (typescript)
Now, If you check the application, you can see the validation is working as expected.
So with these changes, we’re done with our contact manager app built with React + TypeScript.
Thanks for reading!
You can see a live demo of the deployed application here. Also, if you want to refer the code for this entire project, you can download it from here.

Author's Bio

Get the latest insights, industry trends, and expert perspectives from the Mobisoft Infotech team. Stay updated with our teams collective knowledge, discoveries, and innovations in the dynamic realm of technology.