
Caching is a crucial technique for optimizing the performance of web applications, and Redis caching is a powerful tool for implementing caching strategies. In this blog, we will explore how to use Redis with Spring Boot as a secondary cache to enhance performance and reduce latency. We'll cover the setup, configuration, and integration steps to seamlessly incorporate Redis into your Spring-based projects.
What is Redis?
Redis is an in-memory data structure store that can be used as a database, cache, and message broker. It is known for its high performance and flexibility, supporting various data structures such as strings, hashes, lists, sets, and sorted sets. In-memory caching with Redis is particularly popular due to its fast access times and ease of use.
Understanding Two-Tier Caching

In many applications, a two-tier caching system can improve performance by providing multiple layers of caching:
- Primary Cache: Often implemented using in-memory caches like Ehcache or Caffeine. It is typically fast but may not be as scalable.
- Secondary Cache: Redis can serve as this layer, providing a scalable and persistent cache that can handle larger datasets and complex querying.
Implementing a secondary cache with Redis allows you to offload some of the caching responsibilities from your primary cache, providing additional scalability and redundancy.

Steps to Integrate Redis as a Secondary Cache in a Spring Web Application
1. Add Dependencies
First, you need to include the necessary dependencies in your `pom.xml` if you're using Maven.
<dependency>
	<groupId>org.springframework.boot</groupId>
	<artifactId>spring-boot-starter-data-redis</artifactId>
</dependency>

<dependency>
	<groupId>org.springframework.boot</groupId>
	<artifactId>spring-boot-starter-cache</artifactId>
</dependency>
implementation 'org.springframework.boot:spring-boot-starter-data-redis'
implementation 'org.springframework.boot:spring-boot-starter-cache'
2. Configure Redis
You need to configure Redis in your Spring Boot application. This typically involves setting up the Redis connection details in your `application.properties` or `application.yml` file.
For application.properties:
spring.cache.type=redis
spring.data.redis.host: localhost
spring.data.redis.port: 6379
For application.yml:
spring:
 cache:
   type: redis
 redis:
   host: localhost
   port: 6379
3. Enable Caching
In your main application class or a configuration class, enable caching by annotating it with @EnableCaching:
Example Code:
@EnableCaching
public class SpringApplication {
}
4. Create a Custom Cache Manager
You can create a custom CacheManager to configure Redis as your secondary cache. Here’s an example of how to configure it:
Example Code:
@Configuration
public class RedisCacheConfig {
	@Bean
	CacheManager cacheManager(RedisConnectionFactory redisConnectionFactory) {
		RedisCacheManager.RedisCacheManagerBuilder builder = RedisCacheManager.RedisCacheManagerBuilder
				.fromConnectionFactory(redisConnectionFactory);
		return builder.build();
	}
	@Bean
	RedisConnectionFactory lettuceConnectionFactory() {
		RedisStandaloneConfiguration config = new RedisStandaloneConfiguration();
		config.setUsername("username"); // update username
		config.setPassword("password"); // update password
		return new LettuceConnectionFactory(config);
	}
	@Bean
	RedisTemplate<String, Object> redisTemplate(RedisConnectionFactory redisConnectionFactory) {
		RedisTemplate<String, Object> template = new RedisTemplate<>();
		template.setConnectionFactory(redisConnectionFactory);
		template.setKeySerializer(new StringRedisSerializer(StandardCharsets.UTF_8));
		template.setValueSerializer(new StringRedisSerializer(StandardCharsets.UTF_8));
		return template;
	}
}
5. Use Caching Annotations
@Cacheable
With the help of `@Cacheable` annotations, you can use Spring’s caching strategies to specify which methods should be cached. This annotation has some arguments like value, where we can assign a cache name. And we can assign a key, which we can use to uniquely identify each entry in the cache.
Example Code:
@Cacheable(value = "myCacheName", key = "#id")
public String getDataById(String id) {
	// Simulate a slow service call
}
@CachePut
This is also a method-level annotation. It is used to update the cache without interfering the method execution. The difference between this annotation and @Cacheable annotation is that this annotation will always run the method and put the results into the cache but @Cacheable annotation skips the method execution.
Example Code:
@CachePut(value="myCacheName", key="#id")
public Object updateDataById(String id, Data data)  {
//some code
}
@CacheEvict
A method-level annotation which will be used to remove entries from the cache. If we want to remove all entries, this annotation provides a parameter called allEntries. If it is true, It evicts all entries rather than one entry based on the key. Or else we can specify a key to delete a specific entry in the cache.
Example Code:
@CacheEvict(value = "myCacheName", key = "#id")
public void deleteDataById(@PathVariable String id) {
//some code
}
6. Testing and Validation
Once you’ve set up Redis and integrated it into your Spring application, it’s essential to test and validate that the caching works as expected. Ensure that your application can correctly store and retrieve cached data from Redis and that cache hits and misses behave as intended.

Verifying Records Using Redis CLI (Command-Line Interface)
1. Connect to Redis:
Connect to your Redis server using the `redis-cli` command. Also connect your auth user by using the `AUTH` command. By default, it connects to localhost on port 6379.
2. Check for Keys:
Use the `KEYS *` command to list all keys in the Redis database.

3. Validating the tutorial example by Postman.
a. Add new tutorials
curl --location 'http://localhost:8080/api/tutorials' \
--header 'Content-Type: application/json' \
--data '{
   "title" : "Java tutorials",
   "description" : "Java is a popular programming language, created in 1995."
}'
b. Get tutorial by id
curl --location 'http://localhost:8080/api/tutorials/1903'Records added in Redis Cache

c. Update tutorial by id and check records updated in Redis.
curl --location --request PUT 'http://localhost:8080/api/tutorials/1903' \
--header 'Content-Type: application/json' \
--data '{
   "id": 1903,
   "title": "Java tutorials",
   "description": "Java is a popular programming language",
   "published": false
}'
d. Delete tutorial by id and check the record deleted from Redis.
curl --location --request DELETE 'http://localhost:8080/api/tutorials/1903'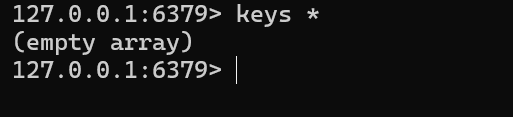
Conclusion
Integrating Redis as a secondary cache in your Spring Web Applications can significantly enhance performance by adding an additional layer of caching. By following the steps outlined above, you can configure Redis to work seamlessly with Spring and leverage its powerful caching capabilities. This setup allows you to balance load, improve response times, and ensure a smoother user experience for your applications.
Once your Redis integration is complete, ensuring ongoing support is essential to maintain peak performance. Our Enterprise Web Development Services offer the expertise and proactive care needed to keep your application optimized, scalable, and running seamlessly over time.

Download Redis Cache Implementation Code
Access the complete source code for implementing Redis as a secondary cache in Spring Web Applications. Download it here.

Deepak Kanmahale
Read more
With over 7 years of experience in developing scalable and robust applications using Java, the Spring framework and Spring Boot. He has a strong background in the Transportation and SaaS-PaaS domains, demonstrating exceptional logic-based problem-solving skills. He also possesses hands-on experience in web development and has contributed to open-source projects, further enriching his diverse technical skill set. Throughout his career, he has led development teams to deliver high-quality software products with a focus on performance, reliability, and scalability. His expertise includes creating seamless integrations between complex systems through well-designed RESTful APIs.
 September 24, 2024


