If iOS 7 set the standards high by creating one of the finest operating system, iOS 8 took forward the experience in the best possible manner offering immaculate features to users. One of it is ‘Interactive Notifications’.
What is Interactive Notification
Interactive Notification allows user to take action on Notification from
Locked Screen, Banner & Notification Center.
Lets see one by one how it looks.
- Locked Screen: You receive an actionable Notification on locked screen.
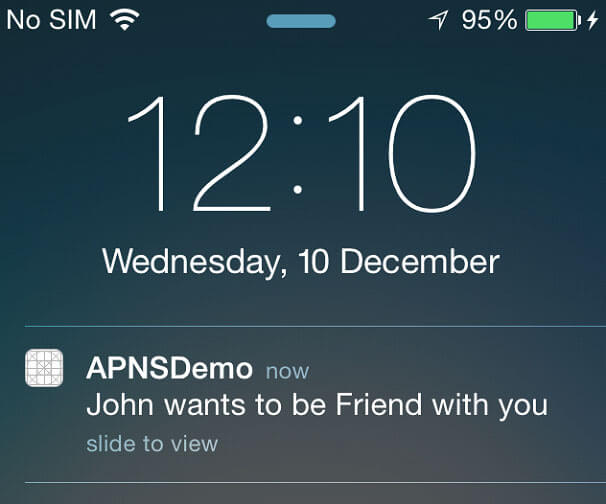
Swipe to the left and you will see actions you have defined in your app.

- Banner : You receive an actionable Notification on locked screen.
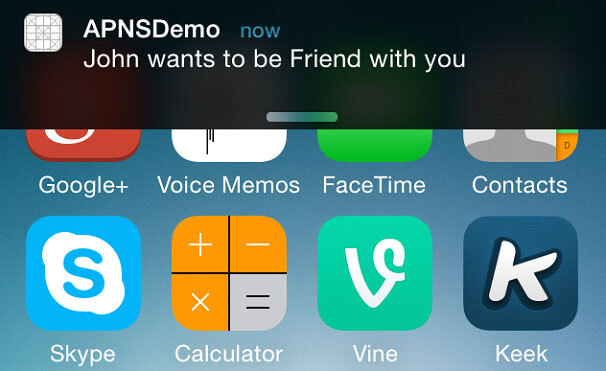
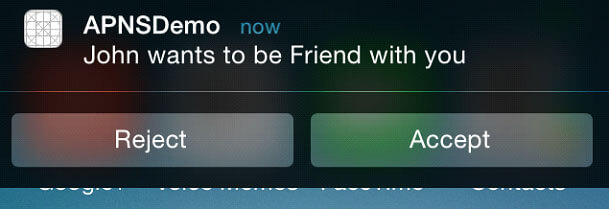
Pull down the banner
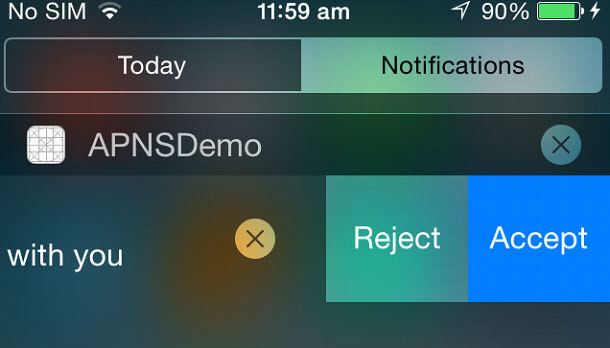
- Notification Center : Check previously missed actionable notification in notification center.
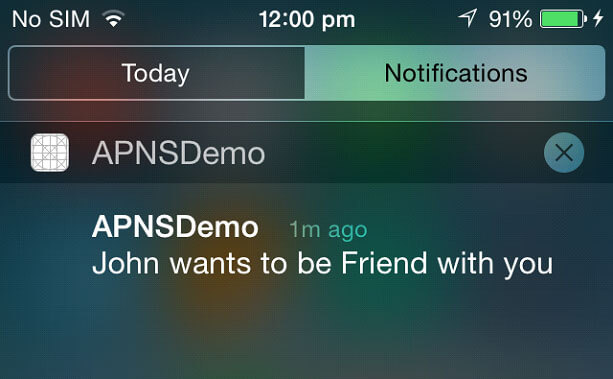
swipe to left
- Modal Alert : Model alert will only be displayed when it is set from Setting App -> Notification -> <App Name> -> Alert Style (Alert). If Yes you will see an Alert instead of a banner.
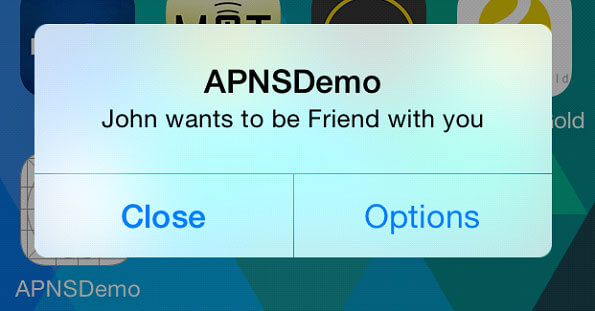
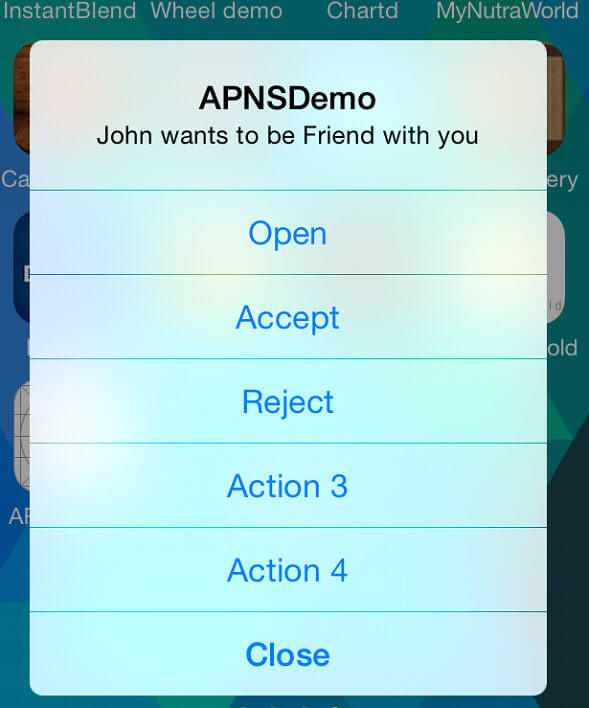
Select Options displays new alerts with all the action defined for the App.
Now lets see how to do it programmatically.
From iOS 8 no words register for push notification API has changed the previous one is deprecated.
To use Interactive notification actions in application, you first need to register your actions. This involves defining your actions, grouping them into a category and then registering those categories with your user notification settings.
In AppDelegate:
Implement the method as shown below and call it from “application:didFinishLaunchingWithOptions:”
method
NSString * const notificationCategoryIdentifier  = @"Friend_Request";

NSString * const notificationActionOneIdentifier = @"Accept_Action";

NSString * const notificationActionTwoIdentifier = @"Reject_Action";


- (void)registerForAPNS {

    if ([[[UIDevice currentDevice] systemVersion] floatValue] >= 8.0)
    {

        UIMutableUserNotificationAction *acceptAction;
        acceptAction = [[UIMutableUserNotificationAction alloc] init];
        [acceptAction setActivationMode:UIUserNotificationActivationModeBackground];
        [acceptAction setTitle:@"Accept"];
        [acceptAction setIdentifier:notificationActionOneIdentifier];
        [acceptAction setDestructive:NO];
        [acceptAction setAuthenticationRequired:NO];

        UIMutableUserNotificationAction *rejectAction;
        rejectAction = [[UIMutableUserNotificationAction alloc] init];
        [rejectAction setActivationMode:UIUserNotificationActivationModeBackground];
        [rejectAction setTitle:@"Reject"];
 [rejectAction setIdentifier:notificationActionTwoIdentifier];
        [rejectAction setDestructive:NO];
        [rejectAction setAuthenticationRequired:NO];

        UIMutableUserNotificationCategory *actionCategory;
        actionCategory = [[UIMutableUserNotificationCategory alloc] init];
        [actionCategory setIdentifier:notificationCategoryIdentifier];

        [actionCategory setActions:@[acceptAction, rejectAction]
                        forContext:UIUserNotificationActionContextDefault];

        NSSet *notificationCategories = [NSSet setWithObject:actionCategory];
        UIUserNotificationType notificationTypes = (UIUserNotificationTypeAlert|
                                                    UIUserNotificationTypeSound|
                                                    UIUserNotificationTypeBadge);

        UIUserNotificationSettings *settings;
        settings = [UIUserNotificationSettings settingsForTypes:notificationTypes
                                                     categories:notificationCategories];

        [[UIApplication sharedApplication]registerUserNotificationSettings:settings];


      [[UIApplication sharedApplication]
       registerForRemoteNotifications];

    } else {

        [[UIApplication sharedApplication] registerForRemoteNotificationTypes:
UIRemoteNotificationTypeAlert|UIRemoteNotificationTypeBadge|UIRemoteNotificationTypeSound];
    }

}
This method will register the App for receiving push notification. Here we have created 2 Actions with identifiers “Accept_Action” & “Reject_Action” which belong to category identifier “Friend_Request”. When the App receives push payload with category identifier : “Friend_Request” the user will see the respective actions on Locked Screen, Banner, Notification Center & Alert.
- UIUserNotificationSettings : It contains the types of notifications that can be displayed to the user by your app. Eg Alert, Sound, Badge.
- UIUserNotificationCategory : It contains information about custom actions that your app can perform in response to a local or push notification.
Category is a type of notification that your app receives, and depending on the category you show user the configured actions for that category.
- UIUserNotificationActionContextDefault is used when the notification is displayed as a modal alert Max 4 actions are Allowed Plus one Open & Close action will be present by default on alert.
- UIUserNotificationActionContextMinimal is used when notification is displayed on lock screen, in the notification center and in banner notifications.
- UIUserNotificationAction : Represents a custom action that your app canperform in response to a remote or local notification.
- Activation Mode: Can be set to background or foreground, which will activate the app in background or foreground once an action is selected by user. If you want to present UI after an action is selected use foreground (eg. Reply to chat) or use background (eg. Friend request), but then you will get little time to complete your action in background.
- Destructive: If “Yes” action will be shown as Red in lock screen and notification center as shown below.

- Authentication: If “Yes” and device is locked, user will have to enter their passcode when they tap on the action. This is useful when your app activation mode is background and hitting on action will result in accessing files. If Activation mode is foreground and device is locked user will have to enter their passcode irrespective of authentication property.
To register device to backend server you will need to implement “application: didRegisterForRemoteNotificationsWithDeviceToken”
You will need to implement “application: didReceiveRemote Notification with fetchCompletionHandler” to show and handle notification when an app is in foreground because iOS won’t display notification when the app is in foreground.
This method will also get called when user tabbed on Notification message and not on Actions.
For silent notification though, this methods gets call in both cases background or foreground.
To handle action you will need to implement “application:application handleActionWithIdentifier: forRemoteNotification: completionHandler” Identifier is equal to action which user has tapped.
Payload for Interactive notification:
Good News Apple has increased Push Payload limit from 256 bytes to 2 kilobytes.
{
	"aps": {
    	 "alert": "John wants to be Friend with you",
	  "category" : "Friend_Request"
          ...
	}
      ...
}
}
Now lets see Silent Notification.
Silent notification:
Is a Remote Notification introduced in iOS 7, which is send silently (i.e without notifying user) to app. This is useful when you need to do image processing and data processing in background and Display user updated data when app comes to foreground. To receive it you will need to set value
In Project -> Capabilities -> Background Modes -> Remote Notifications & In Plist Required background modes : App downloads content in response to push notifications in xcode.
Payload for silent notifications
{
   "aps": {
		"content-available": 1,
		"sound" : ""
            ...
	}
    ...
}
Note: If you use Parse as a backend then you need to set “sound” : “” in payload for silent notifications.
Interactive notifications enable users to take actions on messages, text, reminders, email, and calendar notifications without leaving the app or doing things what they are doing. This feature has added convenience and an ease to users enhancing the entire UX.
 December 15, 2014


