Introduction
Dio is an HTTP client for Dart that makes it easy to work with APIs and perform HTTP requests in Flutter. It is built on top of the Dart HttpClient, with added features that make it more powerful and flexible for handling Flutter networking.
The features are listed below:
Simple and expressive API for making various HTTP requests
Whether you need to perform GET, POST, PUT, DELETE, or other types of requests, Dio in Flutter has got you covered.
Built in support for interceptors to modify request and response data
Interceptors in Dio let you modify requests and responses, perfect for adding headers, logging, handling auth, or custom pre/post-processing.
Support for sending form data, JSON, and handling multipart requests
Dio makes sending form data, JSON, and multipart requests (like file uploads) simple and efficient.
Cancellation of ongoing requests for efficient resource management
Flutter Dio lets you easily cancel HTTP requests, saving resources and boosting app performance.
Efficient handling of timeouts and retries for enhanced reliability
Dio handles timeouts and retries, ensuring smooth responses even with delays or failed requests.
Global configuration options for customizing client behaviour
Dio supports global settings like base URLs and headers, reducing code duplication across requests.
And much more!
Let’s explore how to use Dio in a Flutter application and take a look at some of its features in what can be seen as a complete Flutter Dio tutorial for API integration.
These features make Flutter Dio a great choice for businesses that hire Flutter developers to build scalable and efficient applications.

Step 1: Installing Dio
To use the Dio Flutter package in a Flutter application, first add the package to your project. You can do this by adding the following line to your pubspec.yaml file:
dio: ^5.8.0+1After adding the package to your project, run flutter pub get to install it. This completes the basic Flutter Dio setup.
Step 2: Making HTTP Requests with Dio
In order to explore all the methods of Dio, we will make a simple ui with all method options available in the form as buttons, and on each button click, we will make a respective API hit.
Let's explore the GET, POST, PUT, PATCH, DELETE, and GET with Cache requests to fetch data from APIs. We'll use the "jsonplaceholder.typicode.com " service, which provides mock JSON data for testing purposes. We'll retrieve a list of posts and display their title, body, and id. Here's how you can do it:
Let’s first create our Post model:
This class represents a post object with attributes userId, id, title, and body. We defined a factory constructor from Jason to convert JSON data into a Post object.
class Post {
  final int userId;
  final int id;
  final String title;
  final String body;
  Post({
    required this.userId,
    required this.id,
    required this.title,
    required this.body,
  });
  factory Post.fromJson(Map<String, dynamic> json) {
    return Post(
      userId: json['userId'] ?? 0,
      id: json['id'] ?? 0,
      title: json['title'] ?? '',
      body: json['body'] ?? '',
    );
  }}
Create Dio Client
void  _createDioClient(){
   dio = Dio(BaseOptions(baseUrl: 'https://jsonplaceholder.typicode.com'));
   _addInterceptor();
 }
Let’s understand the block:
- This line creates a new instance of the Dio HTTP client.
- It initializes it with BaseOptions, setting the base URL for all HTTP requests.
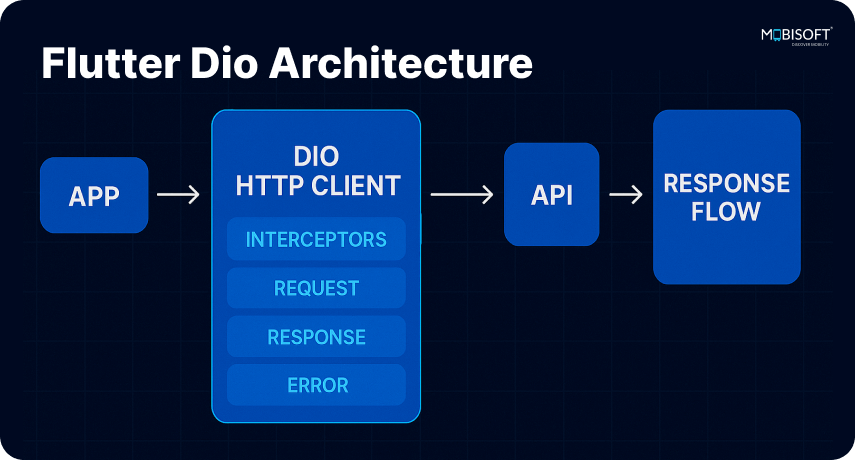
- Then we are calling the _addInterceptor() function, which adds interceptors to the Dio instance.
If you're aiming to build scalable, robust applications using Flutter Dio or any advanced networking solution, consider collaborating with expert Flutter app development services to maximize the potential of your mobile product.
Sending a GET Request with Dio
void _getPosts() async {
  try {
    final response = await dio.get('/posts');
    List<Post> posts = (response.data as List)
        .map((json) => Post.fromJson(json))
        .toList();
     _navigateToScreen(context, PostListScreen(posts: posts));

  } catch (e) {
   _navigateWithResult('GET Error: $e');
  }
}
Now, let us understand the code block.
This asynchronous method uses the Dio package to make a GET request to the API. We await the response from the API and parse the JSON data into a list of Post objects.
Finally, we use _navigateToScreen to display our API response in a new screen, here PostListScreen.
The GET request retrieves posts and displays them in a list, a key feature in many mobile app development services.
Sending a POST Request with Dio
void _makePost() async {
…
      final response = await dio.post('/posts', data: {
        'title': _titleController.text,
        'body': _bodyController.text,
        'userId': 1,
      });
      final post = Post.fromJson(response.data);
    …
}
What the code specifies:
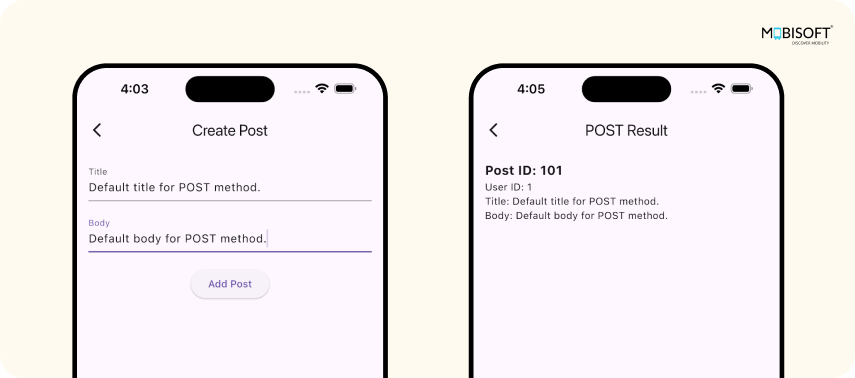
This asynchronous method uses the Dio package to make a POST request to the API. We await the response from the API and parse the JSON data into a Post object.
Finally, the response fetched from the API is shown on a new screen with the details entered in the textfields while making a POST request, and the userId for now has been hardcoded to 1
Sending a PUT Request with Dio
void _updatePost() async {
  try {
    final response = await dio.put('/posts/1', data: {
      'title': 'updated title',
      'body': 'updated body',
      'userId': 1,
    });
 _navigateWithResult(response.data.toString());
  } catch (e) {
  _navigateWithResult('PUT Error: $e');
  }
}
Understand the code block:
- This is a function that works asynchronously and sends a PUT request to the API with the endpoint pointing to /posts/1
- We will be updating the post at index 1 with an updated title and updated body, respectively.
Sending a PATCH Request with Dio
void _performPatch() async {
  try {
    final response = await dio.patch('/posts/1', data: {
      'title': 'patched title',
    });
 _navigateWithResult(response.data.toString());

  } catch (e) {
  _navigateWithResult('PATCH Error: $e');

  }
}
Let’s understand the block.
- This is a function that works asynchronously and sends a PATCH request to the API with endpoint /posts/1
- It updates just the title of that post.
- It waits for the server to respond.
- If the update works, it shows the response using a function called _navigateWithResult.
- If something goes wrong, it shows an error message instead of using a function called _navigateWithResult.
Sending a DELETE Request with Dio
void _deletePost() async {
  try {
    final response = await dio.delete('/posts/1');
    _navigateWithResult('DELETE successful with status code: ${response.statusCode}');
_navigateWithResult('DELETE successful with status code: ${response.statusCode}');
  } catch (e) {
_navigateWithResult('DELETE Error: $e');

  }
}
Let’s understand the code:
- The dio. delete is used to delete the post with the ID.
- await waits for the server to reply.
- If the delete is successful, this shows a message with a status code.
- If something goes wrong, it shows an error message instead of using a function called _navigateWithResult.
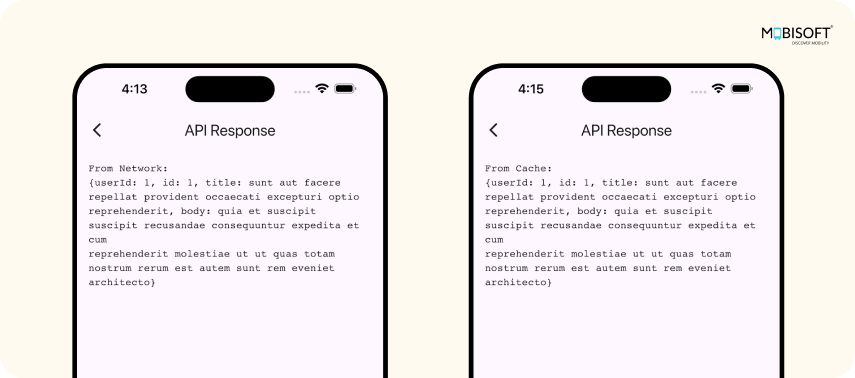
Sending a GET with a Cache Request with Dio
void _fetchCachedPost() async {
  const key = 'posts/1';
  if (cache.containsKey(key)) {
    _navigateWithResult('From Cache:\n${cache[key]}');
    return;
  }
  try {
    final response = await dio.get('/posts/1');
    cache[key] = response.data.toString();
    _navigateWithResult('From Network:\n${response.data}');
  } catch (e) {
    _navigateWithResult('Cache GET Error: $e');
  }
}
Let’s understand the code:
- It tries to get data from an API, but uses a cache to avoid making the same request multiple times.
- It checks if we already have the data stored in memory.
- If it's not cached:
- It makes a network request.
- Saves the data in the cache
- Shows the result using the function _navigateWithResult
- If something goes wrong, then the error is shown using the function _navigateWithResult
Steps to test the cache request
Step 1: Test First Time Request (No Cache)
- Call the function:
_fetchCachedPost(); - It gets data from the network and stores it in the cache
Step 2: Test Cache Hit (Subsequent Request)
It returns the data from the cache; no network call is made.
Customizing Flutter Dio with Interceptors
Interceptors in Dio let you intercept and modify requests or responses. They're useful for adding headers, logging, handling auth, or custom processing.
We will check how to add Interceptors now.
void _addInterceptor() {
     dio.interceptors.add(
    InterceptorsWrapper(
      onRequest: (options, handler) {
        print(" Request: ${options.uri}");
        return handler.next(options);
      },
      onResponse: (response, handler) {
        print(" Response: ${response.statusCode}");
        return handler.next(response);
      },
      onError: (DioError e, handler) {
        print(" Interceptor error: ${e.message}");
        return handler.next(e);
      },
    ),
  );
}
We will understand the code.
In this example, we add an interceptor to our Dio client using dio.interceptors.add() with a custom InterceptorsWrapper. This wrapper lets us define functions for onRequest, onResponse, and onError, which are triggered at different points in the request lifecycle.
These functions allow us to perform tasks like logging request/response details, handling errors, or adding headers automatically.
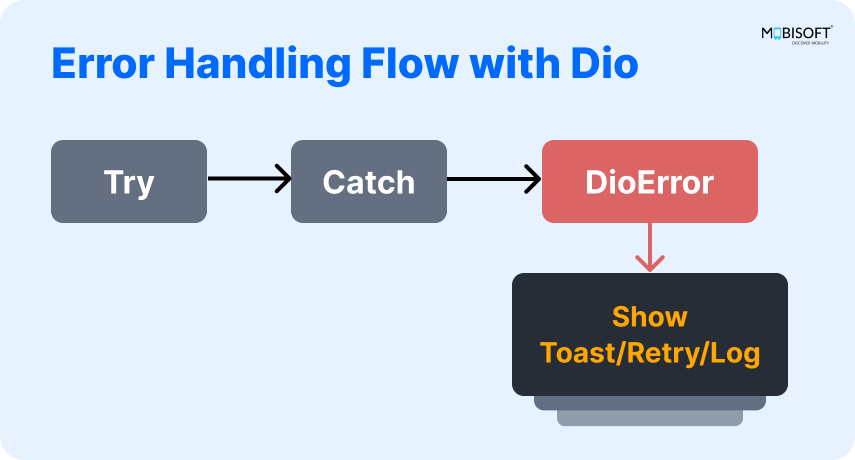
Key Parts of the Code:
- dio Object: An instance of Dio in Flutter used for making HTTP requests. We attach our interceptors to it using dio.interceptors.add(), a common practice in Flutter Dio configuration.
- We have methods defined in this InterceptorsWrapper as:
- onRequest: Runs before the request is sent.
For example, we can use this method for sending an authorization token once the user is authenticated. - onResponse: Runs after receiving a response.
For example, we can use this method for logging the response, status code. - onError: Runs when an error occurs during the request.
- onRequest: Runs before the request is sent.
For example, we can handle different error types and display them to users.
This setup helps centralize request handling logic, making your code cleaner and more maintainable, especially in Flutter API integration projects.
Once all the code blocks are written, we can now run and check the app, an ideal way to test Flutter Dio examples in action. The result is how it looks on the emulator.
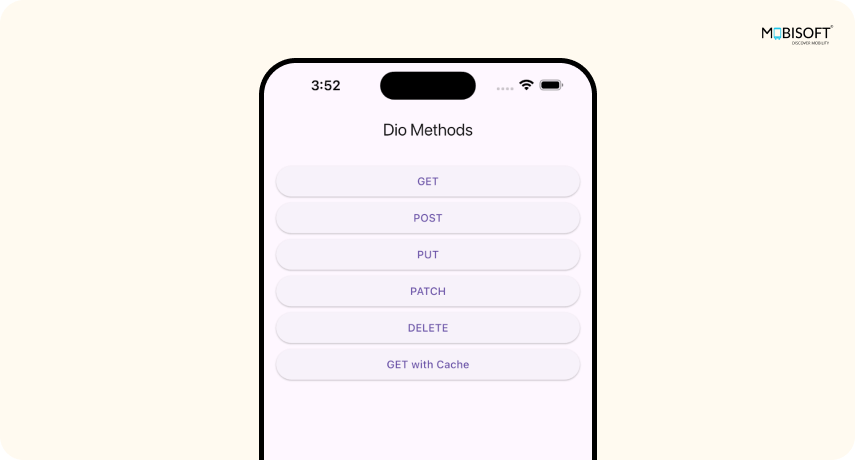
Now let’s see each option on the virtual device.
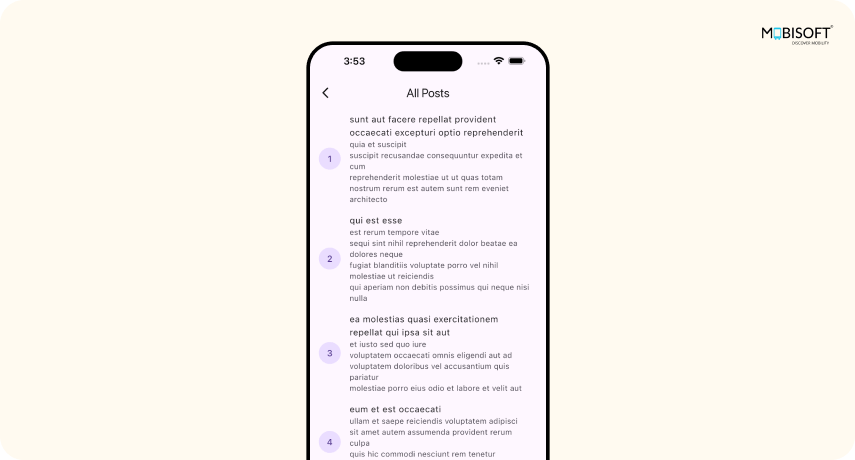
1. When the GET button is clicked
It should display a scrollable list of posts. This showcases the Flutter Dio GET request implementation.
2. When the POST button is clicked
A screen should appear that accepts title and body as inputs, and on the Add Post button, creates a POST request with a separate screen rendered for input entered.
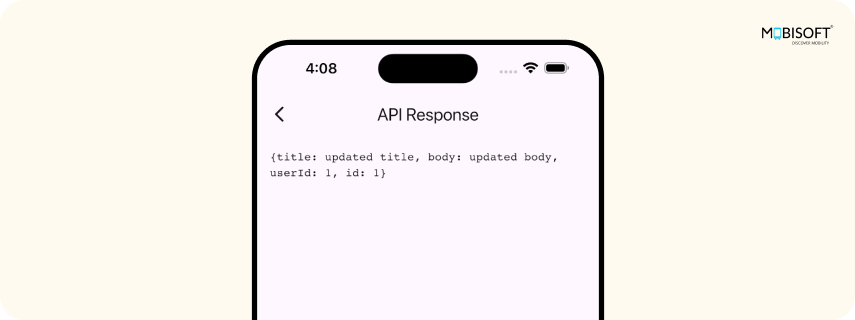
3. Let us hit the PUT button and check the output
It displays the updated title and body for resp. Post with id as 1
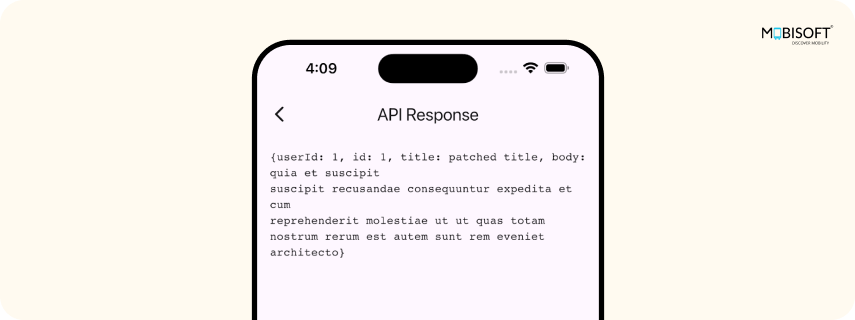
4. Now let’s try the PATCH button
As we can see, it has updated the title which we have provided while making an API hit, and displayed the body as it is.
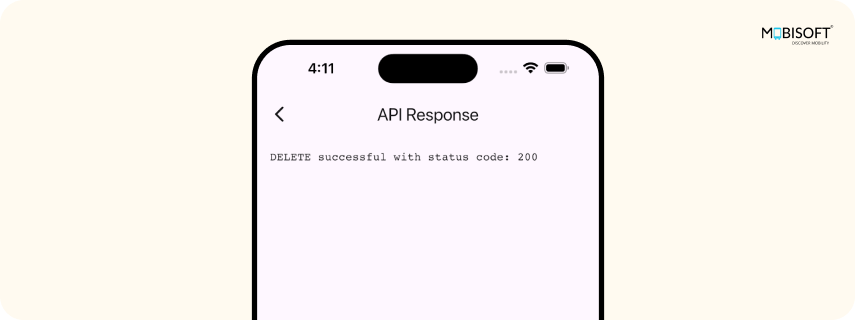
5. Let’s try the DELETE button
After a successful delete, we have printed the status code of the operation, which is what is being displayed.
6. Let’s try GET with Cache
Here at first, an API hit will be made, and the data is stored in memory, and next time onwards it will load the data from the Cache.
This improves maintainability by handling logs, tokens, or global headers centrally, a common strategy in enterprise level mobile app UI/UX design and development solutions.
Summing It Up
I hope you found this tutorial on implementing Flutter Dio in your apps useful. To download the source code for the sample app.
You can find the complete Flutter Dio example in the GitHub repository here.




 June 3, 2025


