Introduction
Google Gemini is a powerful family of multimodal AI models developed by Google DeepMind, capable of understanding and generating text, code, images, and more. Built to rival and often surpass the capabilities of other leading large language models, Gemini offers state of the art performance in reasoning, summarization, question answering, content creation, and programming assistance.
Whether you're developing chatbots, intelligent virtual assistants, content summarization tools, or AI powered automation, integrating Gemini into your backend can significantly elevate the intelligence and responsiveness of your application.
In this blog, we’ll walk through how to integrate the Google Gemini API into a Java Spring Boot application using RESTful APIs. By the end, you'll have a working backend setup that can send prompts to Gemini, receive rich AI-generated responses, and be extended for a variety of use cases from real-time customer support to educational applications and beyond.

Prerequisites
- Java 17+ (recommended) — perfect for Java AI projects
- Spring Boot 3.x
- Maven or Gradle
- A Google Cloud account
- Google Cloud Project with Vertex AI API & Gemini API enabled
Step 1: Create and Configure Spring Boot Project
Generate a new Spring Boot app using Spring Initializr:
Dependencies:
- Spring Web
- Spring Configuration Processor
This setup aligns with typical AI Java application frameworks.
If you're looking to build scalable Java based solutions, explore our web application development services.
Step 2: Obtain Google Gemini API Credentials
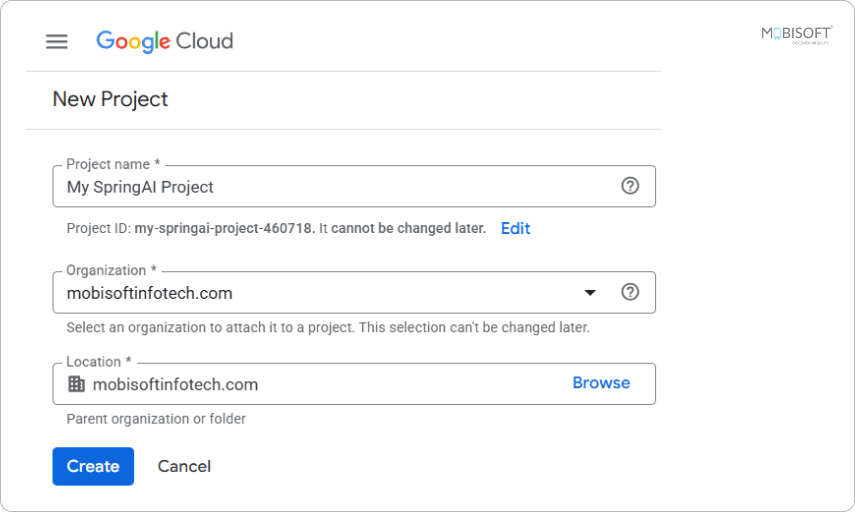
- Create a Google Cloud Project:
- Go to the Google Cloud Console.
- Create a new project.
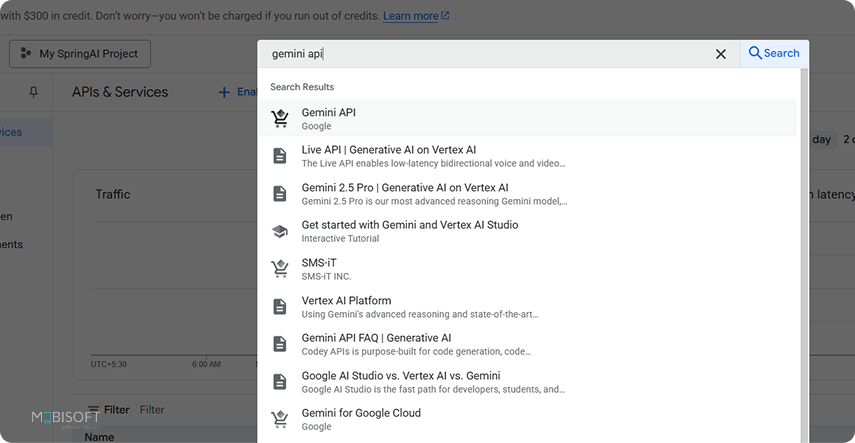
- Enable the Gemini API:
- In the Google Cloud Console, navigate to "APIs & Services" > "Library".
- Search for "Gemini API Google" and enable it for your project.
- Create Credentials:
- Go to "APIs & Services" > "Credentials".
- Click "Create Credentials" and select "API Key".
- Copy the generated Google Gemini API key.

Refer to the official Gemini API docs for detailed info on API usage.
Step 3: Add Dependencies
pom.xml (Maven example):
<dependencies>
    <dependency>
        <groupId>org.springframework.boot</groupId>
        <artifactId>spring-boot-starter-web</artifactId>
    </dependency>
    <dependency>
        <groupId>com.fasterxml.jackson.core</groupId>
        <artifactId>jackson-databind</artifactId>
    </dependency>
</dependencies>
Or if you're using Gradle:
implementation 'org.springframework.boot:spring-boot-starter-web'
implementation 'com.fasterxml.jackson.core:jackson-databind'
This is a common setup for many Java gen AI and backend services.

Step 4: Store Your Gemini API Key
Store it securely. For now, use application.properties:
- gemini.api.key=YOUR_API_KEY_HERE
- google.gemini.url=https://generativelanguage.googleapis.com/v1/models/gemini-1.5-flash:generateContent?key=
To check accessible Gemini models for your API key, you can use the following HTTP GET request:
curl -X GET \
  "https://generativelanguage.googleapis.com/v1/models?key=YOUR_API_KEY"
Output will be as follows:
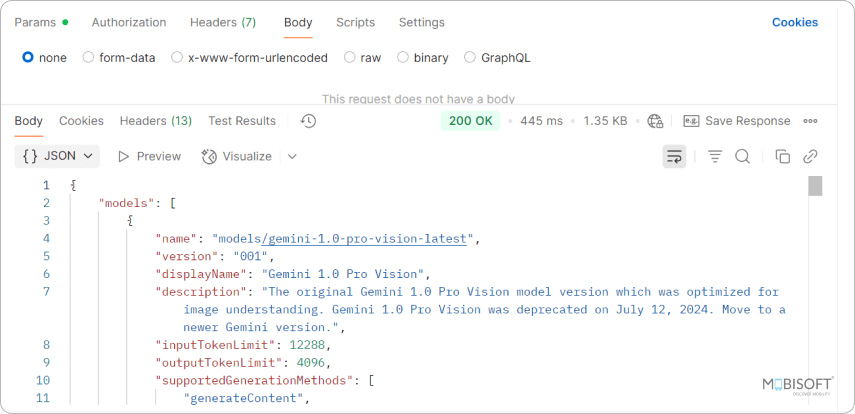
Access to gemini-1.5-flash is recommended for evaluation or trial purposes.
Step 5: Create a Gemini Client Service
Create a service to interact with the Gemini AI API.
GeminiService.java
@Service
public class GeminiService {
    @Value("${gemini.api.key}")
    private String apiKey;


    @Value("${google.gemini.url}")
    private String geminiUrl;


    public String generateContent(String prompt) throws IOException {
        RestTemplate restTemplate = new RestTemplate();
        HttpHeaders headers = new HttpHeaders();
        headers.setContentType(MediaType.APPLICATION_JSON);
        String requestJson = """
        {
          "contents": [
            {
              "parts": [
                {
                  "text": "%s"
                }
              ]
            }
          ]
        }
        """.formatted(prompt);
        HttpEntity<String> entity = new HttpEntity<>(requestJson, headers);
        ResponseEntity<String> response = restTemplate.postForEntity(geminiUrl + apiKey, entity, String.class);
        return response.getBody();
    }
}
This service is a great example of using gen AI with Java in practical projects.
Step 6: Create a REST Controller
GeminiController.java
@RestController
@RequestMapping("/api/gemini")
public class GeminiController {
    private final GeminiService geminiService;
    public GeminiController(GeminiService geminiService) {
        this.geminiService = geminiService;
    }
    @PostMapping("/generate")
    public ResponseEntity<String> generate(@RequestBody Map<String, String> body) {
        try {
            String prompt = body.get("prompt");
            String response = geminiService.generateContent(prompt);
            return ResponseEntity.ok(response);
        } catch (Exception e) {
            return ResponseEntity.status(HttpStatus.INTERNAL_SERVER_ERROR)
                                 .body("Error: " + e.getMessage());
        }
    }
}
This completes the backend setup to use the Gemini Google API effectively.
Bonus Tips
- Use DTOs instead of raw Maps for request/response models to maintain type safety in your Java AI projects.
- Secure your endpoint with authentication when moving to production environments.
To learn more about enterprise-grade generative AI implementations, check our Generative AI services.
Step 7: Test the API
Sample cURL request:
curl -X POST http://localhost:8080/api/gemini/generate \
  -H "Content-Type: application/json" \
  -d '{"prompt": "Explain java 8 features."}'
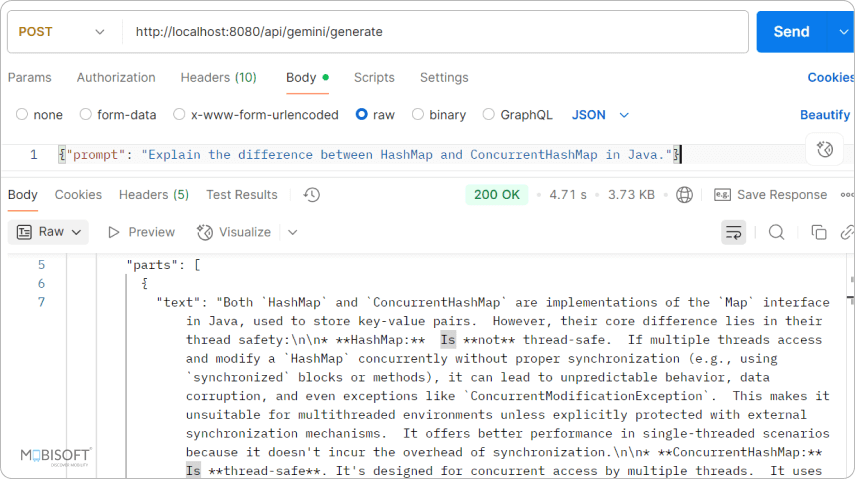
Some examples of what Gemini can do:
Sample Prompt 1:
Explain the difference between HashMap and ConcurrentHashMap in Java.
Gemini’s Output:
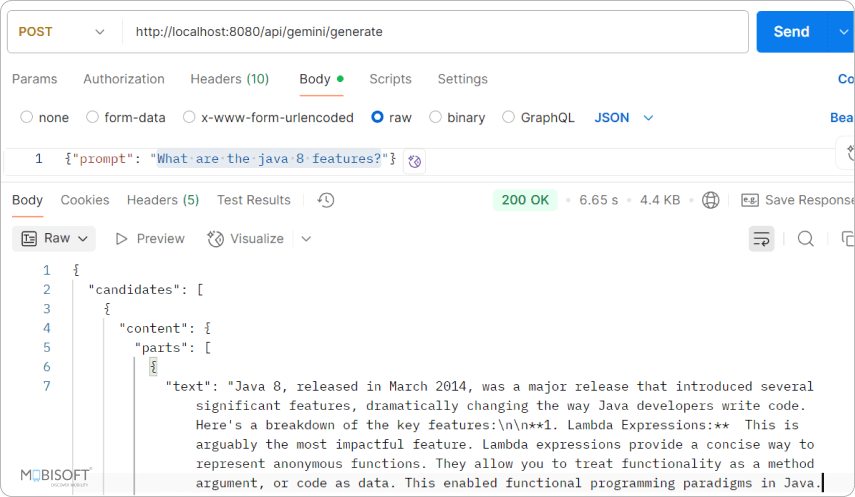
Sample Prompt 2:
What are the java 8 features?
Gemini’s Output:
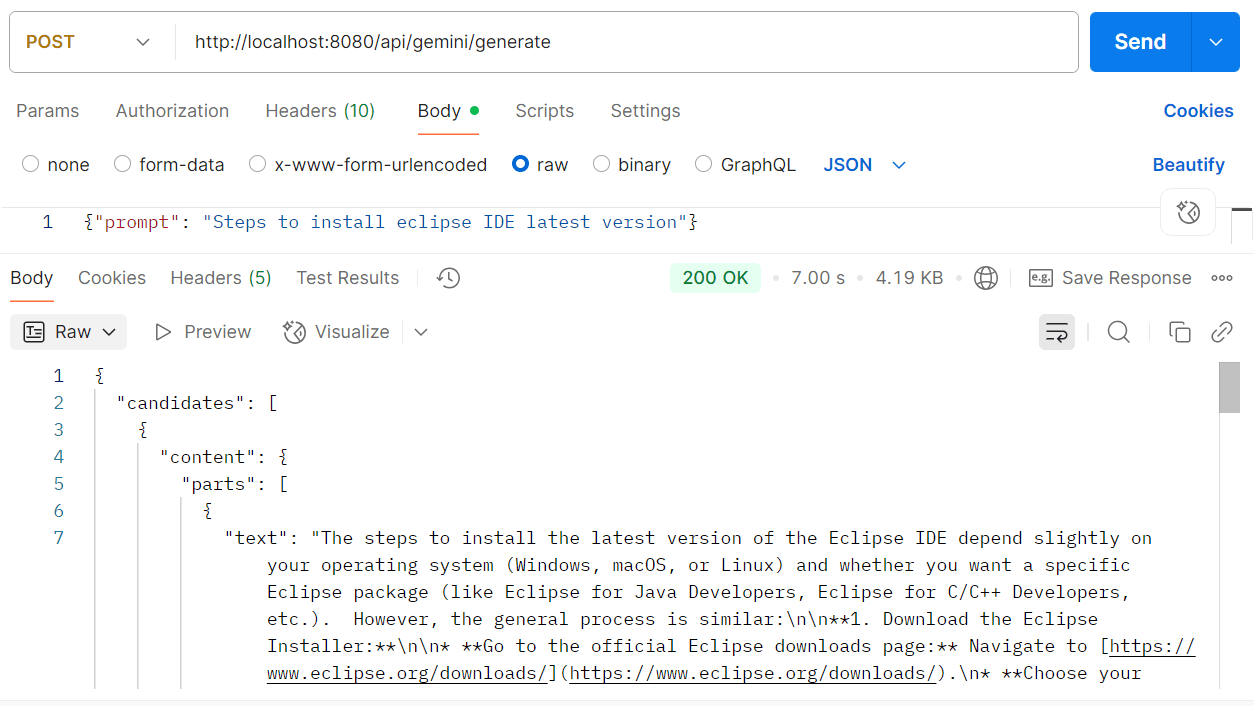
Sample Prompt 3:
Steps to install eclipse IDE latest version
Gemini’s Output:
Sample Prompt 4:
Importance of learning AI
Gemini’s Output:

Conclusion
You’ve now completed this java ai tutorial, integrating the Google Gemini API into a Spring Boot application. This setup allows you to tap into advanced AI capabilities using Java and REST, which excels at tasks such as content generation, question answering, summarization, code assistance, and more.
Gemini is designed to process text, images, and code as inputs, making it a versatile tool for a wide range of applications. It builds on the strengths of Google’s prior models with improved reasoning, understanding, and generation capabilities.
You can find the complete source code for this tutorial on GitHub.
Whether you want to extend your gen ai for java developers projects or explore further, this tutorial serves as a solid foundation for your AI Java development journey.
You might also find our blog on OpenSearch Java Client & Spring Boot integration useful for enhancing search capabilities in AI-powered Java applications.


 June 5, 2025


