Checkbox is one of the elements that is frequently required in iPhone UIs, but the traditional checkbox is not present in iPhone sdk. Switches are sometimes used in the place of checkboxes.
In this tutorial, we will see how to create a custom checkbox. It extends from UIButton class. It is used to select or deselect a particular item or more than one items in a list. For example: The “Keep me signed in” checkbox in certain apps, sound on/off , effects on/off checkboxes in Settings of a gaming app.If more checkboxes are needed, we can create them similarly.
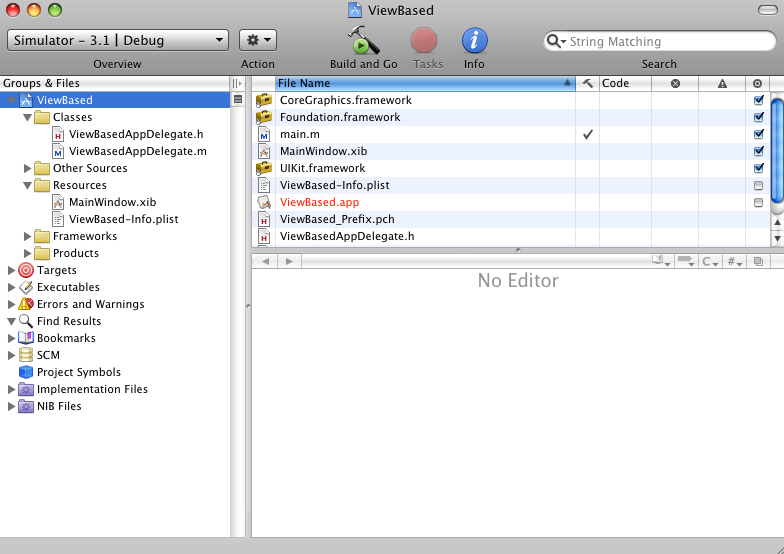
Step 1: Create a window based application in Xcode and name it “MICheckBox”.
Step 2: Create new “MICheckBox.h” and “MICheckBox.m” files which extend from UIView.
(Classes >> Add >> New File >> Objective C Class. Select UIView in the “subclass of” list.)
Step 3: Create a new group in the Classes folder and name it “MICheckBoxUtils”. Drag the “MICheckBox.h” and “MICheckBox.m” files into the group.Now, add the images “checkbox_not_ticked.png” and “checkbox_ticked.png” to the group.
Step 4: Open the “MICheckBox.h” file and make the following changes in it.
[objc highlight="1,2,4,5"]
@interface MICheckBox : UIButton {
       BOOL isChecked;
}
@property (nonatomic,assign) BOOL isChecked;
-(IBAction) checkBoxClicked;
[/objc]
Here, we have changed the UIView class from which it extends to UIButton. Also, we have declared a boolean property “isChecked” which
keeps a track of whether the button is checked or not. “checkBoxClicked” is the method to change the state of checkbox when it is clicked.
Step 5: Now, open the “MICheckBox.m” file and add the following code to it.
[objc highlight="4,10,11,12,13,14,15,16,17,18,19,24,25,26,27,28,29,30,31,32,33,34,35,36,37,38"]
#import "MICheckBox.h"

@implementation MICheckBox
@synthesize isChecked;

- (id)initWithFrame:(CGRect)frame {
              if (self = [super initWithFrame:frame]) {
                         // Initialization code

                         self.contentHorizontalAlignment =
                                    UIControlContentHorizontalAlignmentLeft;

                         [self setImage:[UIImage imageNamed:
                                     @"checkbox_not_ticked.png"]
                                     forState:UIControlStateNormal];

                          [self addTarget:self action:
                                     @selector(checkBoxClicked)
                              forControlEvents:UIControlEventTouchUpInside];
                }
                return self;
}

-(IBAction) checkBoxClicked{
               if(self.isChecked ==NO){
                        self.isChecked =YES;
                       [self setImage:[UIImage imageNamed:
                                    @"checkbox_ticked.png"]
                                    forState:UIControlStateNormal];

                }else{
                        self.isChecked =NO;
                        [self setImage:[UIImage imageNamed:
                                         @"checkbox_not_ticked.png"]
                                         forState:UIControlStateNormal];

                }
}

- (void)dealloc {
             [super dealloc];
}

@end
[/objc]
initWithFrame” method – This method initializes the button with the frame given by us. The contentHorizontalAlignment property allows us to set the alignment of the content (i.e image and text) of the button(checkbox). Initially, the image of the button will be the unselected checkbox, so we set the image “checkbox_not_ticked.png”. Then we programmatically link the button to the “checkBoxClicked” method.
“checkBoxClicked” method – In this method, whenever the checkbox is clicked, the image is changed from checked to unchecked and vice versa.
Step 6: Now that we have created the “MICheckBox” files, we need to test them. Hence, put the following code in the “MICheckBoxAppDelegate.m” file.
[objc highlight="2,10,11,12,13,14,15,16,17,18,19"]
#import "MICheckBoxAppDelegate.h"
#import "MICheckBox.h"

@implementation MICheckBoxAppDelegate
@synthesize window;

- (void)applicationDidFinishLaunching:(UIApplication *)application {

             // Override point for customization after application launch
             MICheckBox *checkBox =[[MICheckBox alloc]
                          initWithFrame:CGRectMake(100, 200, 150, 25)];

             [checkBox setTitleColor:[UIColor blackColor]
                          forState:UIControlStateNormal];

             [checkBox setTitle:@"Checkbox"
                          forState:UIControlStateNormal];

             [window addSubview:checkBox];
             [window makeKeyAndVisible];
}

- (void)dealloc {
                 [window release];
                 [super dealloc];
}

@end
[/objc]
Here, we have imported the “MICheckBox.h” file so that we can create its instance. In the “applicationDidFinishLaunching” method, we create an object of MICheckbox and set its title color to black. Also, we set its title to CheckBox. Then we add the checkbox to the main window by the “addSubview” method.
Step 7: Download the source code for this tutorial here.
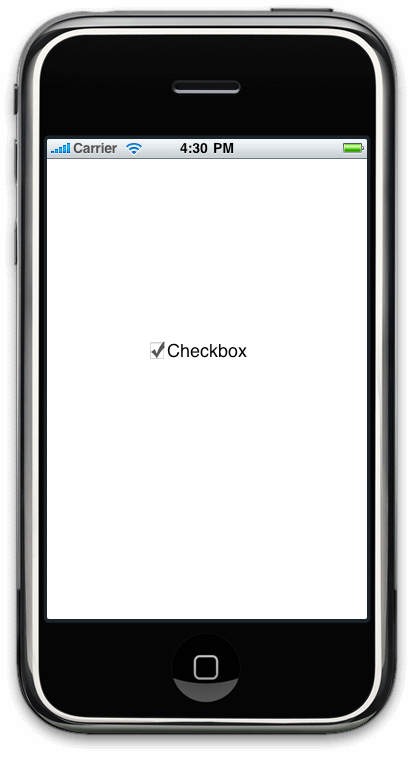
The output will be as follows:
CheckBox Unticked

CheckBox Ticked