Update (19 Dec 2014) : Please note that this tutorial is now obsolete. Please use facebook’s official tutorial for reference.
Now a days social networking websites like facebook are becoming very popular, so integrating facebook with app has become a necessity to make your application popular. We are going to do the same through this tutorial. The Facebook Connect SDK provides code which third-party developers can embed into their applications to connect to their Facebook accounts and exchange information with Android apps. It’s a way of embedding “social context” to an Android app, according to Facebook.
Create a Viewbased Application with name ‘fbconnect-samples’.
Follow the following steps:
1) Download Facebook Connect for Android
- 1.1 First you have to set up new java project with fbconnect itself.
- 1.2 We have to add all JARs and Library files as below.
- 1.3 Import all files in the destination group folder.
- 1.4 To test import all JAR and library in case any miss.And compile.
2) Login to Facebook.
After that go to Developers Page (http://www.facebook.com/developers/) as shown below.
3) Register your application with Facebook
- 3.1 Click on Set up New Application Button in the upper right hand corner.
- 3.2 Give Application name and click on create application button. Then you will see new application screen with detail including “API key”and “API Secret Key”
4) Now Save project (Command +S). Build and Run Project.
5) Click on Fconnect Button and Facebook Login Dialog will appear.
6) Login with your user name and Password. Click on publish To Feed.
7) Wait for untill post to Wall Dialog pops up.
8) The Msg on Facebook will something look like this.
Description
1) Download Facebook Connect for Android
https://developers.facebook.com/resources/facebook-android-sdk-current.zip
Just go through the project. In particular, the “Connect” sample project. Sample Project gives demo of some of the functionality.
1.1 First you have to set up new java project with fbconnect itself.
– Unzip “fbconnect-android.zip/api” into your workspace and then
Import Project to Eclipse.
-add External library “android.jar” into project’s build
path. I used android.jar from Android 1.6.
-After it compiles – from eclipse’s menu choose File->Export->Java-
>Jar file
– select fbconnect project’s “src” directory as resource to export.
– type in path and name of exported .jar (fbconnect.jar)
– go to your project’s preferences and add fbconnect.jar into your
libraries (in Java Build Path)
1.2 We have to add all JARs and Library files as below.
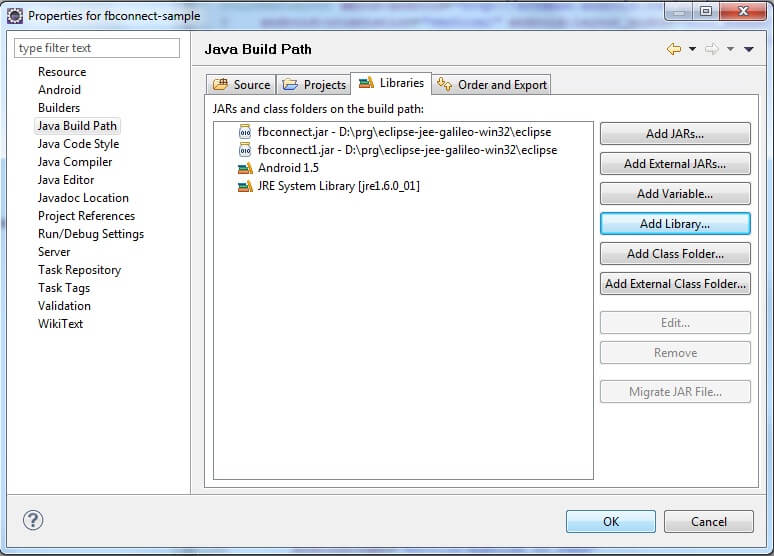
fbconnectjarfile
1.3 Import all files destination group folder. It should also look as shown below.
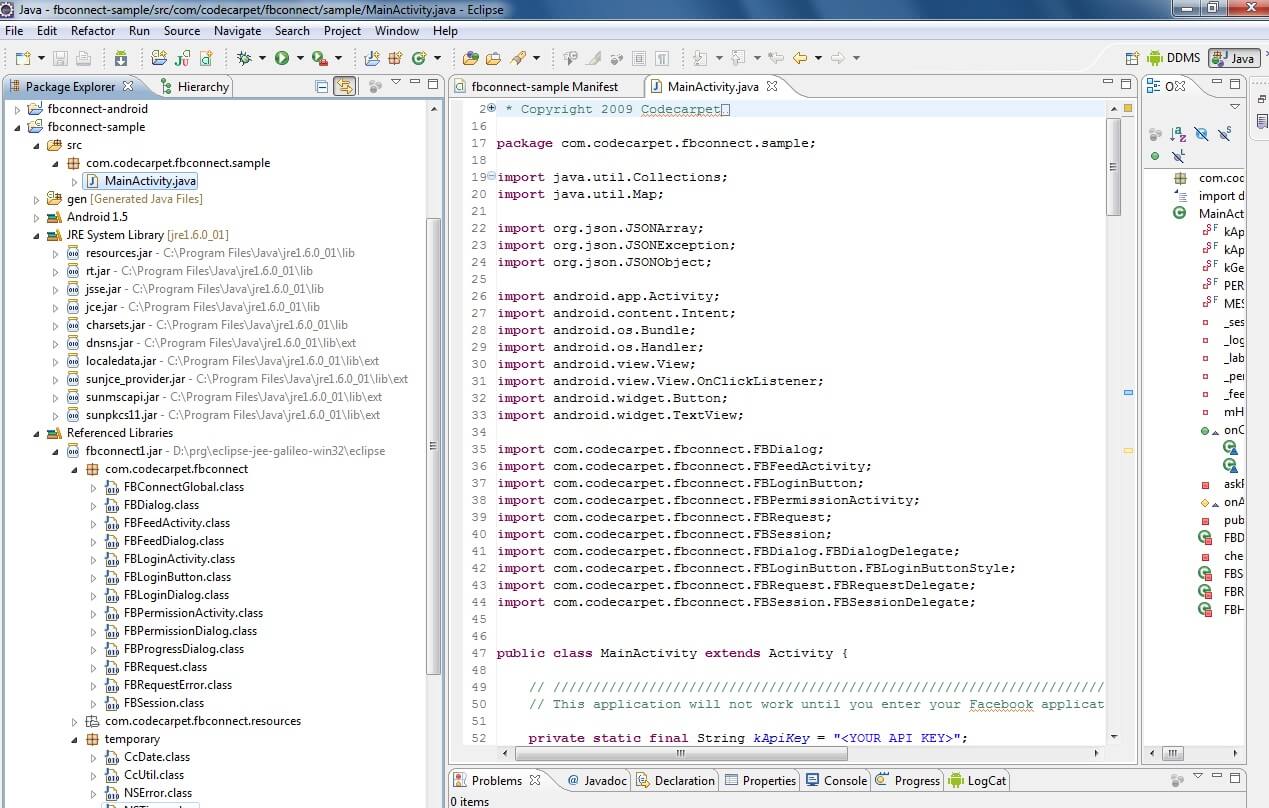
fbconnectimplementation
1.4.To test import all JAR and library in case any miss and compile.
2) Login to Facebook.
After that go to Developers Page (//www.facebook.com/developers/) as shown below.
facebookdeveloperslogin
3) Register your application with Facebook.

facebooksetapplication
3.1.Click on Set up New Application Button in the upper right hand corner.
3.2. Give Application name and click on create application button. Then you will see new application screen with detail including “API key”and “API Secret Key”

facebookapikey
Note : This application will not work until you provide your Facebook application’s API keys.
Now to get started with actual coding:
Append Following code in .xml file for UI Design
[sourcecode language="xml" highlight="8,14,21,31"]

<?xml version="1.0" encoding="utf-8"?>
<LinearLayout xmlns:android="http://schemas.android.com/apk/res/android"
	android:orientation="vertical" android:layout_width="fill_parent"
	android:layout_height="fill_parent" android:background="@drawable/cyan"
	android:gravity="center_horizontal">

	<com.codecarpet.fbconnect.FBLoginButton
		android:id="@+id/login"
		android:layout_width="wrap_content"
		android:layout_height="wrap_content"
		android:layout_margin="30dp"
		/>

	<TextView android:id="@+id/label"
		android:textColor="@drawable/black"
		android:layout_width="wrap_content"
		android:layout_height="wrap_content"
		android:layout_margin="30dp"
		/>

	<Button android:id="@+id/permissionButton"
		android:layout_width="wrap_content"
		android:layout_height="wrap_content"
		android:text="@string/get_permission"
		android:visibility="invisible"
		android:paddingRight="30dp"
		android:paddingLeft="30dp"
		android:layout_margin="30dp"
		/>

	<Button android:id="@+id/feedButton"
		android:layout_width="wrap_content"
		android:layout_height="wrap_content"
		android:text="@string/publish_to_feed"
		android:visibility="invisible"
		android:paddingRight="30dp"
		android:paddingLeft="30dp"
		android:layout_margin="30dp"
		/>

</LinearLayout>
[/sourcecode]
[sourcecode language="java" highlight="1,4,7,8,9,10,11,12,13,14,15"]
private static final String API_KEY = ""; // "<YOUR API KEY>";

	// Enter either your API secret or a callback URL (as described in documentation):
    private static final String API_SECRET = ""; // "<YOUR SECRET KEY>";
    private static final String GET_SESSION_PROXY = null;

private FBSession mSession;

if (GET_SESSION_PROXY != null) {
            mSession = FBSession.getSessionForApplication_getSessionProxy(API_KEY,
        GET_SESSION_PROXY, new FBSessionDelegateImpl());
        } else {
            mSession = FBSession.getSessionForApplication_secret(API_KEY,
         API_SECRET, new FBSessionDelegateImpl());
        }

[/sourcecode]
Here in fbconnect-samplesAppDelegate we have just declared mSession reference variable of type FBSession to keep track of the session and to check if session for current user exists or not.
[java highlight="1,2,3,4,5,21,22,23,24,25,26,27,28,29,30,31,32,33,34,35,36,37,38,41,42,44,45,46,47,48,49,50,51,52,53,54,55,56,57,58,59,60"]
private void askPermission() {
        Intent intent = new Intent(this, FBPermissionActivity.class);
        intent.putExtra("permissions", new String[]{"publish_stream"});
        this.startActivityForResult(intent, PERMISSION_REQUESTCODE );
    }

    @Override
    protected void onActivityResult(int requestCode, int resultCode, Intent data) {
        super.onActivityResult(requestCode, resultCode, data);

        switch (requestCode){
        case PERMISSION_REQUESTCODE:
            if (resultCode == 1)
            {
        		mPermissionButton.setVisibility(View.INVISIBLE);
        		mFeedDirectButton.setVisibility(View.VISIBLE);
            }
        default:
            return;
        }

    }

    private void publishFeed() {
    	Map<String, String> params = new HashMap<String, String>();
    	params.put("attachment", "{\"name\":\"Facebook Connect for Android\",
                        \"href\":\"http://code.google.com/p/fbconnect-android/\",
                         \"caption\":\"Caption\",\"description\":\"Description\",
                           \"media\":[{\"type\":\"image\",\"src\":\"http:/
                         /img40.yfrog.com/img40/5914/iphoneconnectbtn.jpg\",
                         \"href\":\"http://developers.facebook.com/
                           connect.php?tab=iphone/\"}],
                             \"properties\":{\"another link\":{\"text\":
                          \"Facebook home page\",\"href\":
                            \ "http://www.facebook.com\"
}
}
}");

    	// publish_stream extended permission is required to call Stream.publish
    	FBRequest.request().call("Stream.publish", params);
    }

    private void publishFeedWithPrompt() {
    	Intent intent = new Intent(this, FBFeedActivity.class);
        intent.putExtra("userMessagePrompt", "Example prompt");
        intent.putExtra("attachment", "{\"name\":\"Facebook Connect for Android\",
                            \"href\":\"http://code.google.com/p/fbconnect-android/\",
                             \"caption\": \"Caption\",\"description\":\"Description\",
                              \"media\":[{\"type\":\"image\",\"src\":
                               \"http://img40.yfrog.com
                                /img40/5914/iphoneconnectbtn.jpg\",
                               \"href\":\"http://developers.facebook.com
                               /connect.php?tab=iphone/\"}],\"properties\":
                            {\"another link\":{\"text\":\"Facebook home page\",
                                  \"href\":\"http://www.facebook.com\"
}
}
}");
        this.startActivityForResult(intent, MESSAGE_PUBLISHED);
    }
[/java]
Define API key and Secret key with the keys you received while registering your app on facebook.
1. private static final String kApiKey = “7e835e394c0c8283fab2929108d6218f”;
2. private static final String kApiSecret = “eff16d8c6a2c6a9440d9ed63598ad501”;
Validate session variable in requestDidLoad. If it doesn’t exist then create the same for using API key and Secret key. For that, one needs to conform the protocol FBSessionDelegate in respective file. Also create a login button using FBLoginButton.
[java highlight="1,4,8,9,10,11,12,13,14,15,16,17,18,,26,29,30,31,32,33,34,35,36,37,38,39,40,41,42,43,44,45,46,47,48,49,50,51,52,53,54,55"]
private class FBRequestDelegateImpl extends FBRequestDelegate {

        @Override
        public void requestDidLoad(FBRequest request, Object result) {

            String name = null;

            if (result instanceof JSONArray) {
                JSONArray jsonArray = (JSONArray) result;
                try {
                    JSONObject jo = jsonArray.getJSONObject(0);
                    name = jo.getString("name");
                } catch (JSONException e) {
                    Log.e(LOG, "Login response error", e);
                }
            }
            mLabel.setText("Logged in as " + name);
        }

        @Override
        public void requestDidFailWithError(FBRequest request, Throwable error) {
            mLabel.setText(error.toString());
        }
    }

  private class FBHasPermissionRD extends FBRequestDelegate {

        @Override
        public void requestDidFailWithError(FBRequest request, Throwable error) {
            super.requestDidFailWithError(request, error);
        }

        @Override
        public void requestDidLoad(FBRequest request, Object result) {
            int hasPermission = 0;

            if (result instanceof JSONArray) {
                JSONArray jsonArray = (JSONArray) result;
                try {
                    JSONObject jo = jsonArray.getJSONObject(0);
                    hasPermission = jo.getInt("publish_stream");
                    if (hasPermission == 0) {
                        mHandler.post(new Runnable() {
                            public void run() {
                                mPermissionButton.setVisibility(View.VISIBLE);
                            }
                        });
                    }
                    else
                    	mFeedDirectButton.setVisibility(View.VISIBLE);
                } catch (JSONException e) {
                    Log.e(LOG, "Permission response error", e);
                }
            }
        }
[/java]
This methos is automatically called when user is logged in using FBConnect SDK.
In this method we get session for that user and it’s uid which unique identifier for that user.
Once FBSession session is avaiable, we can accesss all the APIs provided by Facebook.
For now, we will see how to post user name and status on the facebook wall.
To get Facebook username a request is send in which select query is written to get username using uid
[java highlight="8,9,10,11,12,13,14,15"]
private class FBDialogDelegateImpl extends FBDialogDelegate {
        @Override
        public void dialogDidFailWithError(FBDialog dialog, Throwable error) {
            mLabel.setText(error.toString());
        }
    }

    private void checkPermission() {
        String fql = "select publish_stream from permissions where uid == "
+ String.valueOf(mSession.getUid());
        Map<String, String> params = Collections
                      .singletonMap("query", fql);
      FBRequest.requestWithDelegate
         (new FBHasPermissionRD()).call("facebook.fql.query", params);
    }
[/java]
Use publishFeed method to post message on the facbook wall. A dialog pops up with a message box to post on Wall.
[java language="highlight=1,2,3,4,5,6,7,8"]
    private void publishFeed() {

Map<String, String> params = new HashMap<String, String>();
    	params.put("attachment", "{\"name\":\"Facebook Connect for Android

    	// publish_stream extended permission is required to call Stream.publish
    	FBRequest.request().call("Stream.publish", params);
    }
[/java]
Use sessionDidLogout method for logout from session.
[java highlight="1,2,3,4,5,6,7,8,9,10,11"]
public void sessionDidLogout(FBSession session) {
            mHandler.post(new Runnable() {
                public void run() {
                    mLabel.setText("");
                    mPermissionButton.setVisibility(View.INVISIBLE);
                    mFeedButton.setVisibility(View.INVISIBLE);
                }
            });
        }

    }

[/java]
4) Now Save project (Command +S). Build and Run Project.
Simulator will look like as follows
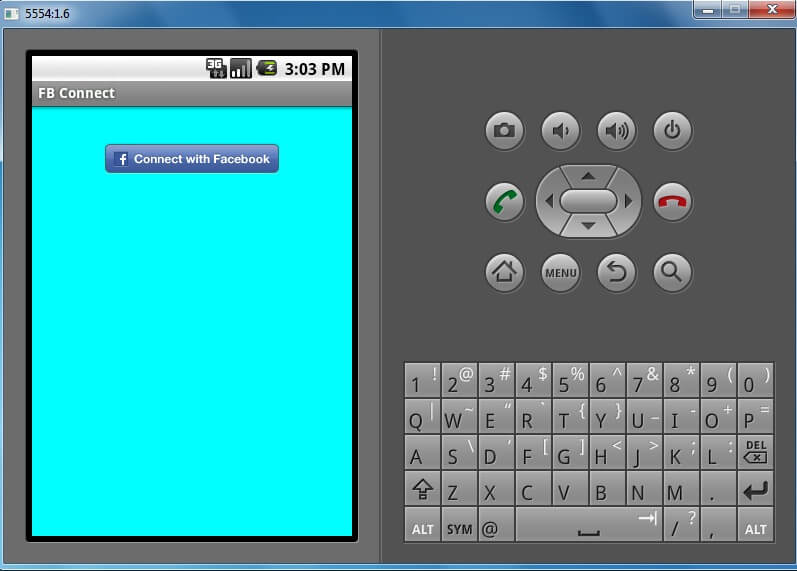
facebookconnect
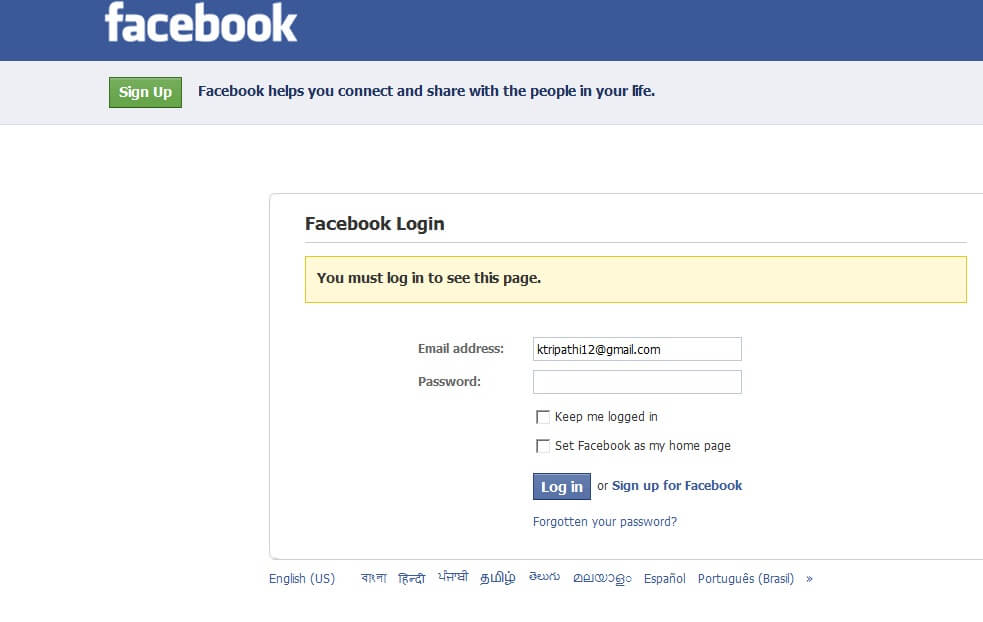
5) Click on Fconnect Button and Facebook Login Dialog will appear.
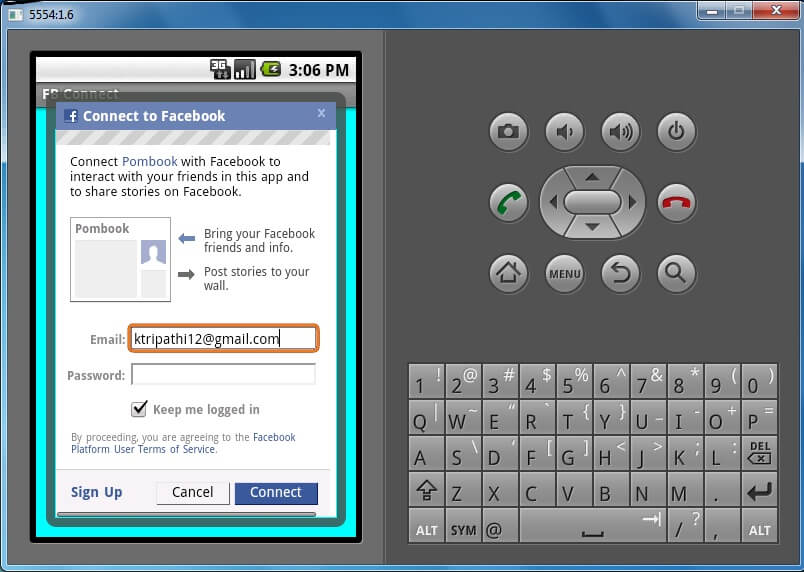
facebooklogin
6) Login with your user name and Password.
Click on publish To Feed
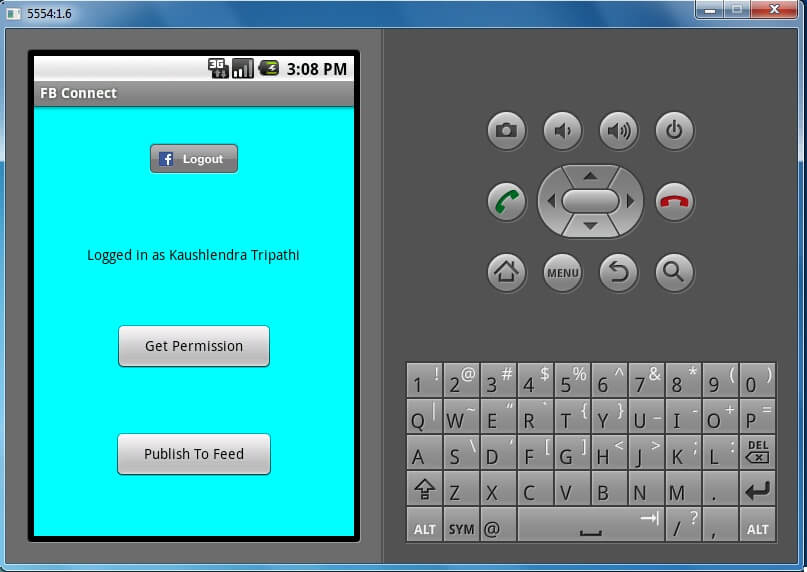
facebookloggedin
7) Wait for untill post to Wall Dialog pops up.
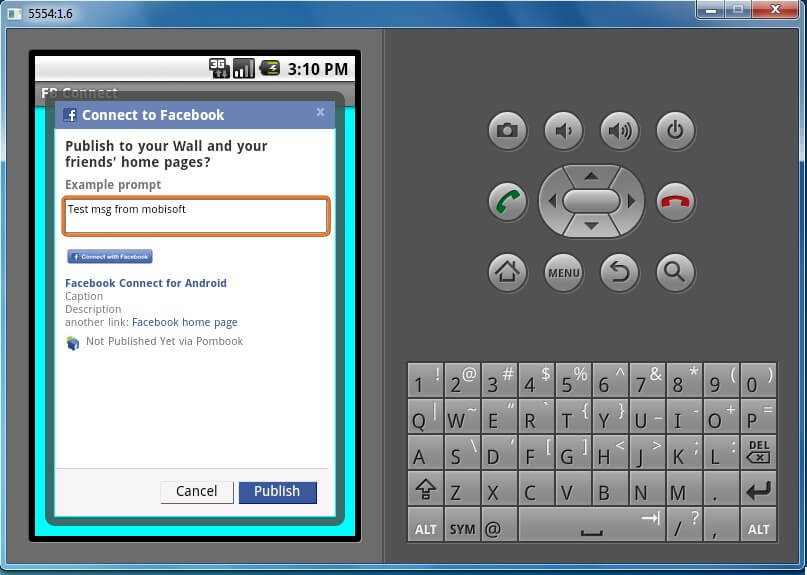
facebookfeed
8) The Msg on Facebook will something look like this.

facebookmessage